Author: Red Ones Go Faster

“Mug” Hunt: The Most Dangerous Game

“Mug” Hunt: The Most Dangerous Game

The Drawbridge Mega-Battle Team has set Extra Life in our sights for another big event. We’ve done two prior Bug Hunts, where different teams have hunted Tyranid creatures big and small, and the nice thing about Extra Life is that we can do some special silly because of the rules of that event (e.g. don’t like a dice roll result? Donate a dollar to re-roll!). So we’re announcing our third Bug Hunt, which will actually be a “Mug” hunt, as your units will be hunting the most (least) dangerous game: man, and making mugs out of the best of the skulls. Yes, we’re working on some skull mugs as part of the prize pool.

Background: The Hunt-Master continues to curate his pocket dimensions to stage his little games. Much blood will be spilled, and many skulls taken–literally. This time when units have been kidnapped to participate through time and space, hearing a mysterious voice saying “take their skulls, all their skulls, and the best and hardest-won will be fashioned into a mug for your prize”. The forces of the best-of-the-best hunters found themselves appearing on battlefields where various Imperial forces are on live-fire maneuvers. The same scroll as years past has arrived, written bafflingly in their own native tongue: “Hunt as many as you can. The winners will be returned with a prize in hand, the rest kept for eternity. Kill your trophies and compete for the greatest haul… but at least one of your number needs to return to your transport to keep them.”

What: This will be a staged event that runs all morning through afternoon on the day of Extra Life (currently TBD, watch for date to be finalized). Players can contribute in two ways. First, by painting Astra Militarium, Adeptus Sororitas, and non-space marine Imperial Agents models to populate the terrain. Or you can join the hunting crew by bringing a single squad of most other forces (including loyalist space marines) and a transport that can hold them (see more info below) and seeing just what all they can hunt before escaping the various “islands” with their haul. There will be multiple GM’s on hand so people can compete starting at different points on the 12 foot island board we’ll have, and we’ll keep a “leader board” through the night detailing which players have the most points killed on their safari expeditions… while still managing to get a single model back and free. If there’s room, players can even give a try multiple times during the event with their squads. As always, prizes at Drawbridge will be based upon a random draw amongst participants where additional draws will be entered for not only the winner, but for each unit newly painted for the event that participants bring (as we ask all models in these events be a minimum of three colors and based), and for “best painted” Imperial humans and hunting squads alike.

Hunting Squads: Players participating in the bug hunt will bring one infantry squad of their choosing, attach one character (non-epic, so no “named” characters), and a vehicle that can transport that squad and character. Note that while the temptation may be the most expensive transport, note that the Imperials will have a set of “Artificial Intelligence” rules for when they notice something and organize a counter-attack–so a Land Raider firing off lascannons 48″ away might just alert the entire half of the island. That means no jump infantry or other “doesn’t fit in a transport” types, and that some armies will have different limitations (e.g. Necrons can only transport Warriors in their Ghost Arks, but they can bring a Night Scythe if they want a different sort of unit). Also, no Drop Pods… as the point is needing to “get away to safety” in the transport. There will be entries into the prize draw for fielding a newly-painted squad, a newly-painted character to lead them, and a newly-painted transport. There will also be extra draws awarded for the best painted combo squad+transport, and the best “Hunters” themed squad (aimed at those who want to convert up a squad of specialized hunters or even specifically human hunters). And sorry: no Knights armies, no Daemons, and no Tyranids, given the nature of this event being about a squad striking out from and returning to a transport.
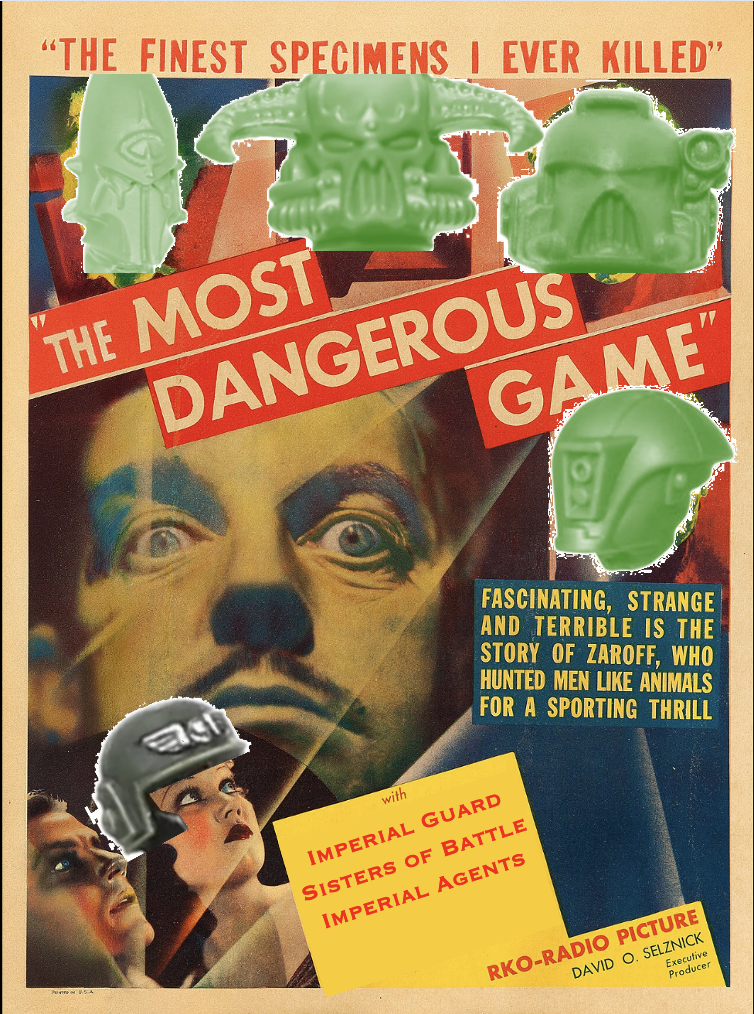
Skulls for the Cause: The goal is to cover the table in groups of regular human Imperium models, from large to small, the biggest tanks to the smallest infantry. The more the merrier. So to encourage people to paint up those units, each squad of Imperial models that are painted up for specifically the event give the person bringing them a bonus two draws in the prize pool. And we’d love if the established regular Imperial players bring along their already-painted masses as well, just to crowd the board with all sorts of regular human skulls for the taking.

How Will it Run? The Imperials are on maneuvers when these hunting squads emerge–so they have live weaponry but confusion can mean that they take time and orders to feel confident engaging. The more OBVIOUS the hunters are, the more likely the Imperials will respond in force. See below for the “if/then” set of reactions that will guide when and where Imperial units respond to the attacks of the hunter squads. The sound of battle, the sight of long range gunfire, and the rustle of nearby bushes will all have a chance to draw other squads into the fray. This is specially dangerous when the last stragglers are trying to get back to their transport with a haul of human skulls to make into mugs. As always with our big events, the goal is simple, silly, and thematic rules to get us throwing dice together and laughing at the fortunes (and misfortunes) of squads as they compete for glory in the “Mug” Hunt!

Leaders: As mentioned above, players can choose to have one character attached to the squad as well. Ideally we are thinking of them as “medic” support characters, particularly apothecary/hospitaller/painboy type models, but you can bring any model that isn’t an “epic” hero.

To reward those who were taking the time to do up their dedicated medic-type models, those fielding a medic will get a bonus in the game. That list includes models like: Apothecary, Sanguinary Priest, Hospitaller, Painboy, Plague Surgeon, Biophagus, Spirit Seer, and so on. Anyone fielding those models will get one “emergency patch-up”, where they can once during their mission. When they do, at the end of any phase, roll a d6 and restore that many models to their unit. That’s in addition to their other rules for bringing back models.

Imperial “Organized Reaction” Rules:

Every player turn their units will be doing things, and those things generate chances for the Imperials to hear, feel, smell, or sense them and attack back. Each player will have a d20 placed near their forces to represent the “alert level” for their turn. The list below has the various things that increase alarm amongst the Imperial models. They are additive (cumulative?). At the end of the player’s turn (move, shoot, charge, assault), note the number that the alert level has risen to that turn and then the player must roll ABOVE that number to remain undetected.

Action/OccurrenceAlert Level ModifierType
Unit Advances+1Sound
Hover Transport Moves+1Sound
Tracked or Wheeled Transport Moves+2Sound, Vibration
Aircraft Transport Moves+1Sight
Aircraft Transport’s Move comes within 24” of Flying Imperial model+4Sight
Massive Transport Moves (really huge hard-to-miss stuff that people might bring… Monolith or Stompa for instance)+10Sight
Imperial Unit damaged by ranged attacks+3Sound, Smell
Ranged Attacks from Silenced source (GM uses judgment, but needs to be like sniper rifles or properly silenced stuff… note that Ork Kommando guns are NOT silenced)-2Sound
Ranged attacks fired from a vehicle or infantry “Big Gun” or “Loud Gun” source (again GM judgment–machine guns and big cannons here, any projectile weapons that make a “bang” louder than a bolter)+2Sound, Vibration
Imperial Unit damaged by melee attacks+4Sound, Smell
Melee Attacks from Silenced Source (only commando troops get this: Kommandos, Night Lords, Raven Guard, Space Marine Scouts, Reivers, Striking Scorpions, units with infiltrate etc.)-2Sound
All Targeted Unit(s) Completely Wiped Out in this turn-2All
Model uses an ability or an attack with the “Psychic” keyword+2Vibes
Something else that would alert a unit (GM’s discretion)+X by GM’s discretionGM’s discretion
Something else that would keep a unit hidden/silent/unobserved, such as move after shoot to a hidden position or specific wargear (GM’s discretion)-X by GM’s discretionGM’s discretion

The player then checks for Alert at the very end of their turn by rolling a d20 and comparing to their Alert Level for the turn they just completed. If they roll ABOVE their Alert level, no problem, their hunt has remained undetected. Any Imperials that are in engagement range, have been shot but not killed by them, or have noticed them in a prior term but not reached them, get to respond with movement, shooting, charge, fight as normal, but no other Imperial units realize what is going on and remain dormant. Imperial units in melee also get to fight back in the player turn as normal. 

If the player rolls BELOW their Alert level, then the GM rolls a d3. That many units beyond any shot/hit respond to the attack. What units respond depend on the modifier descriptions (they indicate which model responds first). After that first unit is designated, the next that respond (up to the d3 result) are nearest to the “noticed” unit units (GM discretion for what makes sense given the situation). 

Sight: If this modifier was involved, the first unit to respond is the vehicle unit.

Smell: If this modifier was involved, the first unit to respond is the nearest infantry unit.

Sound: No special choices, just nearest models.

Vibration: If this modifier was involved, the first unit to respond is the closest infantry unit.

Vibes: If this modifier was involved, if there is an Imperial model with psychic abilities they and their unit respond. If not, go with the closest units.

If multiples of these are involved, the GM can use their discretion about what units compose the d3 responding and why.

Prizes: We’ll have a door prize draw that we do at the end of the event, that will include both 40k model kits as well as skull mugs. Everyone who participates gets one draw in the door prize drawing for attending, and the extra points for painting for the event as listed above. The top three points-getters for successful hunter expeditions will also be tracked, and they’ll get a tiered number of additional draws.
Lord of the Blackstone – A Tale of Four Gamers

Lord of the Blackstone – A Tale of Four Gamers

In addition to a number of games of 11th edition 40k that I’ve played lately, I’ve also got a group of friends that have been having a lot of fun with the random, crunchy, nostalgic joy of 2nd edition 40k that many of us grew up with. We just finished a campaign of Eldar vs Blood Angels and Dark Angels Space Marines that was a lot of fun, and now we’re fired up for a set of games that will have us all playing a different Chaos force. Thus it’s Tale of Four Gamers time: chaos edition!

This post will have the background for the campaign, the first mission, as well as some of the established rules conventions we’ll be using for the game.

Background

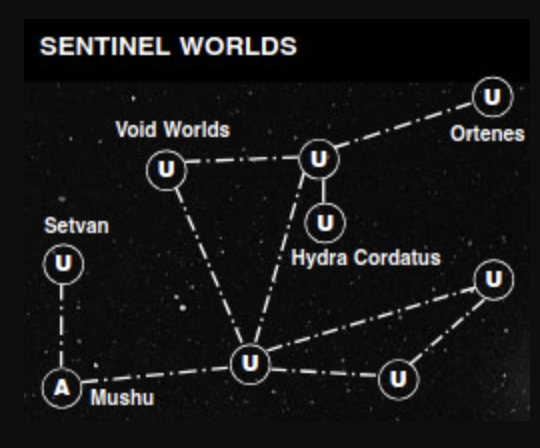
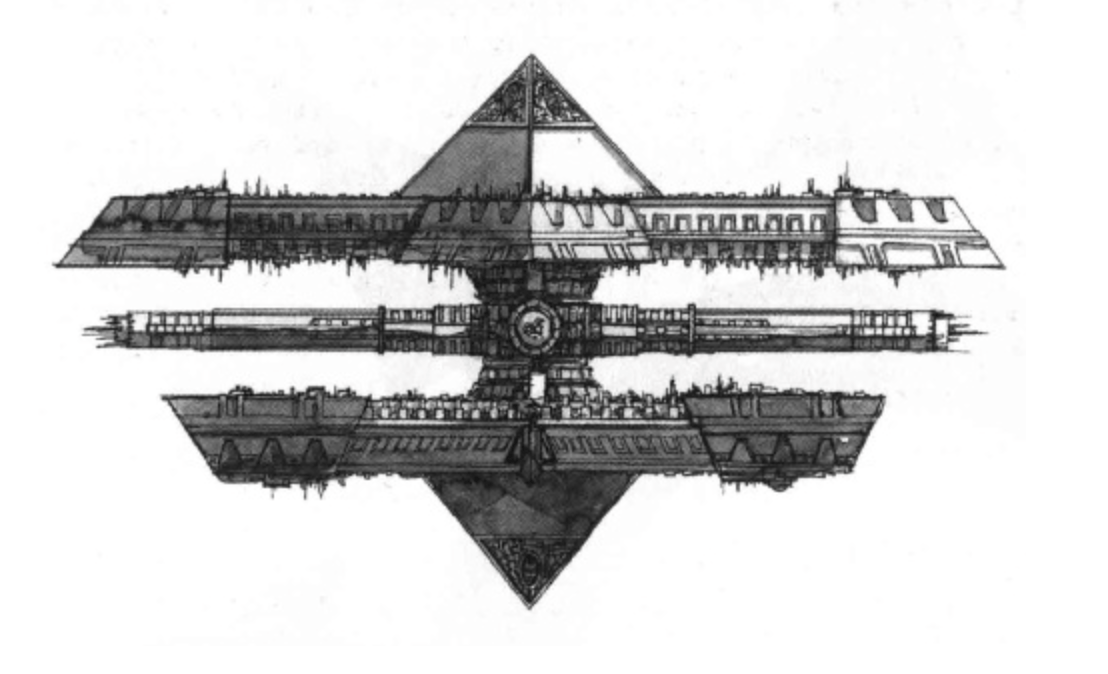
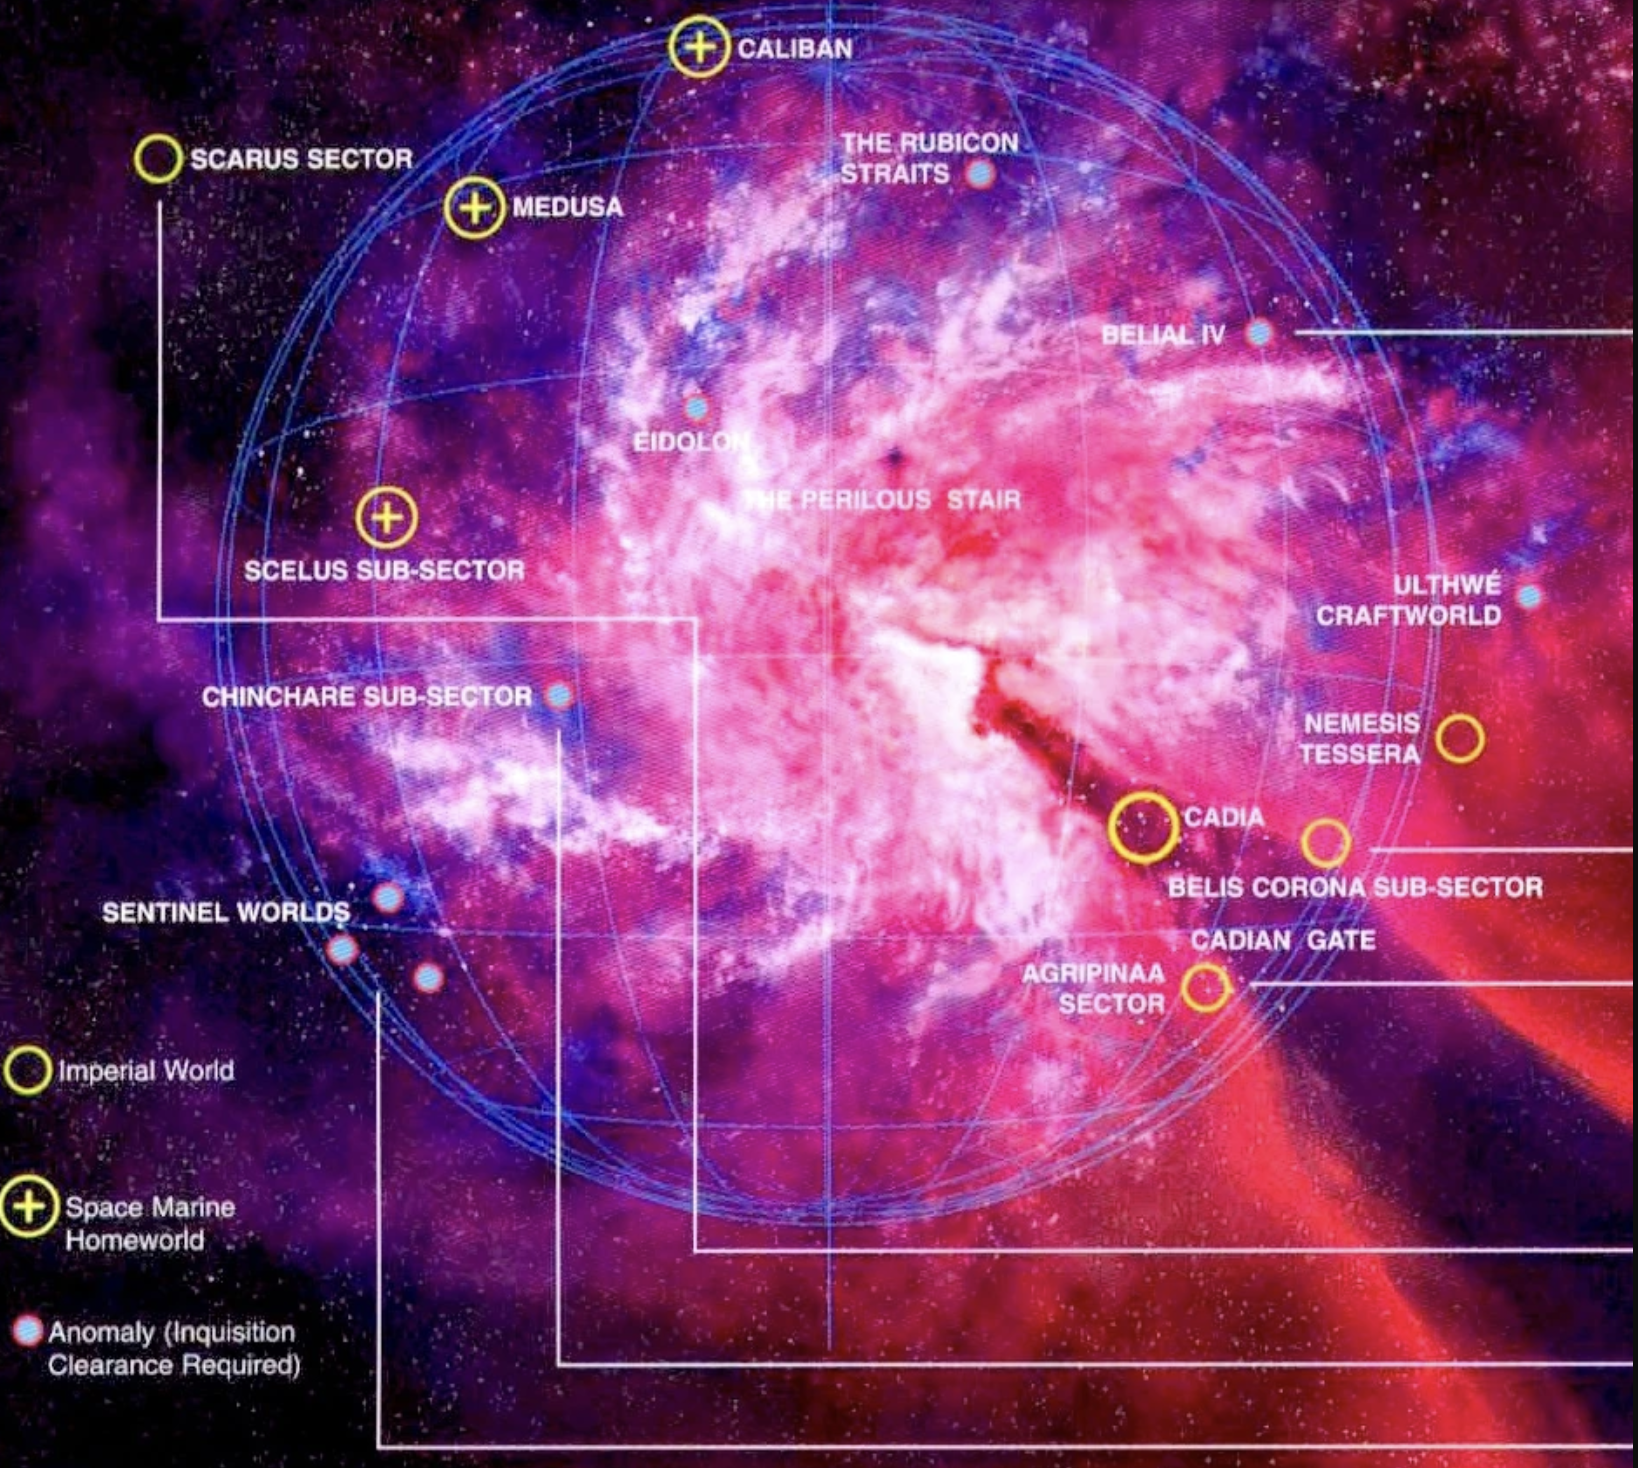
A number of different warbands have fought together for the past thirty years, united under the leadership of a rising Chaos Warmaster: Perelom Gol, The Bloodhand. His fury and combat skill united forces of all types while the taking was good, and his campaign conquered many of the Sentinel Worlds at the edge of the Eye of Terror–gifting those conquests to different Chaos Lords and Demagogues who followed him. Most recently The Bloodhand’s forces discovered an as-yet undocumented Blackstone Fortress moored in a dense asteroid belt.

Four of the most successful leaders amidst The Bloodhand’s forces had their fleets hurriedly summoned to the newly-captured Blackstone Fortress. They received a call from Heretek Madresh, The Bloodhand’s primary tech priest. Each of the flagships and their fleets docked near the fortress, amidst the assembled flotilla of Dark Mechanicum ships aned those of The Bloodhand’s own warband.

They were each invited to bring a small retinue of bodyguards and assemble in the secondary control chamber of the fortress. Upon arrival, they found Heretek Madresh floating near a projection table and a number of large mechanical boxes with opaque containment fields shimmering atop them. The projection table showed the map of the system, and the planets each of them had conquered.

Heretek Madresh spoke, his words grating from an electronic grill set in his face:

“Greetings esteemed leaders of the four most capable warbands our great Bloodhand’s host. I regret to inform you: Perelom Gol, The Bloodhand, has died.”

With that an unseen switch was flipped and the containment field on the largest central box disappeared, revealing the smoking corpse of a giant space marine whose armor was undoubtedly that of The Bloodhand. The Heretek continued:

“Lord Perelom Gol was judged… unworthy… by the systems of the Blackstone Fortress, and upon his attempt to activate it was immolated by an unforeseen defense system. Once word gets out, the fleet will fragment. One of you needs to step up, prove your worth, and take control of the fortress and all of the fleets. Some will run, others will fight. It’s most logical for one of you to take control. So decide, and fast.”

The Chaos Lords and Demagogues looked at each other. Each had fought hard under The Bloodhand. Each had conquered worlds in the system that were even now producing matériel and new soldiers bolstering their forces. Each of them knew THEY deserved to rule this group–the others being charlatans, pretenders, sycophants, or dullards. They would not bend the knee any of these others. They would strike first and seize power. They would take what was rightfully theirs. They would become The Lord of the Blackstone.

Mission One: Flashpoint

Briefing: Each army general strikes at the same time, hoping their forces can eliminate opposing generals in this very first moment. Unfortunately, all had prepared for violence–both telling their retinues to be ready, and carrying personal defensive equipment that allows them to escape. They battle over the command room and potentially useful contents within it, before reaching somewhat of a stalemate each rushes back to their fleet to recover and attack each other with more technology.

Special Rules:

Skirmish Style: Forces can be a total of around 550 points. However each model acts independently as if their own unit. Units can be purchased for this in amounts fewer than their minimum for the unit (tho minimum numbers are needed if you’re going to take upgrades like special or heavy weapons), and normal restrictions on allies or units are limited. These are meant to be the weird and wild retinues of different Chaos war leaders, so have fun.

Fortress-Chosen: Each army general, without knowing it, has a share of the Blackstone Fortress’ internal protection grid applied to them–as the ancient machinery is watching to see which of them is most deserving (which spoilers, won’t be answered in this battle but in the campaign). When a general would lose their last remaining wound they automatically succeed in a bonus saving throw. It’s similar to a displacer field’s effects on a successful save, except that the teleporting movement is back toward the board corner they came from. Once their entire retinue is destroyed, the movement of the teleport becomes the full distance to their exit corner as the Fortress itself gets them to safety for now. This does not move a crate with them (see below).

The Relics of the Bloodhand: There are a number of crates in the room. Any model can carry a crate by touching it in their movement–it moves along with them. However you cannot run or charge with a crate. Any model that gets back to their side’s starting corner with a crate exits back to their armada. Roll on the crate chart below to see what effect it has for the campaign at the end of the battle for every crate you successfully escape with.

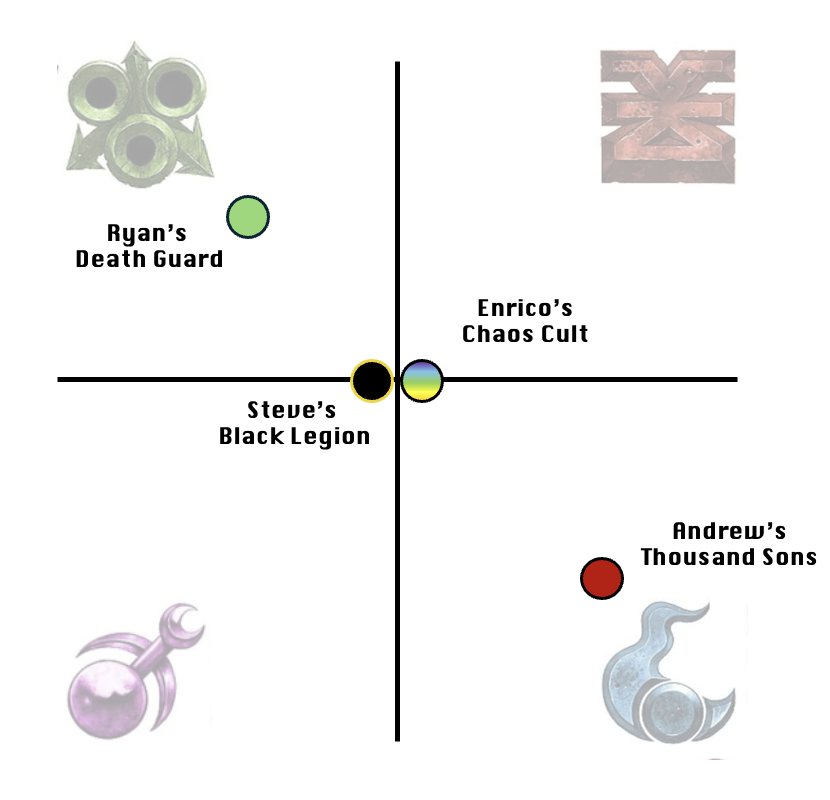
Starting dispositions. Note that Steve’s and Enrico’s forces actually share the center of the grid–until such time as they hit the field and we see what marks they have.

Campaign Guidelines

We’re here to have fun, so these guidelines help us be in agreement on how things work.

Daemon Summoning: We’ll all bring our daemon models to help people summon as needed. Lost and the Damned Models (chaos cults and daemon world units) cannot normally have marks of chaos, so we’ll allow any with a Daemon Gift (pg. 137) to also count as a model on the table with the correct mark.

Chaos Spawn: We tend to play 2v2 games, and that allows for the fun of shifting alliances as we do this campaign, as different people are betrayed at different times. That means we almost always have more than two psykers on the table in any given battle, so the rule of any warp flux of 12+ causing a chaos spawn would be pretty punishing. We’re going to change that to be any three matching numbers triggers a Chaos Spawn.

Knight Night Fight Night 7: Battle Bots

Knight Night Fight Night 7: Battle Bots

Yes, it’s time for yet another Knight Night Fight Night, our SEVENTH of the event at Drawbridge games. We’ve had Deathmatch. We’ve had Tag Teams, both big and minis. And we’ve had six great nights of silly titanic fun together. So it’s time for our seventh. And this time, it’s Battle Bots (or Robot Wars for those of you with refined UK-media tastes). Prepare for arenas of death with moving conveyor belts, pushing and throwing opponents, and other fun surprises.

The event will be Thursday, September 24th. Setup at 6:30pm, dice start at 7:00pm.

Event Rules

Each player brings one titanic walker model–and this time it’s robots only (sorry Gargantuan Squiggoth). Generally that means either an Imperial or Chaos Knight (see the list at the bottom for other allowable models from other forces). We’ll have two arenas of death, indicated by the wooden rails around the tables. The last standing two models from each arena are then placed into a final four-way.

Every round of combat all participant Knights in the ring are dealt a playing card, and play turns will run in that order: lowest numbers first, with suit order high-to-low in reverse-alpha to break numerical ties, so Spades > Hearts > Diamonds > Clubs, with Aces low. The active Knight will move, shoot, can charge and fight. Note that models attacked won’t swing back (there’s no ordinary combat phase).

Note that there will also be arena hazards in this version of Knight Night, which will get their own turn order card for when they run. In particular there will be conveyor belts that will move models around the table, as well as other hazards.

The goal is to incapacitate opposing Knight models by taking all of their wounds–resulting in them being destroyed. Being Battle Bots, there’s no spot to hide and heal up in this arena, so our usual “Recover in the Corner” action will not be used.

“Re-roll Chip”: Every Knight gets one re-roll chip. Every Tag Team who put up a promo (posted on the Drawbridge Events Facebook page and/or Discord) gets a second re-roll chip per player participating in that promo. The player with the best promo (judged by Enrico) gets a third re-roll chip. Re-roll chips can be exchanged or traded as you wish during the game with other players. They can be spent to re-roll any one d6 roll (including the check to see if a model comes out of recovery state–see below). That also applies to opponents’ d6 rolls, so you can save it to use for yourself or use it to antagonize an opponent who rolls that lucky 6 to recover. Note that no one will have command points to keep things simple, this is a sort of replacement for that. And no one will have their Detachment or Army Rule abilities, again in the interest of keeping things simple.

“Disposal Zones”: In Battle Bots, the goal is often to move an enemy model into one of the “crusher’ or “disposal” zones. Whenever a model is reduced to 0 wounds, they go into “recovery state”. Ideally lay them on their side (or indicate with a die if the model doesn’t lay down easily). Models in recovery state can be moved by other models–you move recovery state models by pushing their latent hulks across the arena floor. Every inch you move them counts as double. For instance, if you have a move of 12″, and you walk 4″ to reach the recovery state model, your remaining 8″ of movement means you can push it 4″. Models with an open power fist or claw on the model can “throw” a recovery state model instead by charging it. They automatically throw it 3d6 inches in any direction away from the throwing model (the throwing player chooses the direction, roll for distance after choosing direction). Charge movement itself cannot push recovery state models. If at the end of a round (before cards are dealt), a recovery state model is in a disposal zone on one of the boards, it is destroyed.

However, sometimes a bot just needed a push to get it going again–the damage just knocked something a bit loose and good hard “bonk” makes them right as rain, if a little dented. Any time that your model in recovery state is pushed or thrown by an opponent’s model, there’s a chance that you might snap out of it and start moving again. Roll a d6 after the opponent that pushed you finishes their turn (move and shoot). If you roll a 6 on that roll, you get up with half your wounds remaining. If you (or another player) spends their re-roll chip in advance of the roll, you get a +3 bonus (returning to the game on a 3 or better). You then get to immediately take your turn in the round if you didn’t already get a turn that round (as if you had the card right after the model whose push jostled you awake). If you were thrown by an opponent you get a +1 on the d6 roll as well (as that landing is a hard bump).

Painting Requirements: All models participating in Knight Night must be painted to a tabletop standard and based. Part of this hobby is, well, the hobby, so I want to encourage people to paint and get models finished for events. There will be additional chances at prizes for those who paint up a new Knight or larger model for the event.

Knight Options and Choices

Knight Options: Players can choose any non-character Knight from the Imperial Knights or Chaos Knights codex with gear allowable from the data sheet (no relics or warlord traits). No army rules, detachment rules, or upgrades that aren’t part of the basic datasheet entry for the Knight will be used. These are vanilla versions of the data sheets, folks.

When is a Knight not a Knight: We’re not able to allow in every Xenos and Chaos faction, but applications to field other types are allowable if they’re comparable in stature to a Knight (note they may not be comparable in points).

  • Stormsurge
  • Wraithknight
  • Gorkanaut
  • Morkanaut
  • Stompa
  • Lord of Skulls

Go Big: The following is a list of allowed “go big” options. The drawback of a “go big” choice is that you’ll be much more likely to be standing on a conveyor belt.

  • Warhound Titan
  • Reaver Titan
  • Warlord Titan
  • Revenant Titan
  • Phantom Titan
  • Ta’unar Supremacy Armor

Huge thanks to Topher and Rico for helping with the ideas and execution for this event!

Somber Sands – Session Four

Somber Sands – Session Four

[GM Note: This game summary will be a bit more choppy as I wrote most of it right after the game, but we had our bit of a gap in play, thankfully to result in better health again now this summer. So I’m finishing it now before Session Five, so it might have some gaps! -Andrew]

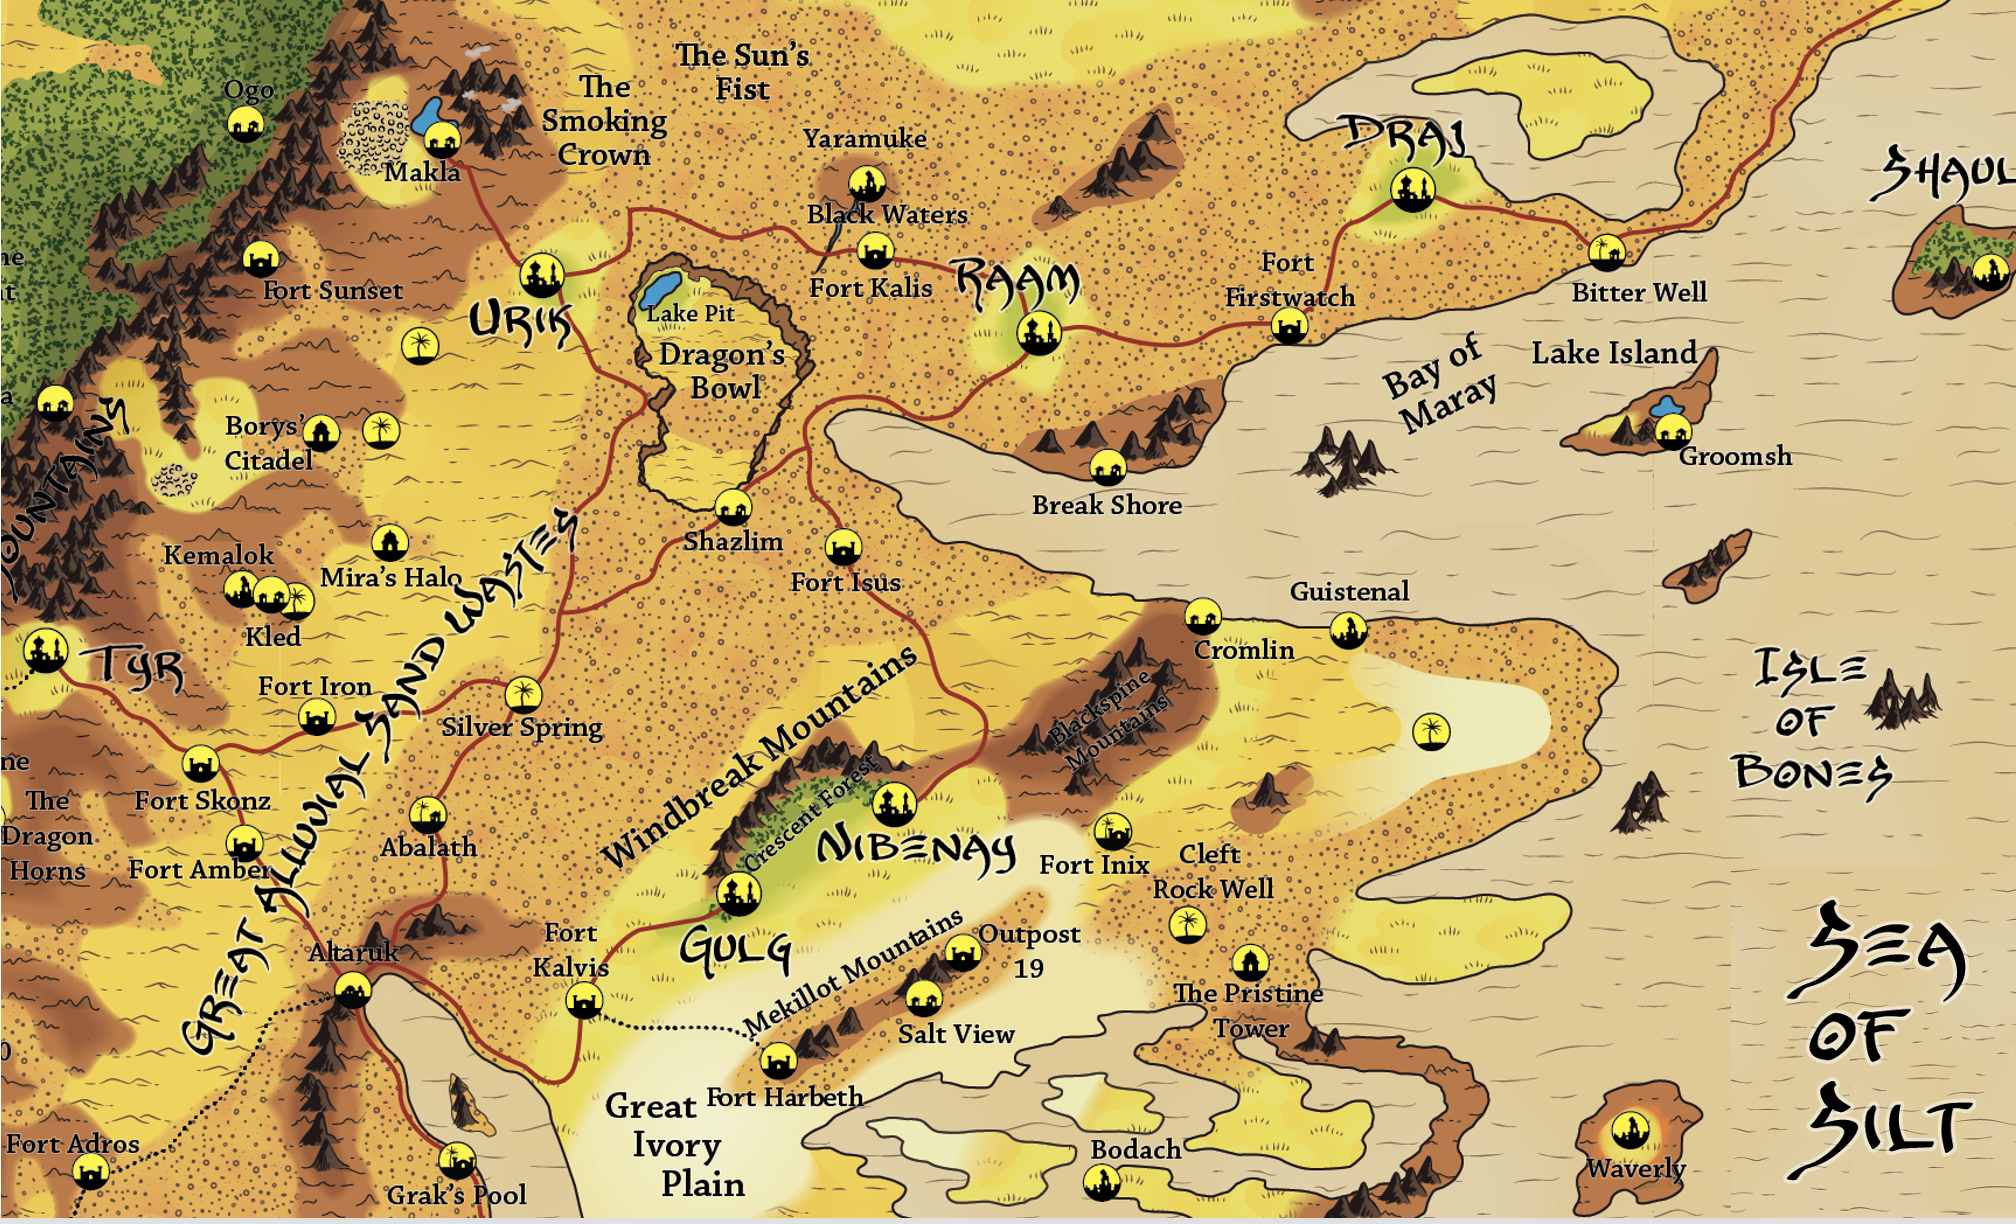
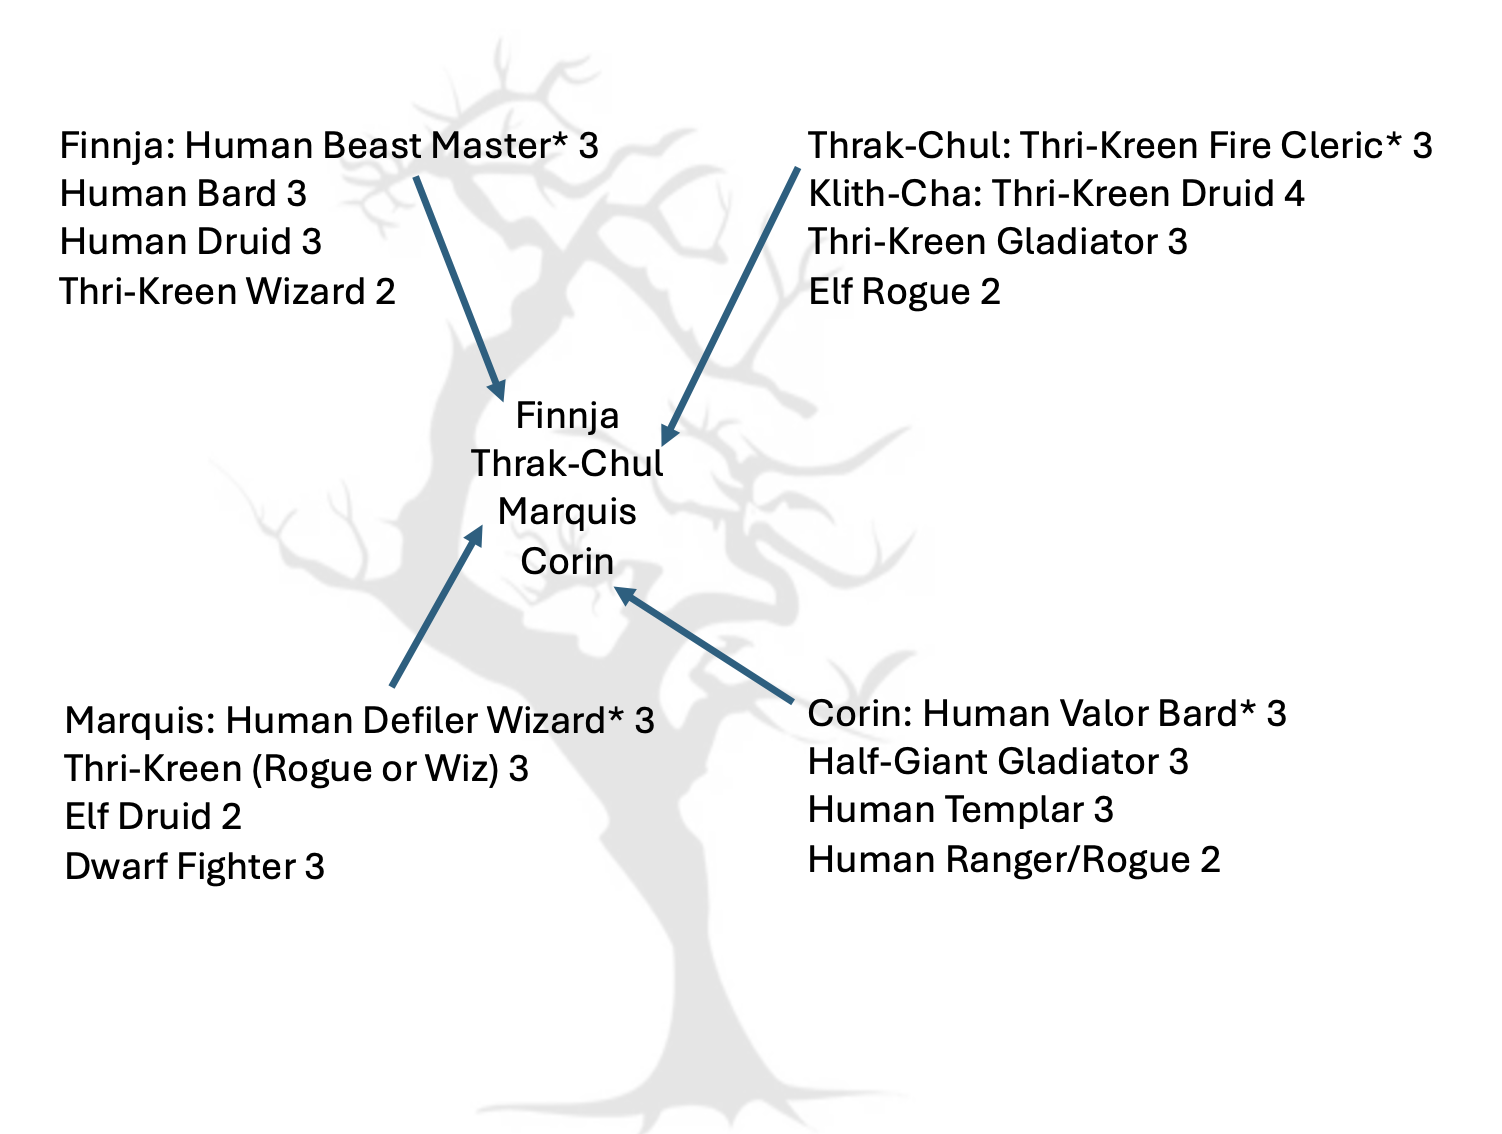
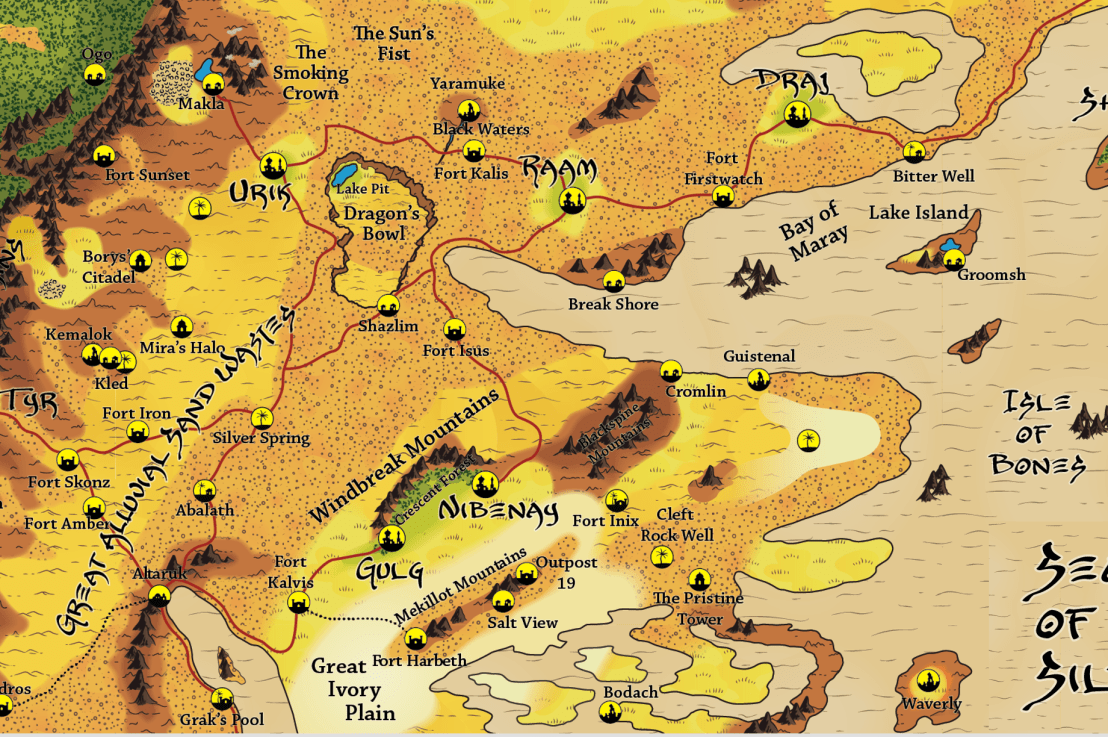
It was a dusty three days journey to Kled, retracing sands that the party had walked before. Corin, Finnja, Thrak-Chul, and Marquis had a rough chuckle when passing the silt basin that they had searched so fruitlessly on their way to the Dwarven minehead. Bez, their Dwarven companion, was talkative, discussing how the thin vein of metal they found in the mine would be the new lifeblood for the town of Kled and their families.

Unfortunately, smoke on the horizon was ominous tidings at Kled. The entire town had been attacked and razed. The few Dwarves who had remained despite the poisoned well now lay as bodies in the street, with homes raided and dwelling shattered by a sizeable, coordinated, and seemingly ruthless force. Whether the elf raiding army in the area, or a band ranging out from Tyr amidst the rumored crisis there, the heroes were unsure. The most stunning losses were finding grandmother’s body lying dead in the middle of the street, and the town elder’s clearly tortured form in the town longhall.

The one thing that gave Corin, Finnja, Thrak-Chul, and Marquis hope was that they didn’t see Cleodis’ body (the youth they had met when they first approached the town in dire need of water). There were tracks everywhere, and Finnja’s trained eyes had a tough time discerning what had happened–other than the attackers had strange clawed and webbed feet. Marquis picked up a thistle-husk doll that was laying forgotten in the street and had a sharp and stunning vision: four Dwarven children, hiding in the rocks north of town. He tried to explain to the group what he saw, and they rushed out north of town to the rocky warrens, carefully calling out in hopes of finding them.

A tearful reunion happened when four Dwarven children, led by Cleodis, came out of hiding to meet them, hugging the adventurers and Bez with tears–the most precious thing in the desert–welling in everyone’s eyes. They told the story of what they had seen, and it proved to be ill omens indeed. They said that the things that attacked walked like men but looked like lizards. They had marched into town, and the one that spoke–which looked different and smaller than the others–had a “face in its tummy” that did the talking. He pronounced the town and its contents the property of “The Saltback” and when the town elder defied them the small one ordered the attack. The kids fled to their hiding place north of town, and didn’t dare go back–not knowing where the army of The Saltback were from.

Surmising that this was some sort of mercenary band headed toward Tyr, the adventurers weighed checking out what was happening in the city versus getting to relative safety elsewhere. They loaded up Bez, Cleodis, and the other kids, and planned to journey back to the spot of the brothers’ mine–at least hopeful that they could be safe there and use the revenue of that thin trace of metal that they found to barter for food and water to survive.

The adventurers decided to avoid Tyr, knowing that the elven army had sacked Fort Iron and unsure of this new force serving “The Saltback”. They instead cut northeast, headed right back to the mine. When they reached the road they had to cross south of Silver Spring, they were disheartened to see two huge armies on the march. Neither seemed to be the elves nor lizards that walked like men–even more forces afield it seemed, both headed toward Tyr. One was very heavily armored in almost chitinous glass armor, marching slowly with a clear rearguard watching the force that moved far behind them. The trailing force were lightly armored but more numerous, runners on foot with loads of spear-bearers in the main column. The two forces were clearly both wary of each other, trying to move and not engage but ready should the others start anything.

The adventurers decided to chance their luck, and dash from their hiding spot on the dunes to the west of the road to the dunes eastward where the mine was hidden. For a tense moment after the mad dash they waited, hoping neither group would send pursuers after them. Relieved, they pushed on to the mine, reuniting Bez, Cleodis, and the other children with Boaz. The two Dwarven brothers swore an oath to start a new clan with the children, adopting them and using the mine as their new home.

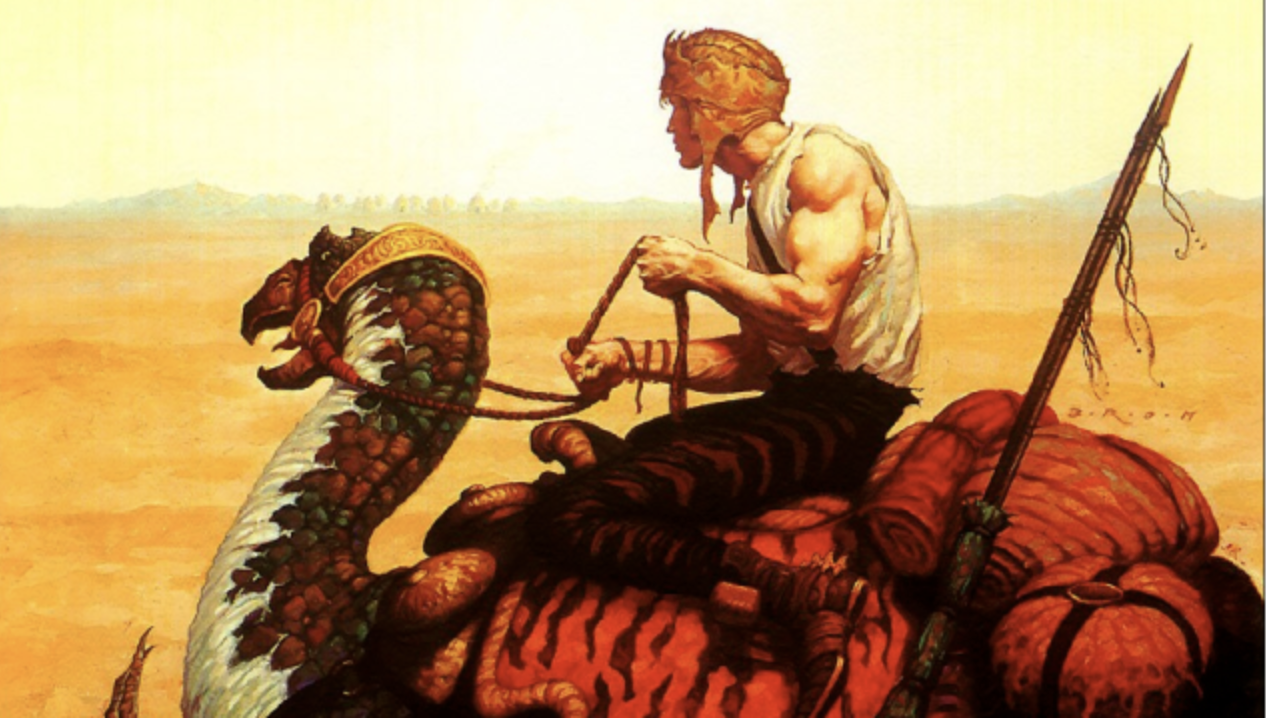
Traveling cautiously along the road, the group decided that perhaps south–toward Abarath–made sense as a next move, hoping the armies are all turning toward Tyr at the crossroads. As they traveled, they come upon a lone man riding an a crodlu. Hailing him, the group met and talked with him.

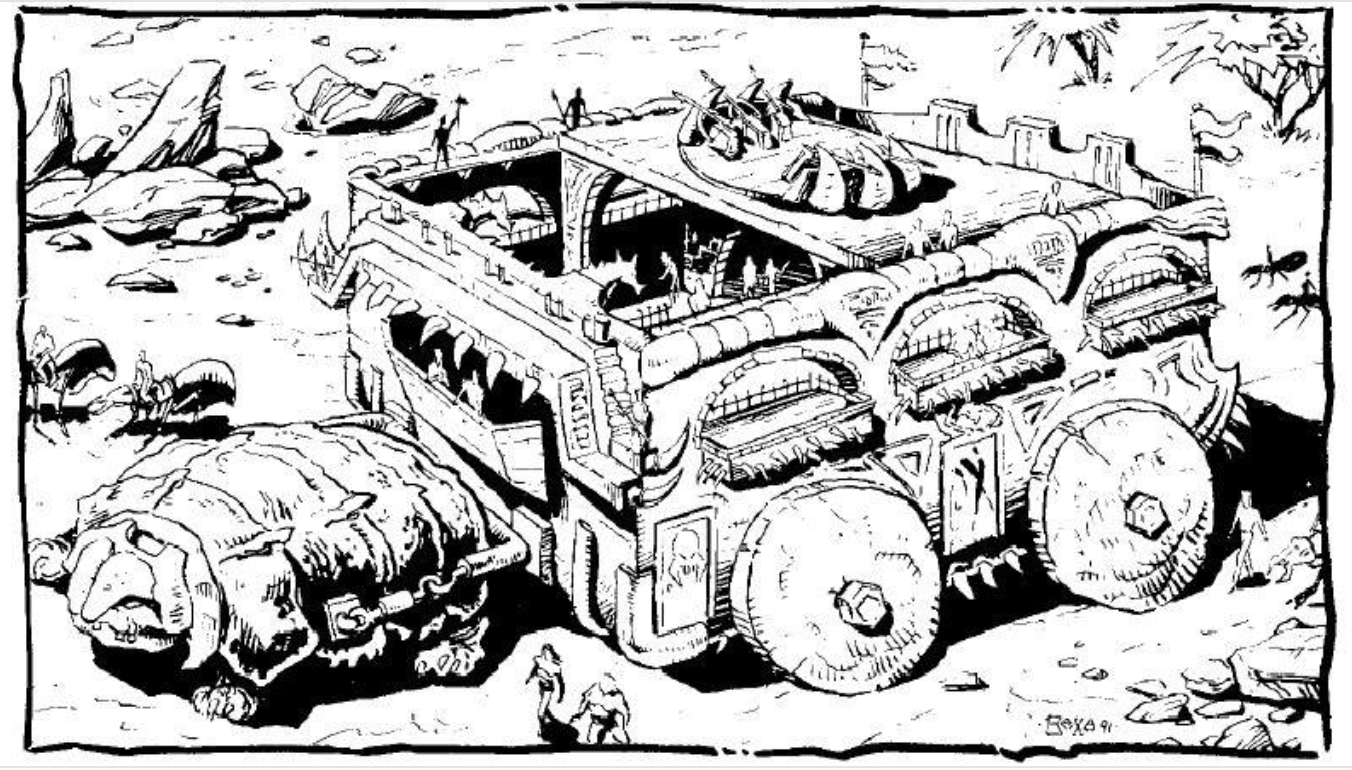
He introduced himself as Timoth, a House Vordon outrider. Corin thanks him “You sir are a spring found under sand”. Hi indicates that he’s working with a merchant caravan that chanced a cut due east to Abarath from Fort Skonz over the sands rather than stick with the road. The adventurers inquired about joining the caravan, and Timoth offers to introduce them. He travels with them for a stretch, when soon a massive rumbling caravan wagon’s dust was spotted. Timoth hailed the guards as he approached, and the adventurers could see the wagon had more than a few guards both outriding alongside it and stationed around the defense-works of the massive wagon.

It took a bit of a trick to duck under the wheels then climb through a defense port into the wagon, but Corin, Finnja, and Marquis eventually managed it, but Thrak-Chul chose to remain outside and travel alongisde the walking guards. Timoth introduced the three boarders to Merchant Mistress Hilleth of House Vordon, the head of the caravan. They learned that House Vordon is a house tied to Tyr. Mistress Hilleth told them the recent news from Tyr: the Dragon King slain by a gladiator throwing a spear through his heart atop his massive, nearly-finished ziggurat. The Dragon King’s death thru the region into chaos. Her own House is in financial ruin due to unpaid contracts for slaves and building supplies, as the Dragon King of Tyr had been near-fanatically pouring all of his City-State’s wealth into the construction of the ceremonial ziggurat. This has prompted almost every other major ruler in the lands of Arthas, along with freestanding House armies and loads of mercenary companies, to all send their forces in the direction of Tyr: half to try and take it over, and half to loot it.

Trak-Chul on the outside makes passing aqcuaintance with a guard named Sliff, who tells him much the same information as Mistress Hilleth relayed to the others. He does reveal that House Vordon is near-bankrupt… and that Mistress Hilleth has some sort of magical powers–she melted a guy who was caught stealing a few days back.

The adventurers get told of the others who are traveling with the caravan, and they’re offered the standard deal for mercenary protection: a ceramic piece now, and twenty more when they reach the caravan’s destination of Nibenay–a City-State well away from the unruly situation in Tyr. Others on the caravan that are not direct members of House Vordon include a group of riders on kanks that call themselves the “Lost Chatkcha”, a group of Mul gladiators that escaped Tyr together, and a few other random sellswords who are traveling with the same deal: passage and water for joining in protection when needed.

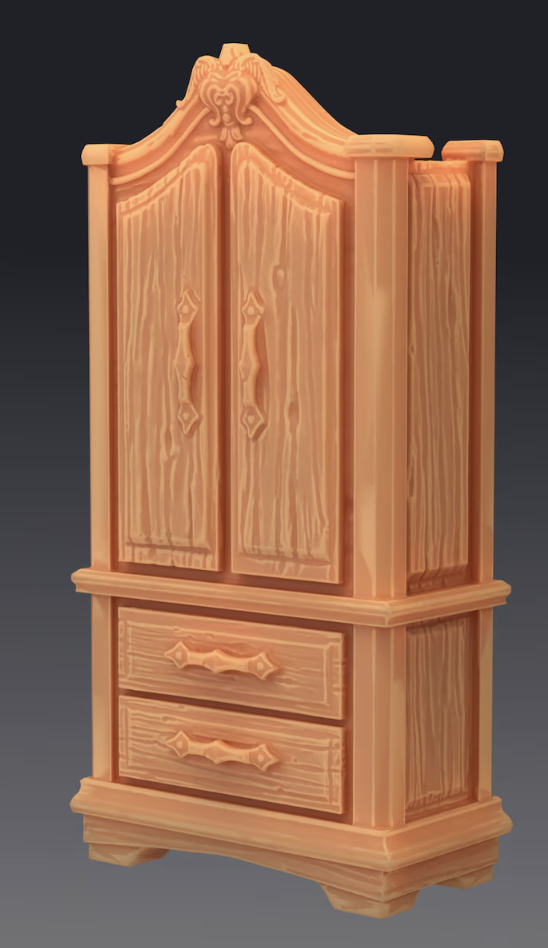
Marquis and Corin ask about whether there is a commissary or shop on the massive wagon, and they’re told to see the Quartermaster: Cupboard. They walk into the room, and see a counter top with some items, and behind it standing a cupboard. Which starts to talk to them. After a bit of confusion, the group figures out how to buy and sell basic items with said Cupboard.

As the merchant caravan rumbled onward the heroes are given a room to sleep and store their things, and instructed on timings for food and water, and when their shifts amongst the guards will be scheduled. They take a break out of the sun to get a bit of rest, excited about what the future will hold as the caravan rumbles northward–surely leaving the woes of Tyr and the clashing armies of the lands of Arthas behind.

40k 11th Edition Launch Events: Urban Camo

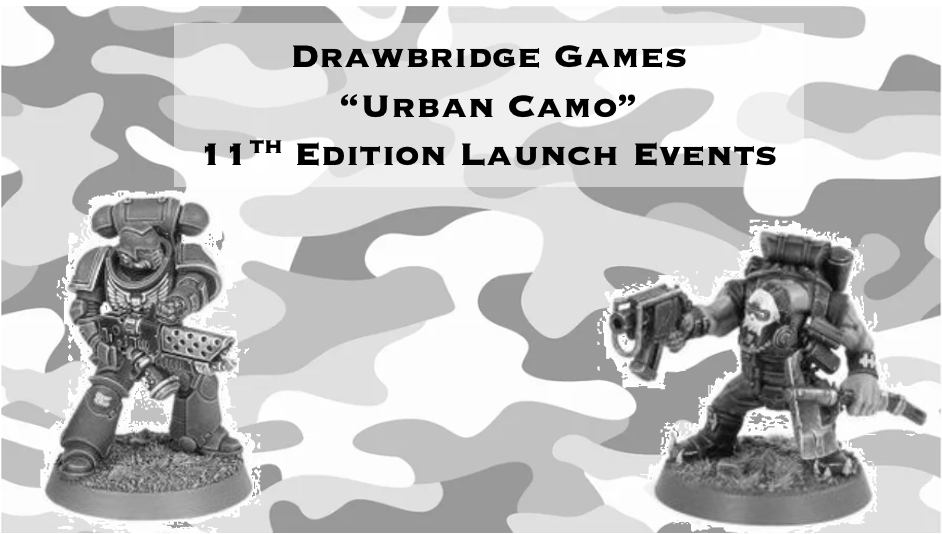
40k 11th Edition Launch Events: Urban Camo

It’s time for a new edition of Warhammer 40,000, which means a new launch event at Drawbridge Games in Pittsburgh, PA!

This time we know a lot of people will be starting brand new armies, or adding the new starter box full of models to their existing collections. And that means a moment where we’ve got at least a couple of “urban camouflage” models: models assembled but not painted yet. While we might be trying our best to get some stuff painted, there is only so much time. So we decided to embrace that.

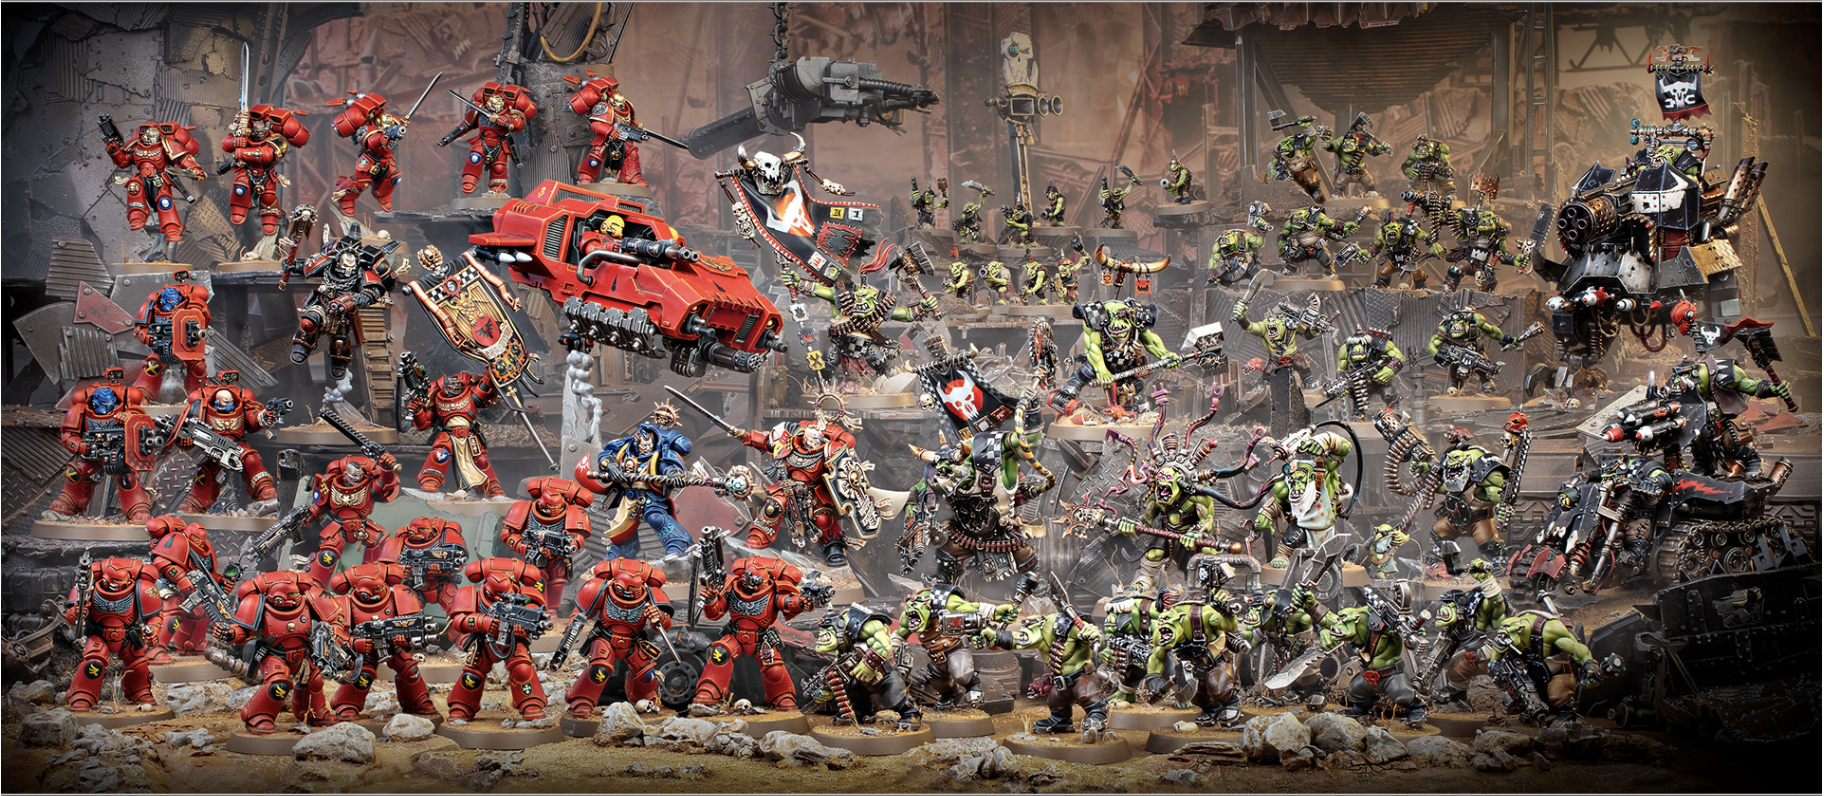
Using our best Orky cunnin’, we decided on an event where people could play those new models, even if they’re still a bit… grey. Why not a massive, urban combat bring-and-battle across the amazing Future Cleveland terrain (graciously loaned to us by Ryan N.)?

Timings: The event will happen on two different days, to ensure that people with different schedules get a chance to play: Thursday July 16th and Saturday July 18th. Thursday the 16th setup begins at 6:30pm with play running till 10:00pm. Saturday the 18th setup begins at 12:30pm with play running until 6:00pm.

Event: This is a bring-and-battle event, where people will score the points of all units their models finish off, during the time that they play. So you don’t need to be there right at the start, but can arrive at anytime and hop onto the table and start fighting–but those there for the day will have more opportunities to get destruction in! Plus we’ll have a generous “reserves” system where people on both sides can cycle in destroyed models to ensure that there are plenty of targets around. We’ll keep a leaderboard of most points destroyed by players on each side, and a prize drawing at the end of each day.

Forces: The launch box is Orks vs Space Marines, so we’re allowing people to field any Orks and any Imperial forces. Remember, they can be in their best unpainted “urban camo” (our usual minimum painting requirements are waived for this event)! But of course they don’t have to be! People can bring in their painted collections–whatever you can reasonably run, you’re welcome to bring to the table (knowing that we’ll roughly even out sides: so even if you bring your entire 1st company of Deathwing terminators, the total points of Orks on the table will decide the total points that people can plop down of Imperials).

Prizes: As usual, we’ll have a door prize drawing for all who enter the event. Must be present to win, and a separate drawing for Thursday and Saturday. Additional draws will go to the leaderboard top three at the end of each session. They’ll be split into two groups: low points leaderboard and high points leaderboard (so the person who brings 350 points of Space Marines and the person who brings 3,500 points of Space Marines are not competing against each other in terms of total points killed. And even tho unpainted “urban camouflage” is allowed, we’ll have an extra bonus. For each unit from the new release box that you’ve painted up and brought to the game, you’ll get another draw in the drawing. Yes, that means if you paint an entire half of the set by then, you’ll get an additional 8 draws for the Marines or a whopping 10 draws for the Orks.

500 Worlds Vespator – Progress and Finale

500 Worlds Vespator – Progress and Finale

For the past three months war has raged at Drawbridge Games, over our 500 Worlds Vespator campaign. Updates were made on the Discord, so this is the summary of the events and the rules for the finale.

Phase Two: Conflict expanded

Battles were roughly even at the beginning, with change in power levels but not much more.

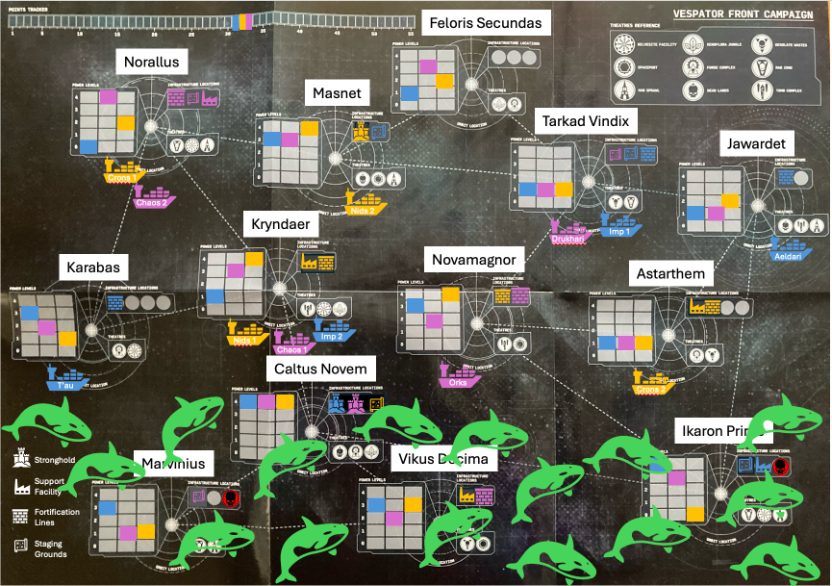
Phase Three: Void Whale Migration

A random event of a Void Whale migration pushed all the fleets to the galactic north of the system, condensing the battles–and doing some damage to some of the southern planets. The Despoiler forces started a slight pull ahead.

Phase Four: Planets begin to take damage

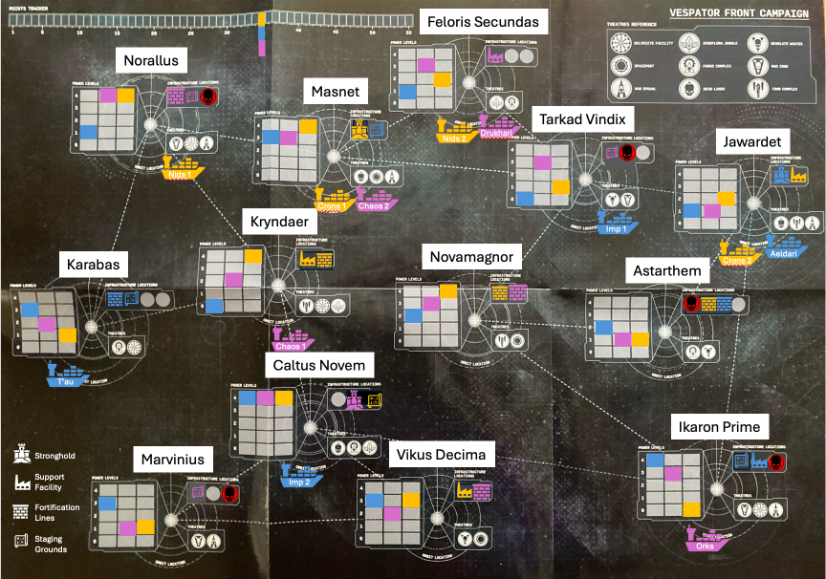
Forces began to more seriously target infrastructure at this point, and while the Reclaimers and the Terraformers began pulling up to match the Despoilers, damage to planets was starting to add up.

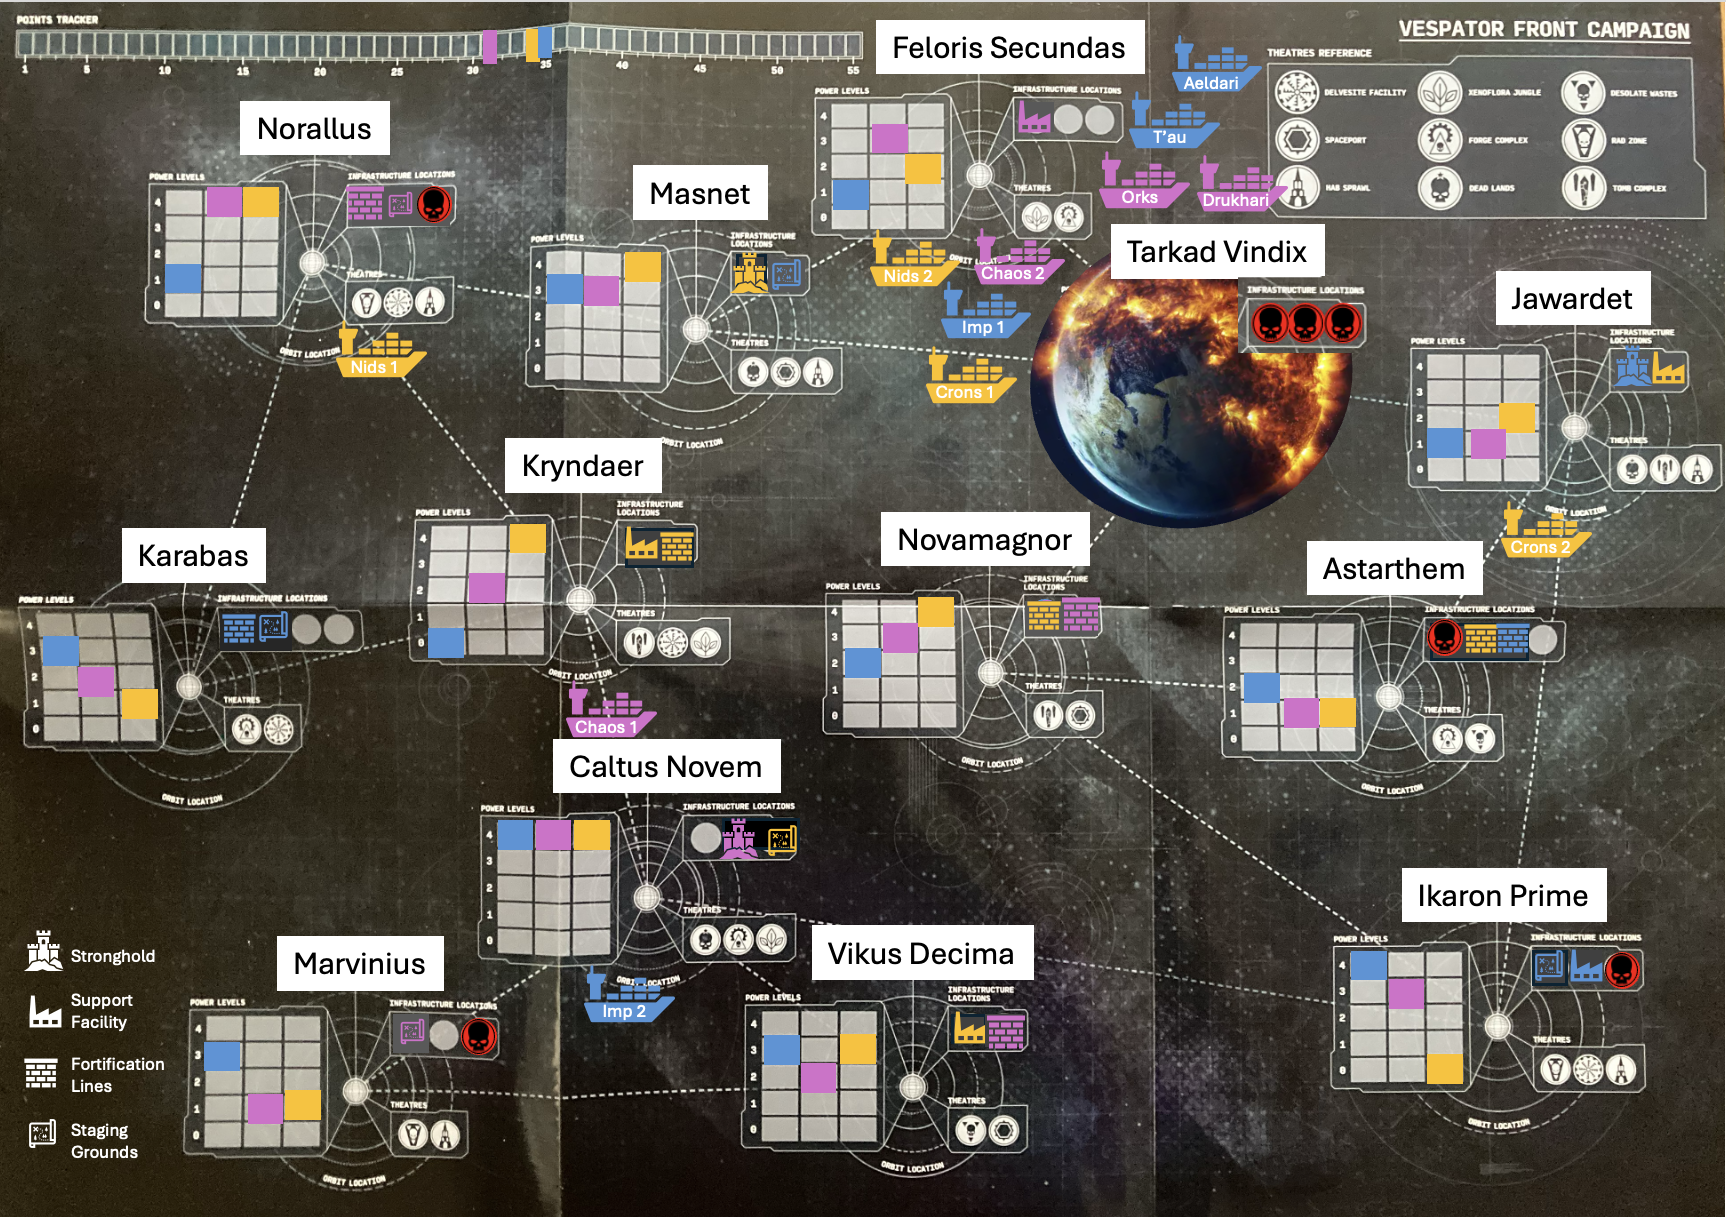
Final Phase: Tarkad Vindix destroyed, Feloris Secundas besieged

The Reclaimers finally got a decisive set of victories on Tarkad Vindix, a site with fading Imperial presence and rising Chaos and Ork enclaves (and increasing attention from the Tyranid fleet–where goes food, there they go). The destructive weaponry directed at the planet triggered a mass exodus, which largely pathed to nearby Feloris Secundus. With all sorts of supplies, populaces, technology, and scrap landed on that contested planet, it became clear that the final clash will be at Feloris Secundus.

Campaign Finale

The final campaign battle will be fought over massed landings of supplies that were rapidly removed from the collapsing Tarkad Vindix, hastily transported onto the surface of Feloris Secundus. Massed refugees, tech repositories, and sacred relics all present too tempting a target, so all the forces in the sector converge onto that one battlefield. Alliances that once held will be tested, as each force tries to grab on to enough materials to evacuate them more permanently.

Rules: the battle will be generally split by factions, but there may be some variances based around who shows up. There will be six key locations of supplies set up on the board, and the Imperial forces (who were most triumphant through the campaign) and any allied forces assigned to them will be occupying them at first–trying to hold them long enough to extract them safely. The attacking forces (likely to be Terraformers and Despoilers) will be endeavoring to access and loot/consume them/despoil these sites. These will be tight deployment zones as is appropriate for a mega battle (to get things stuck in, they will not be far apart), and units an do a “support move” to relocate up to 48″ as long as that movement does not 1) move within 12″ of an enemy position, and 2) does not end within 12″ of an enemy position, and 3) they sacrifice their shooting that turn.

Victory will be determined at the end of the time period (noon to 6pm), ideally four rounds of game play. If attacking forces hold any of the objective locations for a full round that location is destroyed, replaced with a ruin, and considered looted. All models that held that spot are removed from the board as if entering strategic reserve, eligible to return their next movement phase. Also any locations held by attackers at the end of the game are considered destroyed and looted.

Factions win by having a majority of objectives either under their control (Reclaimers plus new allies seeking to control a piece) or destroyed (Terraformers and looters). Individual army commanders count as winning if their models control at least two objectives at the end of the game (Reclaimers/allies) or consumed two objectives (Terraformers and looters). Players will get a draw in the prize draw for being on the winning overall faction, for being an individual command winner, or for fielding at least 500 newly painted points for the battle (500 points for 500 worlds).

Knight Night Fight Night 6: Deathmatch

Knight Night Fight Night 6: Deathmatch

The battlefields of the Warhammer 40k universe are covered in deadly debris: tangled razorwire, broken glass windows, rubble with protruding girders, concrete tank traps, and more. Sounds just like a deathmatch wresting ring, which is why:

Drawbridge Games is pleased to offer our SIXTH Knight Night Fight Night event, which this time is a DEATHMATCH! It’s a night for a knock-down, drag-out slugfest with some of the largest models in the Warhammer 40k world. Plus the glory of being added to the Knight Night Fight Night trophy!

The event will take place on Thursday, May 21st, 2026. Setup at 6:30pm with first dice at 7:00pm sharp. As always we’ll have a door prize drawing, so participating is all you need to do to win!

Event Rules

This year each player will field one Knight-sized or larger model as their entrant. The goal is to be the last model standing–leaving all other competitors laying in a bloody heap–and that last standing model wins the event for their team. The rules are somewhat different this year than prior years, as deathmatch wresting events work a little bit differently. I’ll highlight the changed rules in bold so people can note them.

To start the event, each model will be placed in the ring–which will be full of all sorts of damaging terrain–starting with the highest points cost of the model downward.

Every round of combat all participant Knights in the ring are dealt a playing card, and play turns will run in that order: lowest numbers first, with suit order high-to-low in reverse-alpha to break numerical ties, so Spades > Hearts > Diamonds > Clubs, with Aces low. The active Knight will move, shoot, can charge and fight. Note that models attacked won’t swing back (there’s no ordinary combat phase). The goal is to incapacitate opposing Knight models and be the last model standing while every other model is down and presumably bleeding out. There are a few different special rules we’ll be using that will help this happen, and give Knights an outside chance to keep fighting.

Deathmatch Terrain

Part of a deathmatch is all the flourescent light bulbs, barbed wire, tables, chairs, and random objects. To represent that in this battle, terrain is hazardous and models can be thrown or knocked backward. Terrain inflicts a random number of mortal wounds based on its size, to be adjudicated at the event. Barbed wire would do 1 mortal wound, while some debris would do d3 mortal wounds, and bigger pieces of terrain doing d6 or even more! The edge of the map is considered to be a ring of barbed wire for these purposes.

Knockback and Throwing. Models hit by shooting are knocked backwards somewhat in a direct line away d6 inches. This happens once per model shooting them (so even if a model has 3 weapons, the opponent is only knocked back once). Models can also bull rush or throw their opponents by engaging in melee. Bull Rush allows models that do not have open hands/claws to knock models directly away d6 inches–they declare a charge, and roll a single to-hit roll. If they hit, the model is knocked directly away instead of suffering damage as normal (counts as a throw). Models with at least one open fist/claw can more purposefully throw their opponent. After charging they declare they are throwing, which replaces their normal melee attacks. They use their open fist(s) to toss their opponent. Roll a scatter dice. On a hit, move the thrown model the direction of the thrower’s choice for a number of inches equal to the thrower’s strength. On any other result for the scatter dice, move the model that direction and in the number of inches equal to the thrower’s strength. Thrown models stop if they collide with any objects, and take damage the moment they do.

Re-roll Chip

Every Knight gets one re-roll chip. Re-roll chips can be exchanged or traded as you wish during the game with other players. They can be spent to re-roll any one d6 roll: yours or your opponent’s. The chip can also be spent to get a one-time +2 to a roll on the Down and Bleeding chart (see below).

“Down and Bleeding” Chart

Whenever a model is reduced to 0 wounds, they get laid down on their side (if possible) or otherwise indicated that they’re out. In a multi-person deathmatch there are lots of competitors laying in the wreckage bleeding out. Most of them stay down, but on occasion one of them gets their wind back and returns to the ring. Opponents need to continue to keep them beat down to keep them from returning–and the bigger and more spectacular the hazard that takes them out, the more likely they’re out for the count.

At the end of each round, all players who have a down and bleeding model roll on the chart below. If the damage that brought a model to zero wounds was done by object damage (being thrown or knocked into something and suffering mortal wounds from it) they suffer a -1 on their Down and Bleeding rolls until they are eliminated or get a back in the action. If it’s impossible for a model to get a result of a 5 or a 6 on the chart at any point they must roll on it, then they are removed from the battlefield as if they rolled a 1.

RollResult
1 “It’s a bloodbath! Send in the stretcher!”The model finally bleeds out from their damage. They are removed from the battlefield and do not take further part in the game.
2 “Why are the refs not checking on him?’The model remains in the game but taking no part in it.
3 “I see him twitching!”The model remains in the game but taking no part in it.
4 “He’s tangled in wires and glass!”The model remains in the game but taking no part in it.
5 “With so much blood it’s a wonder he could stand back up!”The model stands up and is restored to d6 wounds. Add a cumulative -1 penalty to all future rolls on this chart.
6 “He was playing possum! Surprise attack!”The model stands up and is restored to 2d6 wounds. Add a cumulative -1 penalty to all future rolls on this chart. The model gets priority to act first in the subsequent round (it receives an Ace card before the cards are dealt)

Painting Requirements: All models participating in Knight Night must be painted to a tabletop standard and based. Part of this hobby is, well, the hobby, so I want to encourage people to paint and get models finished for events. There will be additional chances at prizes for those who paint up a new Knight model for the event. And there will be even more additional entries in the draw for anyone who paints up “Dangerous Ruins” terrain–so you can help fill out the battlefield by painting up debris. In particular Ork-themed terrain would be perfect (and will help with the summer events coming up too!).

Knight Options and Choices

Knight Options: Players can choose any non-character Knight from the Imperial Knights or Chaos Knights codex with gear allowable from the data sheet (no relics or warlord traits). No army rules, detachment rules, or upgrades that aren’t part of the basic datasheet entry for the Knight will be used. These are vanilla versions of the data sheets folks.

When is a Knight not a Knight: We’re not able to allow in every Xenos and Chaos faction, but applications to field other types are allowable if they’re comparable in stature to a Knight or larger model (note they may not be comparable in points).

  • Stormsurge
  • Wraithknight
  • Gorkanaut
  • Morkanaut
  • Stompa
  • Lord of Skulls
  • Seraptek Heavy Construct
  • Warhound Titan
  • Reaver Titan
  • Warlord Titan
  • Revenant Titan
  • Phantom Titan
  • Hierophant Bio-Titan
  • Ta’unar Supremacy Armor

Somber Sands: Session Three

Somber Sands: Session Three

Corin, Finnja, Thrak-Chul, and Marquis strode out again into the sands, their goal to reach the fork in the road at of Silver Spring. They reached the road after three days of wading through sands, including spending time digging a length of fibertree out of a silt basin. A paltry prize for the labor, but perhaps worth selling should they ever reach a merchant. On the road, they met a passing traveler: a half-elf merchant named Tilrun who rode on a large lizard-mount Inix. Tilrun stopped and talked with the PCs and introduced his Inix (named “Peaches”). Oddly, when Marquis shook hands with Tilrun he had a sudden vision: five bodies hung atop a black-grey painted wall. Marquis shook his head in disbelief, a bit stunned by the occurrence. None of this magical powers would have done such a thing… as far as he knew.

The PCs traveled with Tilrun toward Fort Iron, along the way toward the the City-State of Tyr. As they walked alongside the Inix, Finnja and Thrak-Chul mentioned what they saw to Marquis–the desecration of plant life that they understood as Defiler magic. Marquis remained silent, but knew that their questions were probing. As they camped the first night of travels, Tilrun told the PCs that the rumors are that the Sorcerer-King of Tyr was killed by a gladiator who struck him down with a magic spear, and that the City-State is in chaos. Yet they continued in that direction, thinking that the City-State might be better than wandering the wilds.

After three days, they reached Fort Iron. It’s painted black-grey walls were intimidating, making the stone give the appearance of raw iron. From their view it looked deserted, but taking care to listen they heard some strange noises from inside. Thrak-Chul climbed up the wall, then froze as he looked over the parapet. There were slain bodies on the ramparts, and down in the fort was a war party of elves with the same tribal marks as those they had fought before. An ill-advised shout from the PCs suddenly caused the elves inside to scramble, and one blew a horn–only to hear it echoed by a number of war horns from behind the sand dunes to the west. Where the entire elf army was probably encamped.

Thrak-Chul dropped and the PCs panicked. Tilrun spurred his Inix, and when some of the PCs failed to climb on Thrak-Chul attacked Tilrun to try and stop him. With a mighty kick, Tilrun kicked him off and rode off. With the elves no doubt racing behind them, the PCs ran and covered themselves in sand in a ditch just beyond the first low dune. They held as still and hidden as they could, hearing first the raiding party then riders from the massed army pass them by, chasing the Inix running on the horizon.

At dusk, the smell of cooked Inix suggested that there might be a moment to make a break for it, and the PCs slipped off–tho they could see the dead body of Tilrun hanging from a gibbet the wall, in a pattern that matched Marquis’ vision… just less their four bodies.

The PCs found themselves on the eastern side of Fort Iron, so ended up looping through the desert then back-tracking toward Silver Spring, staying off the road in case of elf army patrols. They saw evidence of recent travel on the roads, indicating that the army may well have sent war parties ranging. After two days of distance they came upon a wrecked sand sledge that had been run off the road.

They recognized the dwarven design, and Finnja’s keen eyes spot a track where someone must have run, then been dragged away from. A small pile of sand nearby had a buried scroll case with a note. Inside was a cryptic map and note, intended for Father Grimnuz (a name they recognized from the Dwarf village of Kled, the town elder). It had some strange symbols that seemed to be directional, a drawing of two dead trees, and a note “found metal” and the names Bej, Bez, and Boaz. With some care in decoding, the PC’s determined a potential way to follow the directional symbols (a clue about how far to walk in a given direction before turning).

The PCs followed the directions, crossing the road again (cautiously, wary that an elven army is ranging somewhere in the area), to a spot roughly a day south of where they expect Silver Spring to be. They find a spot with two trees in a small depression amidst the dunes. Found a small trapdoor between the two trees. Unfortunately a crossbow trap was rigged to it, which left its mark on Thrak-Chul’s chitin. They gathered the crossbow, and the group clambered down into the hole to find a small underground room that served as a mining camp. Tearing up a bedroll and attaching to a tree branch, they lit a torch to help them explore. They filled their waterskins from a water barrel there, and refilled some rations from a crate of supplies. They then followed a tunnel dug in the rock downward.

They quickly reached the end of the tunnel, and at the end of it past a shored-up door, they found two dwarves hard at work mining. The PC’s proclaimed “We have your spear” as Thrak-Chul brandished the bone spear. The dwarfs misunderstood and attacked, shouting “They sacked the Town, Boaz!” and “Get ’em, Bez!”

The dwarves fought like demons to protect their fledgling mine, with Bez using spells and Boaz swinging a heavy stone pick with brutal efficiency. Boaz pushed his way through druid-conjured vines and the heavy hit of Finnja’s maul, and even tho Bez was stopped by the party Boaz fought them to a near standstill and dropping Marquis. Finally he shouted “This is my mine!” and the remaining PCs drew back, and assured them that it was his mine and they had no intention to take it.

Bez, being healed and awoken by the PCs, was greeted by Boaz bragging “I bested them” (and exchanged a knowing nod when Corin replied “Yes, he bested us”). They showed the note, and talked about the potential demise of their other brother Bej in the wreck of the sledge. They learned that Bej was supposed to go and convince the town elder to bring other dwarves from Kled to help work the mine. They had found a faint trace of iron, a small seam, that with work might actually yield more. Bez decided to accompany the PCs back to Kled to inform the town, by Boaz would continue to mine on his own for the moment.

They headed back out into the desert again with Bez, trekking to Keld with plans to head onward to Nibenay from there.

500 Worlds Vespator – Campaign Phase One

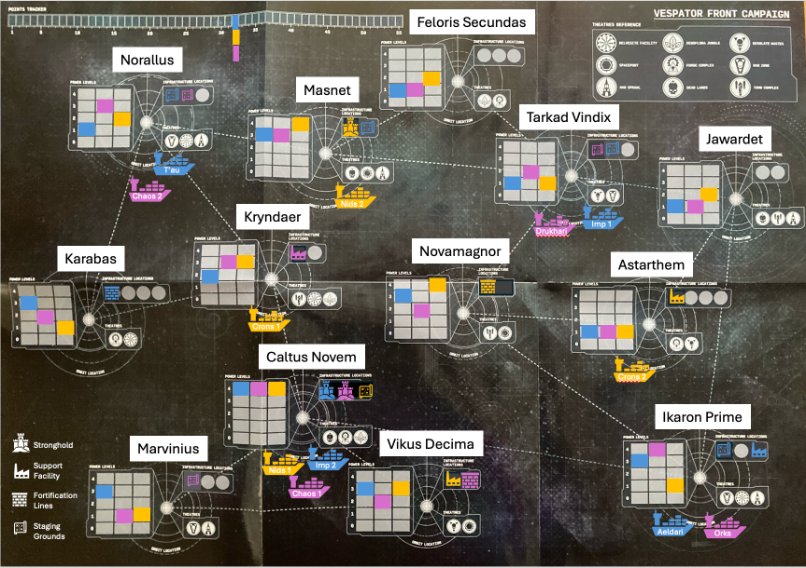
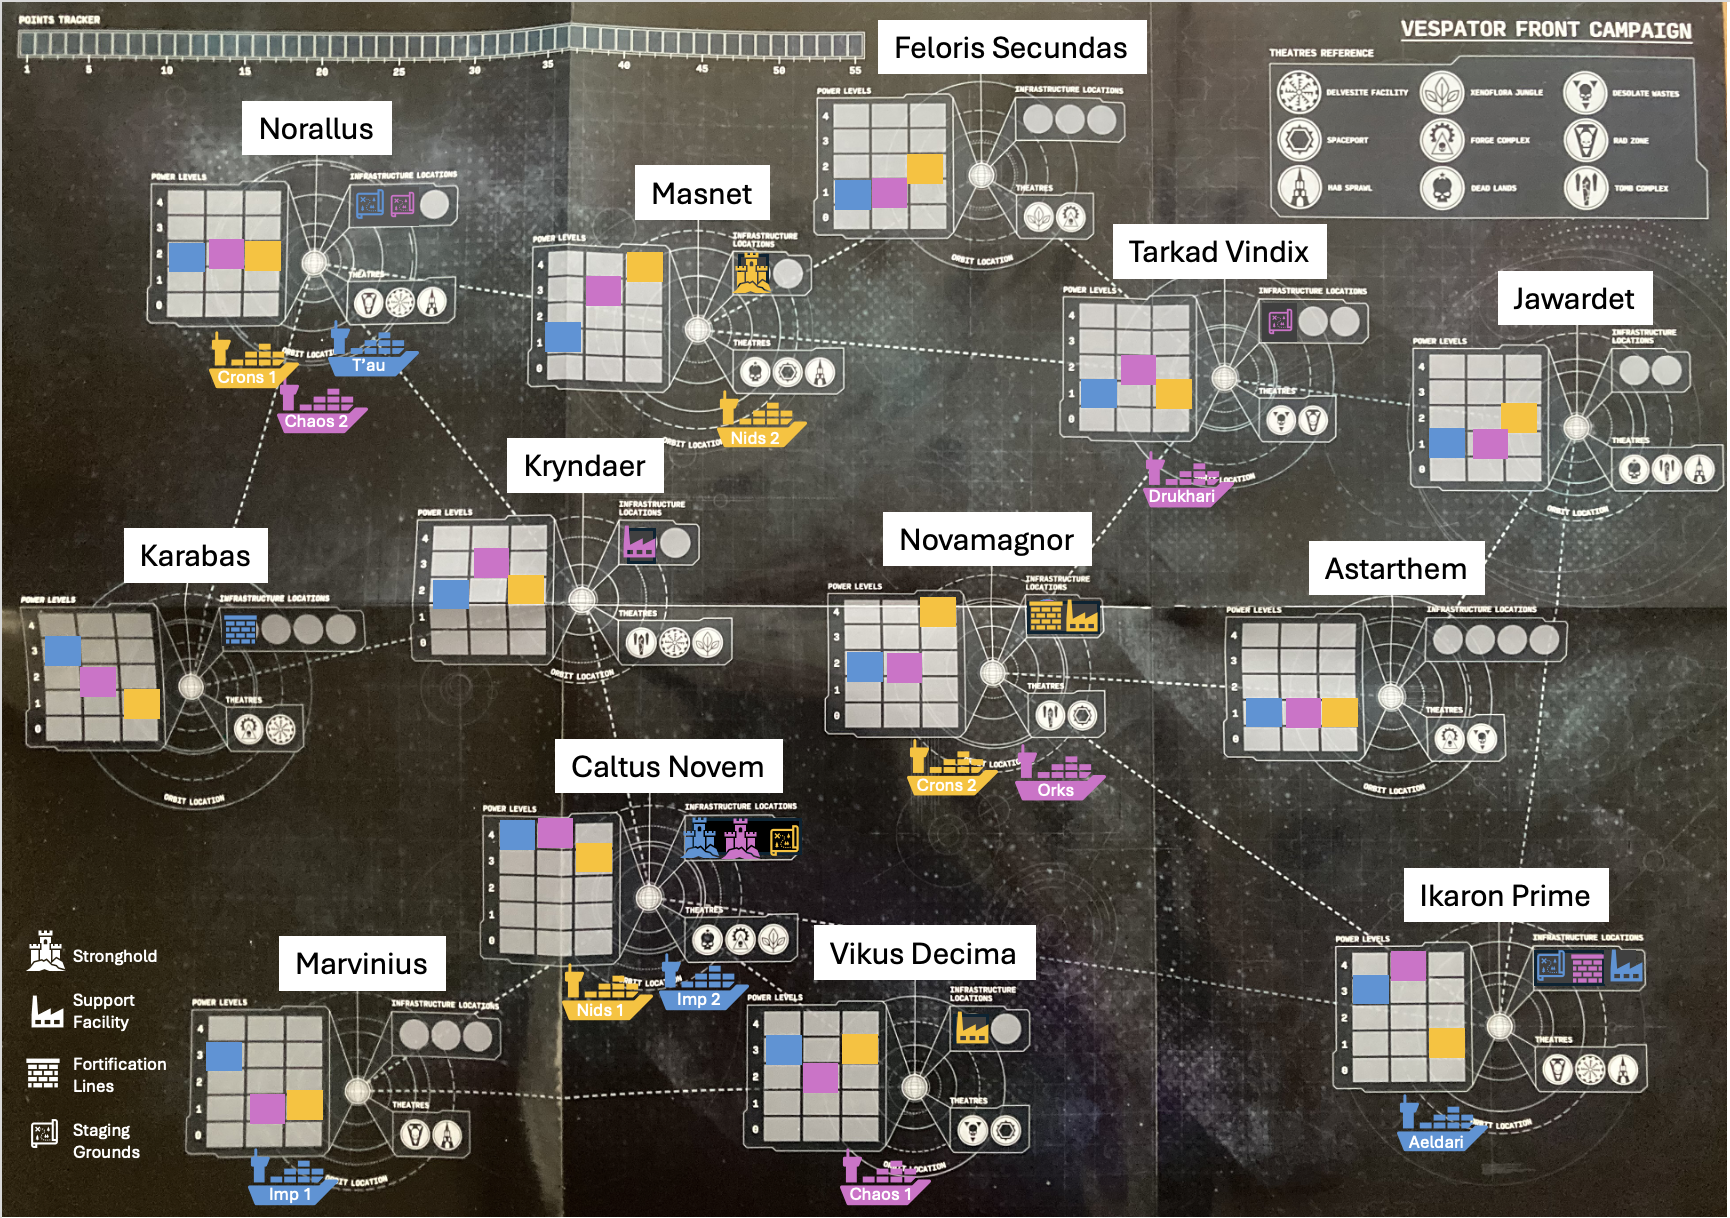
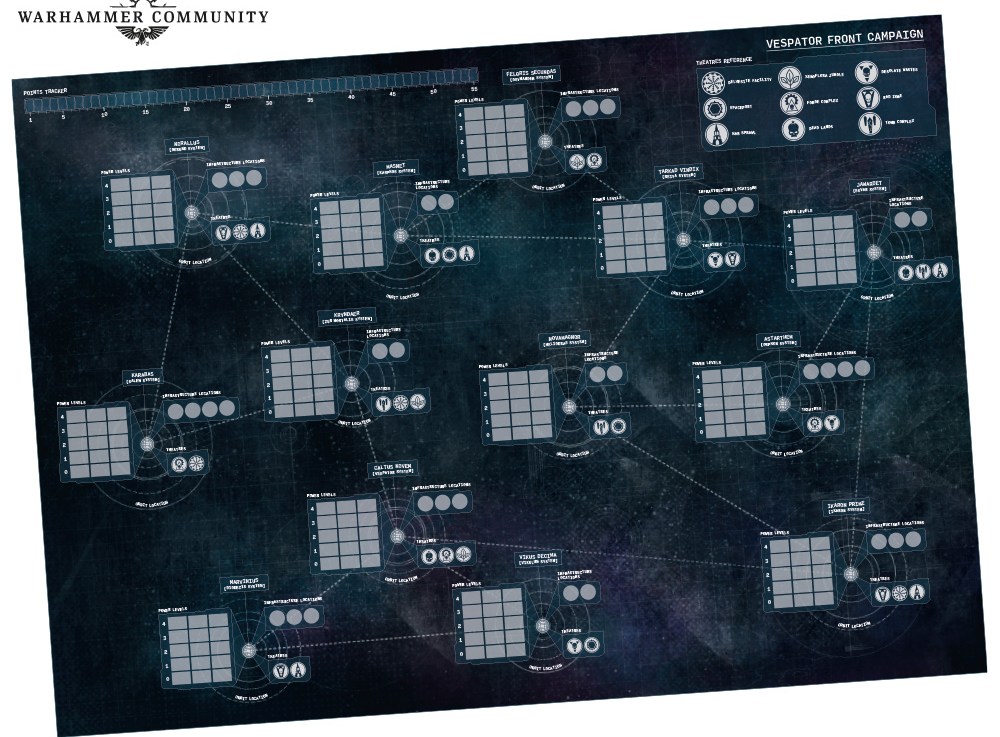
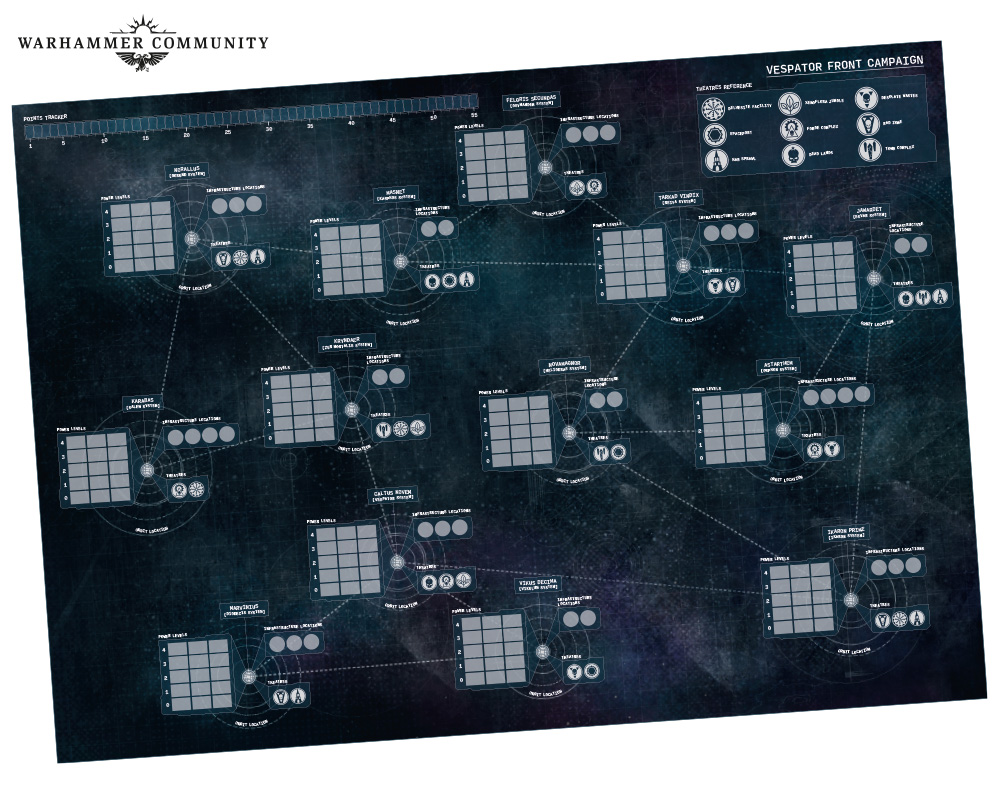
The first phase of Operations are decided, so it’s time for games! Map is below:

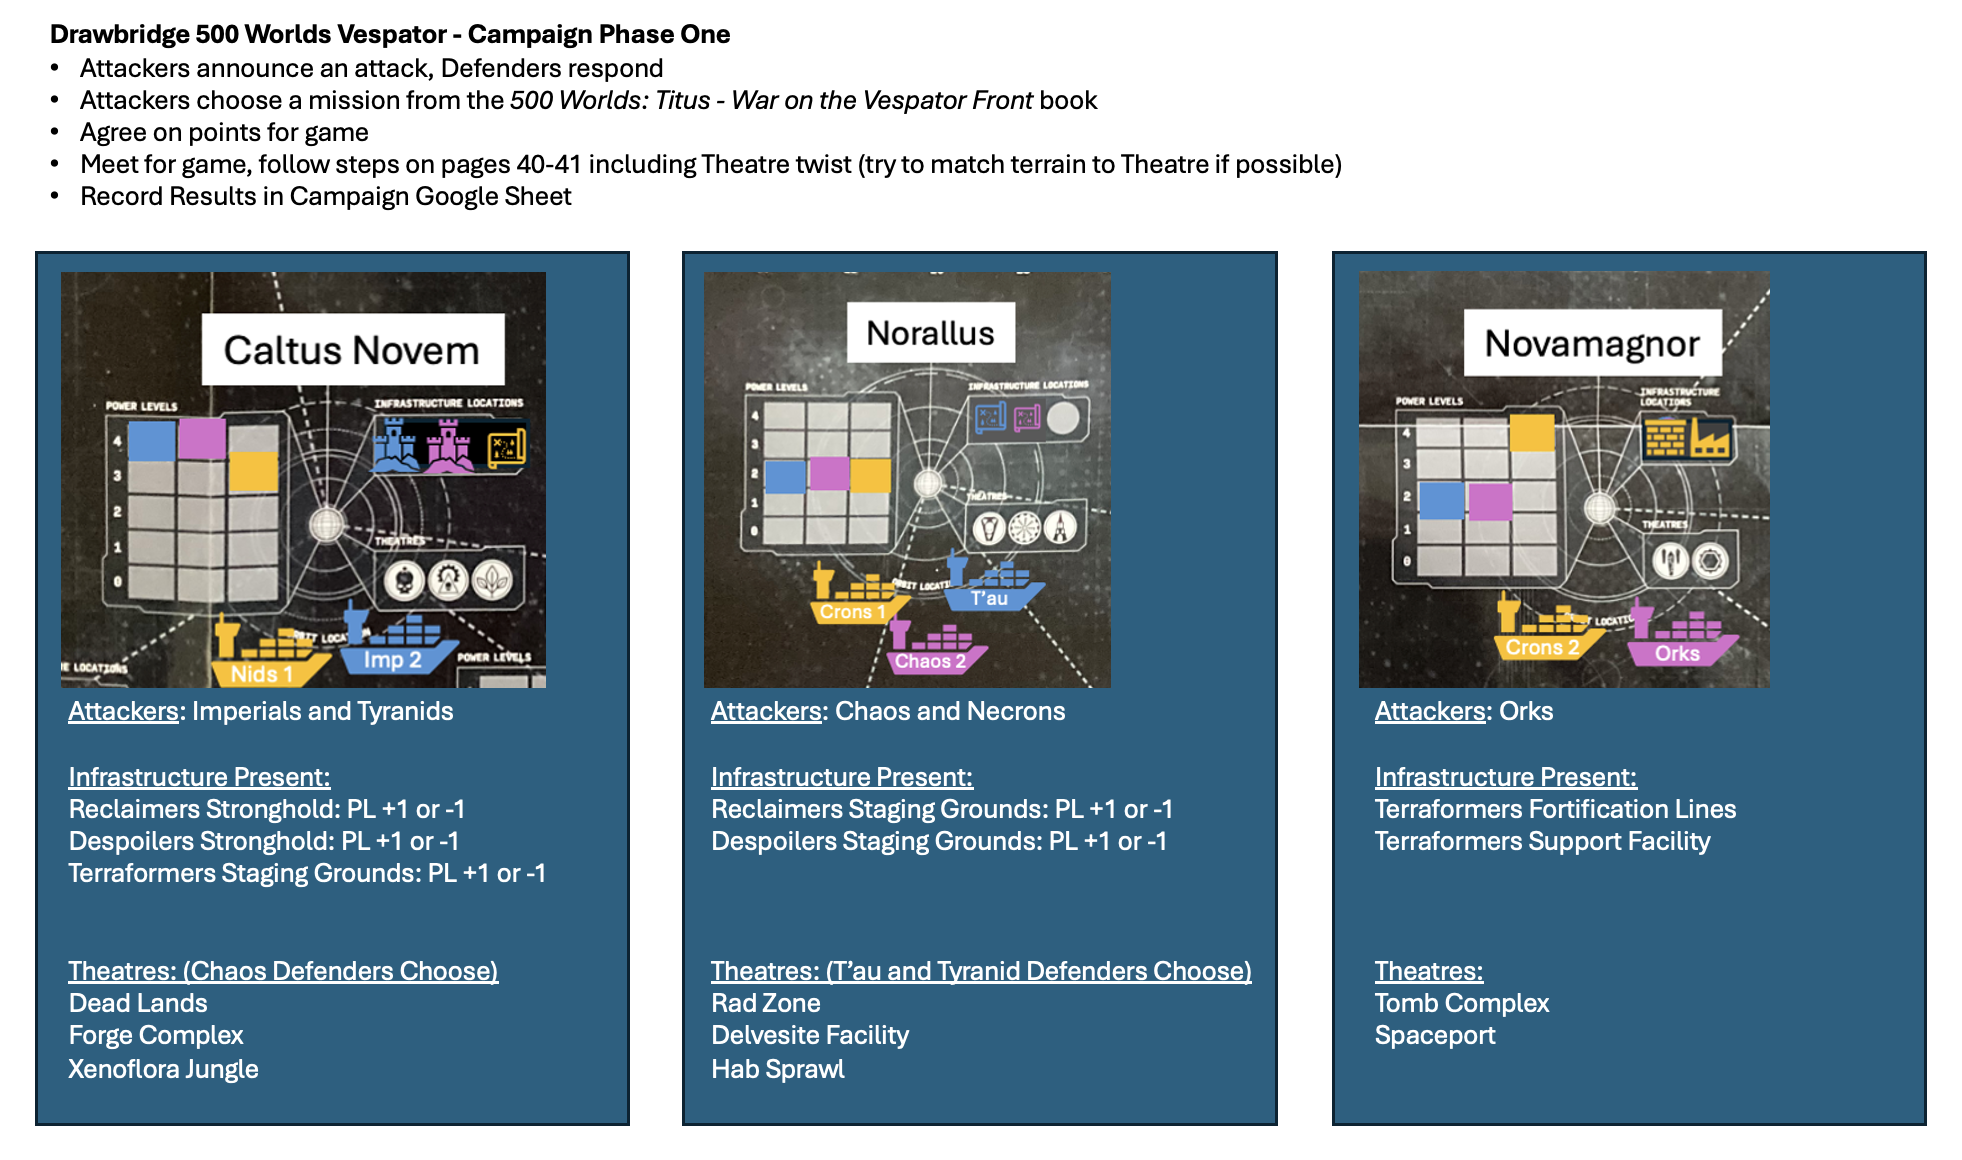
The following image details the available Battle sites this phase and who are the attackers. Remember: anyone can defend any planet where they have at least 1 Power Level (currently all planets!).

After your games, submit info to the shared google sheet (link in our Discord), and you can upload photos of your games (with descriptions of what is going on) in the Discord as well and I’ll include selected good action shots in future Campaign Phase updates!

500 Worlds at Drawbridge – Spring Store Campaign

500 Worlds at Drawbridge – Spring Store Campaign

The 500 Worlds Campaign is upon us and Drawbridge Games is going to be a site of battle for control of the Vespator Front. These are the tentative campaign rules for our store campaign. I’ll be serving as the “Warmaster” for the campaign, as well as being a pinch-hitter for all teams to help fill any gaps when games need to be played. Note that this is a campaign, not a crusade–so we’re not using any crusade rules but will be playing with the rules from the 500 Worlds: Titus set, including the map of the Vespator Front. Players are encouraged to pick up a copy of the set for themselves, as the information on the missions, infrastructure, and theaters of battle that will be affecting games will be in those rules.

NOTE: These rules are tentative, and based around the in-depth rules review from Goonhammer. The Warmaster may change things when we actually get the rules and can read them for ourselves. If players note any changes that would help make it a better play experience, absolutely let me know!

We’ll be having three Alliances that form the teams for the campaign. They are as follows:

Reclaimers are a some-what tense collaboration of forces that are supportive of Roboute Guilliman’s vision of a re-united 500 Worlds of Ultramar. While the Imperial forces are under command to do so, it serves Aeldari, Votann, and T’au interests to let the Imperials bring order to the segmentum in the short term.

Despoilers already lay claim to many of the 500 Worlds, and seek to simply despoil and extract from them. Whether stealing resources or enslaving populations, their goals range from actively warring against Imperial forces to simply spreading destruction to suit the goals of their own personal warlords. These include all Chaos forces, Orks, and Drukhari.

Terraformers represent the grand designs of the Necrons in particular, who have plans for a vast network of energy spanning the 500 Worlds. They’ve developed a new form of beacon/shroud device that allows them to direct splinter hive fleets of Tyranids toward various planets and away from others, as an entirely consumed planet isn’t a particular problem for them as long as it’s not a Necron tomb world. It’s not so much an alliance as the Necrons schemes relying upon a certain amount of sheer natural destruction as Leviathan carves its way through the 500 Worlds.

Each of these Alliances will be given their own Discord channel to conduct their secret planning for the campaign (only the Warmaster will be able to see all three channels). They each will elect (or endorse a volunteer) who will be the Alliance Leader for that Alliance. All members of each alliance will be given a role in Discord that changes the color of their name to show their allegiance as a fun perk on the server.

Each alliance will begin with four Fleets plus two reserve (spare) fleets. Our numbers are a bit higher than what the campaign envisions, so we’ll be flexing this part just a bit–allowing each fleet to represent multiple games. The results of all the games for any given Fleet action will be combined to determine the outcome of that action.

Reclaimers will start with two Imperial Fleets, an Aeldari Fleet, and a T’au Fleet. Despoilers will start with three Chaos Fleets, and a Pirates Fleet (shared Orks and Drukhari). Terraformers will start with two Necron Fleets and two Tyranids Fleets (the latter also including Genestealer Cult uprisings).

In their discord channels (and conveyed to me by each Alliance Leader) each Alliance will determine which planet will be their Stronghold (Power Level 4 and fills an Infrastructure), and then the relative Power Level of all the other planets in the system (three planets at Power Level 3, four more planets at Power Level 2, and the remaining two planets that are Power Level 1). They then will then decide to build three additional pieces of non-stronghold Infrastructure–spots that get attached to planets to provide minor bonuses. From the Goonhammer article: “Strongholds increase your power level when you fight on your home planet. Staging Grounds give you a higher power level as well when you fight on that planet or a connected one. Support Facilities let you count further planets as connected, and Fortifications increase a planet’s minimum Power Level.”

The campaign will begin on Wednesday, January 28th (presuming the 500 Worlds: Titus campaign books are released on schedule on Saturday the 24th, and adjusting if not). Each Alliance will Select Operations to be ready for games to start during the Monday/Tuesday before every Wednesday (or every other Wednesday, we’ll work out the right pace as we go). Each Alliance will get four selections each round (one per fleet). I’ll reveal each on the Wednesday and note which games can be played. If your fleet isn’t attacking on a given selection step don’t fret, anyone from the Alliance regardless of fleet can be a defender. We’ll keep these somewhat loose, so people can arrange games with players who fit their schedules. And players can play multiple games if they wish, it just has to be against different opponents from the opposing Alliance (tho we’ll try and coordinate to ensure everyone who wants a game can have at least one if timings allow). I do ask that each campaign round each Alliance do at least one Battle Operation so we can ensure that everyone who wants to play a game that round has a window to do so. Given that we’ll be doing Select Operations each week it is expected that players may not play every week just from scheduling alone–that’s okay and you’re still a part of the campaign and the alliance whether you get in one battle or multiple battles across all twelve weeks!

Note that there are a variety of missions players can choose when they’re part of a Battle Operation launched by a Fleet–in effect the attacking player gets to decide what sort of mission they’re doing as part of that battle. Alliances can of course discuss what benefits them most on given planets, and players can agree to follow that discussion or not. That gives some control to each player to affect events, and makes it feel like these campaigns are multiple forces that may not always fight in the way the leaders of the alliance wish. Players may want to seek different benefits, or just vary the missions!

Battles can be of any agreed-upon points value between the two players who decide to play. Games of 2,000 points are generally encouraged, but people should have in mind smaller forces and larger forces (if they have them and wish to) to accommodate other players. Even people just starting up a brand new army can still get games in this way. Aim for increments of 500 points, with 500 points being the smallest force for a conventional game of 40k. I say “conventional” because one of the missions is a Boarding Action, and there are likely to be special rules and even smaller number of points for those games when they’re played.

Drawbridge has lots of great terrain, so do your best to follow the rules for the Theatres for the planets being attacked. These determine the sorts of battlefields that are possible, and all have their own fun special rules that affect the games.

Once each game is finished, we’ll have a shared Google Sheet for recording results. In my Warmaster role I’ll go through and record the results and track them on my poster and provide routine updates for all (I think Sean indicated that he would mirror it with an electronic version we can have updated and share, thanks Sean!).

The plan will be to run the campaign for roughly three months at first (12 Select Operations phases), so we’ll have a target date for the Campaign Finale* of sometime around the week of April 15th. If there is continued energy for the campaign at that point, the Finale* will earn its asterisk and become a midpoint mega-battle instead (and we’ll have the fun of plotting another mega-battle to conclude things at the extended time). We’ll conclude the campaign with a Saturday event on April 25th. This will be a mega-battle, where the three Alliances will be deployed across all of the tables at Drawbridge in one final showdown clash representing the campaign’s culmination. Each Alliance’s Campaign Points will be used to determine deployment and missions for this event.

The Finale* (or midpoint) will also be the moment when we’ll do our grand door prize drawing extravaganza for the campaign. Given the scale, we’ll have multiple prizes and entries to the drawing for it will be earned throughout the campaign. Depending on the number of people who participate in the 500 Points for 500 Worlds painting challenge (see here: https://red-ones-go-faster.com/2026/01/08/500-points-for-500-worlds/ ) we’ll either do the drawing for that on that day, or have participants from that be given extra draws in the campaign drawing. But that means April 25th will be the deadline for completing your 500 Points for 500 Worlds entry pledge.

Draws in the drawing will be publicly tracked in the google sheet as well (I’ll lock that page to admin only). They will be one draw for each campaign round the player plays at least one game. One draw for participation in the final mega battle. One draw for fielding a fully painted Boarding Action force the first time it’s fielded. One draw for each newly-painted 500 points of models for the campaign army played, the first time they’re fielded (yes this can overlap with the 500 Points for 500 Worlds challenge, but is also a way to reward people who are tackling their piles of grey plastic as part of this campaign). One draw for painting up a table’s worth of thematic terrain for a particular Theatre and using it in at least one game. A variable number of draws during the Finale* for some player-voted competitions: best sport in each Alliance and best painted army (a scale of draws for first, second, and third most votes in each category). Finally one draw for being on the side of the Alliance with the highest number of Campaign Points calculated for the Finale*. Note that none of these are about winning any one particular game you’re playing, so remember that the spirit of this is fun games and collaborative encouragement of hobbying.

This is a lot of info, and again note that we can adjust it to fit what works best–so if you have any suggestions either now or when the 500 Worlds: Titus materials release, contact me to discuss.