This is the campaign guide for a Dark Sun-based Dungeons and Dragons game I’m running. The images are from the classic Dark Sun resources of Second Edition Advanced Dungeons and Dragons (which I’ll shorten to just AD&D forward), which is what I’m basing it on. If a Fifth Edition (5e) version of Dark Sun rules get released I’ll review them and we can see about converting over. These rule adjustments are designed to capture the spirit of the AD&D rules while giving us the actually playable 5e basis for our gameplay. There will be a separate post with the character creation guide, this is more the rules changes for the campaign.
Start Here: A Great Overview of Dark Sun
This video does a great job giving all the info you need to know about the Dark Sun world in 8 minutes–no rules content, just the basics of the campaign setting’s feel. Mandatory viewing for players. The only change is that I’ll pronounce Thri-Kreen different than he does.
Starting Levels and Character Trees
Dark Sun is a purposefully harsh campaign, and I’m going to run it that way. The rules for it in AD&D included the suggestion of starting as higher level characters than level one (as anyone surviving would have to be somewhat skilled). So we’ll be starting all characters at level 2. And more importantly, Dark Sun very purposefully included the use of Character Trees, which I’m going to use as well. Each player in our first session will roll up four characters that will form their character tree. They will then choose which of the four will be their “active” character at first, while the other three will be “inactive”. Between some sessions of the game players can then swap to other characters in the tree. Each time an active character gains a level, one inactive character in the player’s tree gains a level. It’s designed to play out in interesting ways in the campaign and gives some flexibility if there is a character death. Inactive characters are neither NPCs nor followers. They generally do not come into contact with the campaign world while inactive (they just are doing something else). The characters in the character tree know each other somehow, and are working toward similar ends. Each player can decide what that connection is as they flesh out the four characters on their tree between sessions.
Peoples, Classes, and Latent Psychic Powers
Dark Sun has the following character species to choose as player characters: Humans, Elves, Half-Elves, Dwarves, Muls (sterile half-dwarves bred for labor), Half-Giants, Halflings (who yes, are cannibals), and Thri-Kreen (human-sized preying mantis people). Aasimar, Tieflings, Dragonborn, Goliaths, and Gnomes are not used. There will be some limits on what classes can be chosen based on the race of the character (and race will be rolled for randomly on character creation, along with starting stats). See the chart below for differences.
| Species | Base Species and adjustments from PHB | Available Classes |
| Human | Human. Use the variant trait as listed (Increase only two ability scores by 1; but gain proficiency in one skill of choice and gain one feat of choice). | Any |
| Elf | Elf. Adjust Ability Score Increase to +2 Dex, -2 Con. Remove “Fey Ancestry”. No Subrace is chosen. Gain Advantage on all Stealth checks. Height is between 6.5’ and 7.5’. | Any |
| Half-Elf | Human. Adjust Ability Score increase to +1 Str, +2 Dex, +1 Int, +1 Wis, +1 Cha. Gain “Darkvision” as per Elf entry. Gain advantage on all Animal Handling checks. May befriend an animal they meet in-game as a pet/companion. | Any |
| Dwarf | Dwarf. All are Hill Dwarf subtype. Remove “Dwarven Combat Training” and “Stonecunning”. Tool Proficiency can be any artisan tool set of choice. | Bard, Cleric, Druid, Fighter, Gladiator, Ranger, Rogue, Templar |
| Mul | Human. Replace ability score increases with +2 Con. Add “Dwarven Resilience” and “Darkvision” as per Dwarf entry. Hairless. Sterile. | Bard, Fighter, Gladiator, Ranger, Rogue |
| Halfling | Halfling. Adjust Ability Score increase to +2 Dex, +2 Wis, -2 Cha. No Subrace is chosen. Remove “Lucky” and “Brave”. Willing to eat sentient creatures outside of their tribal affiliation. | Any |
| Half-Giant | Human. Replace ability score increases with +4 Str, +2 Con, -2 Int, -2 Wis, -2 Cha. Can choose Hit Dice result rather than rolling for HP as follows: d4=4, d6=5, d8=7, d10=8, d12=10. Height is between 8’ and 9’. Half of alignment is fixed, other is chosen after each long rest based around current whim. Require 4 gallons of water per day. | Bard, Cleric, Druid, Fighter, Gladiator, Ranger, Rogue |
| Thri-Kreen | Unique. Ability Score increase +1 Wis, -1 Cha. Has +2 Natural Armor bonus. Unarmed attack 1d4+Str damage. 4 limbs affect what can be carried in combat (including using a shield and a 2-handed weapon at same time). Advantage on Athletics checks when Jumping. Does not need to actually sleep while performing a long rest, regardless of class. Water checks are by the week not by the day for Thri-Kreen. Proficient with the chatkcha (a crystal throwing wedge, see equipment below). May be unable to use certain magical items given body shape. Willing to eat sentient creatures, particularly like the taste of elves. | Bard, Cleric, Druid, Fighter, Gladiator, Ranger, Rogue, Wizard |

Classes have somewhat different names in Dark Sun, and some have variations from their basic versions. Paladins, Monks, Sorcerers, and Artificers do not exist in this setting. And there will be some subclasses that cannot be accessed or are considerably adjusted given the setting. Wizards (and some other subclasses) in particular are interesting as they need to choose whether they are “Defilers” or “Preservers” in addition to their other class abilities (which will have its own rules in the Magic section below).
| Dark Sun Class | Base Class | Setting Adjustments |
| Bard | Bard | Mostly unchanged. All spells and supernatural class abilities are considered Psychic powers. Available Bard Colleges: Lore, Valor, Whispers. College of Whispers only available via connection to a Dragon King. |
| Cleric | Cleric | Somewhat changed. There are no gods. Deities are the four elements Earth, Air, Fire, and Water, and domains are based around them (see Magic Section for full details of each domain). Add a single weapon to proficiency list based around fit to your element (e.g. blowgun for Air). |
| Druid | Druid | Somewhat changed. Must be Circle of the Land as subclass choice. Can choose Desert, Scrubland (counts as Forest), Grassland, Mountain, Silt Sea (counts as Coast), or Salt Flats (counts as Swamp). They then pick a specific spot of that type in the world as their “Guarded Lands” which they are obliged to watch over and revisit on occasion. Wild Shape options list appears in the Magic section below (the usual “need to have seen it” applies). |
| Fighter | Fighter | Mostly unchanged. Available Subclasses: Battle Master, Cavalier, Champion, Psi Warrior. Can also select Eldritch Knight, but must choose either Defiler or Preserver (see Magic section). |
| Gladiator | Barbarian | Mostly unchanged. Available Subclasses: Berserker or Totem Warrior. Berserker functions as written. Totem Warrior is changed in name to “Arena Trained” and has the following substitutions. “Spirit Seeker” and “Spirit Walker” are each replaced by selecting a bonus feat that represents a fighting manuever or style. “Totem Spirit” is changed in name to “Fighting Style”. Bear is renamed “Brute”, Eagle is “Daring”, and Wolf is “Coordinated” but effects at 3rd and 6th level are unchanged (tho the 6th level ones are not supernatural but just result of training). The “Totemic Attunement” Eagle (“Daring”) ability is replaced by gaining advantage on all Athletics checks. |
| Ranger | Ranger | Mostly unchanged. Cannot select Dragons as favored enemy. Favored terrain options for “Natural Explorer” ability are Desert, Scrubland (counts as Forest), Grassland, Mountain, Silt Sea (counts as Coast), or Salt Flats (counts as Swamp), and remove the “find twice as much food when foraging” portion. Ranger spells and supernatural abilities are considered Psychic powers. Subclass choices: Hunter, Beast Master (same list as Druid Wild Shapes), Monster Slayer, Swarmkeeper. |
| Rogue | Rogue | Mostly unchanged. Subclass choices: Thief, Assassin, Inquisitive, Scout, Mastermind, Soulknife. Can also select Arcane Trickster but must choose Defiler or Preserver (see Magic section). |
| Templar | Warlock | Greatly changed. Warlock patrons in Dark Sun are one of the existing Dragon Kings, and Templars serve as their disciples. Choosing this class will have big effects on character gameplay, as in addition to leveling up a Templar gains certain rights within their Dragon King’s domain (e.g. pass judgment on slaves at low levels, accuse freemen or even nobles at higher levels, can keep a certain number of people imprisoned, etc.). That comes with the cost of adherence to the Dragon King’s wishes. All the Templar’s magic abilities can be removed if the Dragon King Patron chooses to remove them. The player and the DM will work out which Dragon King is the patron source of power after initial character creation, which will have a specific custom set of Patron powers associated based on which Dragon King is served. |
| Wizard | Wizard | Greatly changed. Must choose Defiler or Preserver. Subclass choices must be one of the Schools of Magic from the Player’s Handbook. Any subclass abilities that have spell-like effects also trigger the Defiler rules when that path is chosen (rough idea is that spell level equivalent is highest spell level known at level when that ability is acquired). |
Finally every character in Dark Sun is minorly psychic in some way. There will be a chart in character creation that will add a psychic ability to each character as a bonus ability they have in addition to Character Species and Class rules.
Magic in Dark Sun
The following section contains the various adjustments to magic and spellcasting in Dark Sun.
Defilers and Preservers
Arcane magic in the world of Dark Sun is linked to the devastation of the lands. Power can be had at the cost of furthering the devastation, or care can be taken at the price of lessened arcane ability. Arcane spellcasters (primarily Wizards) must choose to either be a Defiler or Preserver. Choosing Defiler means learning a mode of magic where earth and life crumbles as you draw the power of spells. Choosing Preserver means not having those impacts on the world, but reducing progress as learning the exact arcane geometry of magics in a way that does not destroy the world takes much more care and effort.
Preservers can cast their spells (including cantrips) without affecting the world around them. However, they progress slower than a Defiler does within the same time frame and effort. As such, their Spells Known and Spell Slots per Spell Level are treated as if they are two levels lower than their character level. This means 1st and 2nd level Preserver Wizards can only use cantrips. The same for 3rd and 4th level Eldritch Knights and Arcane Tricksters. For purposes of spell effects, their caster level is also treated as two lower when it comes to adding caster level to results and durations. There are rumors that Preservers have a form different from but akin to that of Dragon Kings (see below), but research would need to be done into that. Finally, the lure of a Defiler’s ease in raw magical power is strong. A Preserver can choose to, at any time, swap to being a Defiler. Their spell effects and spell slots per level normalize immediately. They can learn one new spell each long rest to get caught up (representing the ease in working out Defiler magics). However, once they make this fateful choice it is hard to turn back. Characters cannot switch back to Preserver without a significant undertaking to right the balance in their soul they have defiled with this choice–the DM can work with a player interested in gaining Preserver status to find a suitable quest to do so.
Defilers on the other hand gain spells known and spell slots per level at the normal pace, and use their normal caster level. However, the action of casting their spells draws magical energy from the plants in the vicinity to fuel their arcane power. When a Defiler casts a spell, all vegetation in a sphere around them turns to ash. The radius depends on vegetation density and the level of the spell. The number in the chart below shows the radius in 5 foot squares around the Defiler where all vegetation is turned to ash. For instance, a 3rd level spell cast in Salt Flats terrain would consume plant life for ten 5 foot squares in every direction.
| Terrain Type | |||||||||
| Spell Level –> | 1 | 2 | 3 | 4 | 5 | 6 | 7 | 8 | 9 |
| Stony Barrens | 6 | 8 | 10 | 12 | 14 | 16 | 18 | 20 | 22 |
| Sandy Wastes | 6 | 8 | 10 | 12 | 14 | 16 | 18 | 20 | 22 |
| Rocky Badlands | 6 | 8 | 10 | 12 | 14 | 16 | 18 | 20 | 22 |
| Salt Flats | 6 | 8 | 10 | 12 | 14 | 16 | 18 | 20 | 22 |
| Boulder Fields | 6 | 8 | 10 | 12 | 14 | 16 | 18 | 20 | 22 |
| Silt Sea | 6 | 8 | 10 | 12 | 14 | 16 | 18 | 20 | 22 |
| Mountains | 6 | 8 | 10 | 12 | 14 | 16 | 18 | 20 | 22 |
| Scrub Plains | 3 | 4 | 4 | 5 | 5 | 5 | 5 | 6 | 6 |
| Verdant Belts | 2 | 2 | 2 | 3 | 3 | 3 | 4 | 4 | 4 |
| Forest | 1 | 1 | 2 | 2 | 2 | 2 | 3 | 3 | 3 |
Casting additional spells in already-defiled locations increases the radius. Calculate the radius of the highest level spell cast, then for each additional spell cast in within that area add the additional radius to the total for a general sense of how much terrain turns to ash. Six third level spells would consume and entire football field of plant life from a Sandy Waste.
Defiled spaces do not just affect plants, but also all living creatures. All non-Defiler living creatures in the radius of effect when a Defiler spell is cast suffer a reduction in actions during their next activation–they are limited to a single action for that next activation. Additional Defiler spells that enlarge the area do not have this same effect. It only happens the moment when the square that a character is standing in becomes ash. That includes moving and bonus actions: only one action can be performed. In addition, death saves suffer Disadvantage for characters standing (well, usually laying) on or above defiled ground. Keeping a Defiler at arm’s length is a good plan, whether ally or enemy.
Defiling is often a crime in many settlements, or tightly restricted. The Dragon Kings are rumored to all be Defilers, and there may be something about defiling and their nature that could be uncovered in the course of gameplay. Even where it is not a crime, Defilers are regarded with a mix of mislike through sheer hatred. “Such is the burden of power” they might whisper to themselves.
Cleric Domains: Fire
| Level | Ability |
| 1 | Inner Warmth: Immune to the effects of heat exhaustion, including the effects of wearing metal armor. Does not change need for daily water consumption. |
| 2 | Channel Divinity (Fire): Water Creatures can be turned/destroyed like undead |
| 6 | Elemental Harmony: Immediately add Ignan to list of languages. Can use Charisma skills on Fire elementals. Halve all fire damage suffered. |
| 8 | Elemental Weapons: Non-wooden weapons you wield become imbued with fire, adding an additional d6 of fire damage to all successful attacks. |
| 17 | Elemental Apotheosis: You begin to take on the form of a fire elemental. Details can be revealed upon in-game research. |
Domain Spells: Fire Bolt (Bonus Cantrip), Burning Hands and Flame Blade (1st), Flaming Sphere and Protection from Energy (3rd), Fireball and Fire Shield (5th), Wall of Fire and Delayed Blast Fireball (7th), Shapechange [into fire elemental only] (9th)
Cleric Domains: Water
| Level | Ability |
| 1 | Waterbearer: Can go one week without water rather than one day (if the Cleric is Thri-Kreen it can instead go one month without water). Does not change the effects of heat exhaustion. |
| 2 | Channel Divinity (Water): Fire Creatures can be turned/destroyed like undead |
| 6 | Elemental Harmony: Immediately add Aquan to list of languages. Can use Charisma skills on Water elementals. Halve all cold damage suffered. |
| 8 | Elemental Weapons: Weapons you wield become imbued with cold, adding an additional d6 of cold damage to all successful attacks. |
| 17 | Elemental Apotheosis: You begin to take on the form of a water elemental. Details can be revealed upon in-game research. |
Domain Spells: Chill Touch (Bonus Cantrip), Fog Cloud and Grease (1st), Protection from Poison and Misty Step (3rd), Sleet Storm and Ice Storm (5th), Wall of Ice and Otiluke’s Freezing Sphere (7th), Shapechange [into water elemental only] (9th)
Cleric Domains: Earth
| Level | Ability |
| 1 | Ground Sense: Gains Blindsight (30’) that functions against anything touching or moving along the ground/stone. |
| 2 | Channel Divinity (Earth): Air Creatures can be turned/destroyed like undead |
| 6 | Elemental Harmony: Immediately add Terran to list of languages. Can use Charisma skills on Earth elementals. Halve all damage suffered from stone weapons. Halve all falling damage. |
| 8 | Elemental Weapons: Weapons you wield become imbued with a cloud of hovering rocks, adding an additional d6 of bludgeoning damage to all successful attacks. |
| 17 | Elemental Apotheosis: You begin to take on the form of an earth elemental. Details can be revealed upon in-game research. |
Domain Spells: Shillelagh (Bonus Cantrip), Longstrider and Pass Without Trace (1st), Spider Climb and Meld Into Stone (3rd), Stoneshape and Stoneskin (5th), Flesh to Stone and Move Earth (7th), Shapechange [into earth elemental only] (9th)
Cleric Domains: Air
| Level | Ability |
| 1 | Breath of Giants: Can hold breath for one hour. Can extinguish a small flame (up to size of torches) as a bonus action. |
| 2 | Channel Divinity (Air): Earth Creatures can be turned/destroyed like undead |
| 6 | Elemental Harmony: Immediately add Auran to list of languages. Can use Charisma skills on Air elementals. Halve all thunder damage suffered. |
| 8 | Elemental Weapons: Weapons you wield become imbued with electricity, adding an additional d6 of thunder damage to all successful attacks. |
| 17 | Elemental Apotheosis: You begin to take on the form of an air elemental. Details can be revealed upon in-game research. |
Domain Spells: Shocking Grasp (Bonus Cantrip), Jump and Thunderwave (1st), Gust of Wind and Levitate (3rd), Gaseous Form and Lightning Bolt (5th), Passwall and Chain Lightning (7th), Shapechange [into air elemental only] (9th)
Wild Shape and Animal Companions can be chosen from the following list: Baboon, Bat, Cat, Giant Fire Beetle, Hawk, Hyena, Jackal, Lizard, Scorpion, Toad, Vulture, Erdlu (think Emu), Carru (think Bison with Camel humps), Kank (think Horse, but as a Bug), Aprig (think Pigs but with shells).
In addition, there are some magic spells that simply do not exist or work differently in the Dark Sun setting. This will be the basic list from the player’s handbook, but check any spells that have water effects, extra-planar effects, or that create objects with the DM before selecting them.
| Spell | Change |
| Astral Projection | Does not exist |
| Banishment | Sends target to the Grey |
| Conjure Celestial, Conjure Fey, Conjure Woodland Beings | Do not exist |
| Control Water | Does not exist |
| Control Weather | Limited precipitation. Temperature can only range between Unbearable Heat and Cool. |
| Create or Destroy Water (1st level) | Can only destroy water. Considered an evil action by all sentient races. |
| Create Food and Water (3rd level) | Can only create food, not water. |
| Creation | Cannot create Adamantine or Mithral. Metal objects have a duration of 1 minute rather than 1 hour. |
| Detect Magic | Also detects psionic spells and abilities |
| Entangle | Only works in areas with reasonable scrub. Defiling in the area immediately ends this spell. |
| Find Familiar | Limited to Bat, Cat, Toad, Hawk, Lizard, or Scorpion |
| Fog Cloud | Duration limited to 1 minute per level |
| Goodberry | Does not exist |
| Hallucinatory Terrain | Targets get advantage on Intelligence checks to disbelieve water-based terrain illusions |
| Mirage Arcane | Targets get advantage on Intelligence checks to disbelieve water-based terrain illusions |
| Planar Ally | Does not exist |
| Planar Binding | Does not exist |
| Plant Growth | Half effect (50-foot radius and plant life becomes simply normal not overgrown). Cannot be used on Defiled ground. |
| Reincarnate | Different Table is used |
| Tsunami | Does not exist |
| Wall of Ice | Duration limited to 1 minute per level |
Skills in the Dark Sun Setting
In addition to the regular skills, Dark Sun has a couple of specific skills that are added to each character sheet. Any character class can select these skills as their chosen skills to receive the bonus when gaining proficiency. Given the expanded pool, all character classes get one additional skill from their class list or these skills to receive the proficiency bonus at first level.
Bureaucracy (Cha): Helps characters navigate the rules and abuses of political systems of the City States of the Dragon Kings.
Heat Protection (Wis): Represents a character using clothing and personal pacing to optimize endurance against heat. Successful checks can halve the needed amount of water per day for a character, and can offset wearing metal armor.
Somatic Concealment (Dex): In a world where spellcasting is sometimes illegal and sometimes unwelcome, being able to disguise the motions of casting spells can be important. This skill can allow spell casting to go undetected more effectively. Notably this roll is one not made by the characters, but made by the DM.
Water Find (Wis): Represents a character being particularly skilled at getting every possible bit of water from their environment–from catch nets to filters to the right desert tubers with a few drops of water in them, this skill helps find enough water to survive.

The Dark Sun Economy: Ceramic Bits, Rare Metals, and Piecemeal Armor
The rarity of metal in Dark Sun affects the economy in which the adventurers participate. The monetary system is based on Ceramic Pieces (cp), which are baked in specific molds with certain glazes to stop forgery. The exchange rate of ceramic pieces is 100cp = 10 sp = 1 gp = 1/5 pp. Ceramic pieces are themselves grooved to be broken into Bits, with 10 Bits making one Ceramic. In addition the rarity of metal means metal coins themselves distort value. When buying items, anything non-metal costs 1% of the price listed. However all metal items costs the price listed. A bedroll is normally 1 gp, so would be 1 cp–meanwhile a suit of Plate Armor would be 1,500 gp, the equivalent of 150,000 gp in other settings (the sourcebook has an amazing quote regarding this: “Simply put, a sorcerer-king can either purchase several suits of field plate or build a substantial addition to his city walls”). The DM will rule whether any given item counts as metal or non-metal, and if there are non-metal versions of it available. Given the scarcity of metal coinage, gems are used as stand-ins for exchange and widely accepted. Gems will be given a value in Ceramic Pieces when distributed as treasure. Barter can also be used with many sellers.
The most affected aspects of this for adventurers are weapons and armor, as metal versions of them are quite rare and fetch a princely sum. Dark Sun’s residents have adapted other materials for their weapons in particular–which make for a wider variety of tools, albeit not as high quality as metal weaponry. See the chart below:
| Weapon Material | Cost | Weight | Attack Roll Modifier | Damage Modifier |
| Metal | 100% | 100% | ||
| Bone | 30% | 50% | -1 | -1 |
| Stone/Obsidian | 50% | 100% | -1 | -2 |
| Wood | 10% | 50% | -2 | -3 |
Weapons that are already completely non-metal material (clubs, quarterstaffs, slings, blowguns, and whips) are not affected by these modifiers–yes, a quarterstaff is far more effective than a wooden scimitar.
Armor in Dark Sun is often worn piecemeal, so we’ll use the slightly more complicated Piecemeal Armor rules system for calculating that. The armor bonus of different types of armor gets split into spots on the body, and added to a base of 10. When worn as a full suit it’s the normal AC bonus, but you can combine pieces together for more protection or to have some metal components. Note that wearing metal armor (marked in the chart below) full suit, as breastplate, or on more than two limbs all qualifies as wearing metal armor for water needs and heat exhaustion. Dex modifier to AC, Required Strength, and Stealth disadvantage are counted by the most restrictive piece of the set (e.g. If you’re getting the +1 AC bonus from Chain Mail on Two Legs but all the rest leather armor, you’d also have no Dex modifier to AC, a required Str 13, and Disadvantage on Stealth checks). You’ll also note that the ubiquitous Chain Shirt and Breastplate of other worlds do not have entries. They are just parts of larger sets of armor (and yes, they carry the penalties of those in Dark Sun because metal is hot and heavy). In terms of encumbrance, the breastplate is half the weight of the complete suit of armor, and each arm or leg is 1/8th the weight of the full suit.
| Armor Type | Metal? | Full Suit | Breastplate | Two Arms* | One Arm* | Two Legs | One Leg |
| Padded | N | 1 | 1 | 0 | 0 | 0 | 0 |
| Leather | N | 1 | 1 | 0 | 0 | 0 | 0 |
| Studded Leather | Y** | 2 | 1 | 0 | 0 | 1 | 0 |
| Hide | N | 2 | 1 | 1 | 0 | 0 | 0 |
| Scale Mail*** | N | 4 | 2 | 1 | 0 | 1 | 0 |
| Half Plate | Y | 5 | 3 | 2 | 1 | 0 | 0 |
| Ring Mail**** | N | 4 | 2 | 0 | 0 | 2 | 1 |
| Chain Mail | Y | 6 | 3 | 2 | 1 | 1 | 0 |
| Splint Mail | Y | 7 | 3 | 2 | 1 | 3 | 1 |
| Plate Mail | Y | 8 | 4 | 2 | 1 | 2 | 1 |
*Thri-Kreen may not “double up” on their arms armor. Given the spikes and ridges on their arms the equivalent of one arm worth of armor covers two arms.
** Studded Leather armor only counts as metal if the breastplate is worn.
*** Scale Mail is made from the hides of extremely tough scaled beasts in Dark Sun.
**** Ring Mail is made of woven bone circlets (usually slices of spinal vertebrae)
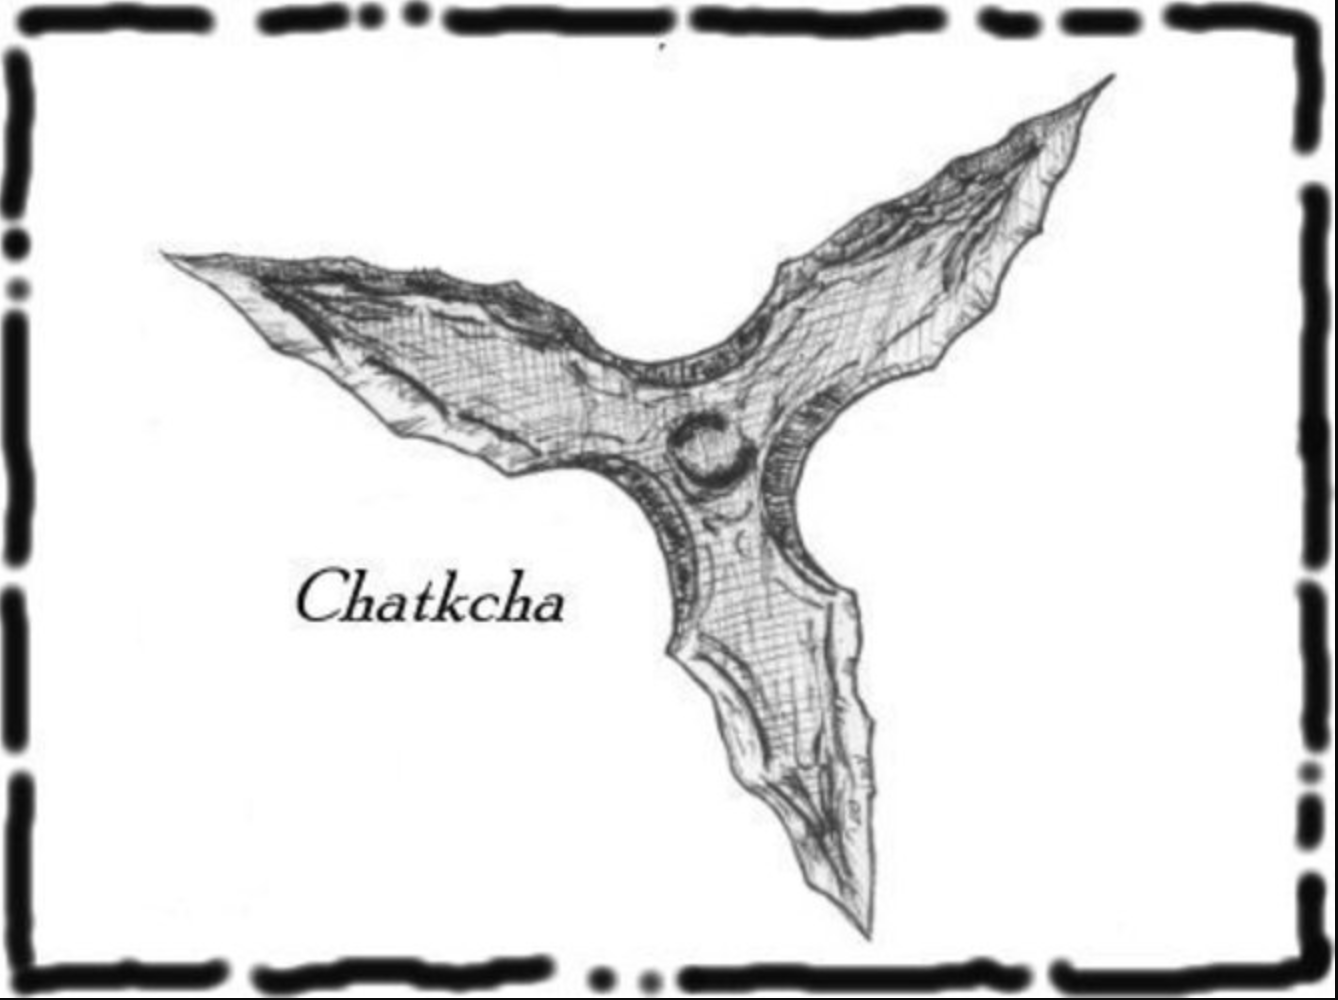
New Weapon: The Chatkcha. This is a crystal throwing wedge that is used by the Thri-Kreen. It does 1d6+Str modifier on a successful hit, and returns to the user on a miss. It has the thrown property with a range band of 20/60.
Dehydration, Heat Exhaustion, and the Morality of Dire Circumstances
We will use the rules for Dehydration [Hazard] and Exhaustion [Condition] from the PHB 2024 (pgs. 365-366). Most of the time Dark Sun is near-extreme heat, so armor and metal armor increases water needs. A full suit of medium armor, a full suit or breastplate of heavy armor, and/or a full suit, breastplate, or two or more limbs of metal armor doubles the amount of water required to not gain exhaustion. Remaining entirely in the shade or dark for the day can reduce water needs, as can remaining inactive–both are methods to halve the amount of water needed (are not cumulative). The chart on PHB pg. 365 has the full set of water needs, but for our purposes all player characters need 1 gallon of water per day (except Half-Giants require 4 gallons, and Thri-Kreen require only 1 gallon of water per week, and thus check for dehydration much less frequently). Truly extreme heat can increase water needs further.
When a character reaches 6 exhaustion levels they die. Exhaustion from dehydration can only be removed by drinking enough water alongside a long rest (long rest alone does not remove thirst-related exhaustion levels). Each long rest with full daily water removes two exhaustion levels.
Alignment affects attitudes toward desperate situations such as not having enough water. Watching out for others, prioritizing oneself, and equal distribution vs uneven distribution are all influenced by the character’s alignment. The DM can make suggestions about how different alignments react to the most dire situations of deprivation if players wish.
Other Campaign Rule Errata
We will utilize critical misses. A roll of a natural 1 results in not a just a miss/failure on a check, but a catastrophic miss or failure. The DM will determine based on the circumstances.