Author: Red Ones Go Faster

Calculations of a Year

Calculations of a Year

It’s the end of 2017, and I’m writing my final blog wrap-up for my personal Warmachine and Hordes gaming. I’m judging it as a successful year for me. Painted a whole ton of miniatures (561 total points). Won a qualifier for the Appalachian Cup, and got to second place in the Cup itself. Showed well enough in the GenCon masters to consider attending again. And played just about the same number of games as last year (120).

I’ve also learned that I have some specific faction interests, and that is focusing my painting. Trollbloods, Convergence of Cyriss, and potentially Protectorate of Menoth are the three that will be the one’s I’ll sustain for the long run. In particular, Convergence is calling my name right now.

It was a crazy fall semester for me, and that slowed my pace of gaming and painting somewhat. I didn’t hit my double-points for the year goal (730points), but I still did well beyond the 365 minimum I set myself. I also had to slow down my blogging, so this is just a final culminating one with some shots of the last bits of painting I’ve accomplished (and finally updated stats for my games).

Painting-wise I finished up a bunch of Convergence models and one Protectorate of Menoth Warcaster. At least for the start of 2018 I am going to focus on Convergence of Cyriss, as I’m enjoying playing them and managing to paint them effectively enough.

Convergence of Cyriss Transfinite Emergence Projector

Transfinite Emergence Projector. This is a great model, and I’m really pleased with how it turned out. 

Convergence of Cyriss Modulator

Modulator. My second for the force. I sadly think that I’ve already changed my mind and only need one for my Orion army plans… but at some point when I finish a Prime Conflux it will be nice to have a pair of them. 

Convergence of Cyriss Accretion Servitors

Accretion Servitors. Gotta repair those robots!

Convergence of Cyriss Elimination Servitors

Elimination Servitors. They’re handy for spot removal, and get to be shield guards in theme. Now to finish two more sets to run with Iron Mother (and paint her… heh). 

Protectorate of Menoth Testament of Menoth

The lone non-Convergence for this stretch. I REALLY like how he turned out, as I love my theme for Protectorate. They’re just such a pain to paint, and are seeming to need more and more models to do right. Gotta get working on them. 

365 Points Challenge Progress (2017):

561/365

Battles (Privateer Press):

Overall Totals 2017: 120 (Win/Loss 86/34/0); 2016: 123 (Win/Loss: 74/49/0); 2015: 43 (Win/Loss: 29/14/0)

Trollbloods:

40 Wins (Gaspy1, Terminus, Barnabas, Gunnbjorn, Kaya2, Helynna x3, Stryker2, Kraye, Venethrax, Kaya3, Absylonia2, Skarre1 x2, Kallus2, Gaspy3, Karchev x3, Una2 x2, Saeryn & Rhyas, Grayle, Baldur2 x2, Baldur1, Horgle2, Kozlov x2, Exulon Thexus, Skarre2 x2, Siege, Vlad1, Lylyth1, Heretic x2, Nemo 1, Kraye, Calandra, Butcher1, Vlad2) / 11 Losses (Feora3, Exulon Thexus, Caine3, Haley1, Calandra, Kozlov, Absylonia2, Butcher3, Vlad1, Axis, Elara2, Coven)

Convergence of Cyriss:

17 Wins (Maddox, Haley2, Rask, Helynna, Makeda1 x2, Gorten, Kaelyssa x2, Vayl2, Gaspy1, Heretic, Haley3 x2, Butcher3 x2, Terminus) / 5 Losses (Venethrax, Helynna, Heretic x2, Child)

Protectorate of Menoth:

4 Wins (Kaelyssa, Magnus2, Skarre1, Lyltyh1) / 7 Losses (Makeda1, Deneghra1, Thyron, Kozlov, Kryssa, Fiona, Gaspy3)

Skorne:

8 Wins (Kaelyssa, Nemo3, Zaadesh2, Makeda1 x2, Kaya3, Grayle, MacBain) / 4 Losses (Makeda2, Venethrax, Grayle, Horgle2)

Retribution of Scyrah:

13 Wins (Tanith x2, Venethrax x2, Malekus, Gaspy1, Ragnor, Zaadesh2 x2, Grayle, Borka1, Makeda1, Strakov) / 5 Losses (Zaadesh2, Thyra, Xekaar, Tanith, Gaspy1)

Cryx:

2 Wins (Gaspy3 x2)

Howl of the Carrion King

Howl of the Carrion King

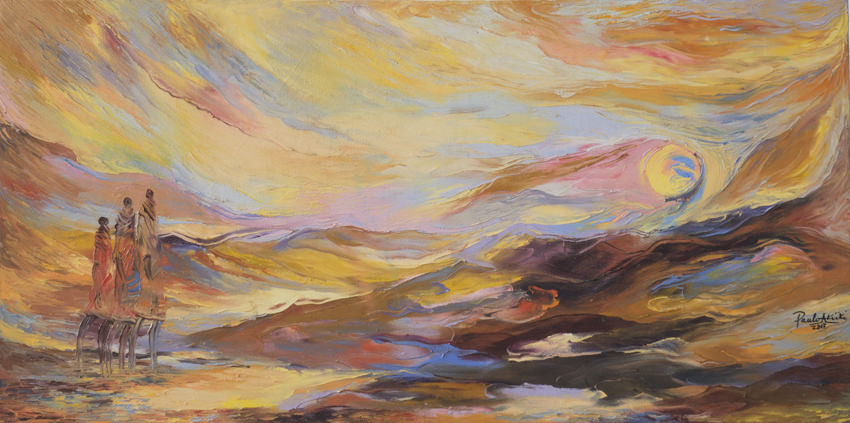
So I started a new Pathfinder game with a group of players, and tracking the progress of the campaign on a blog makes sense. It’s a classic module series, the Arabian-nights themed Legacy of Fire path. I’ll keep each of the six books of the adventure as one separate entry each. 

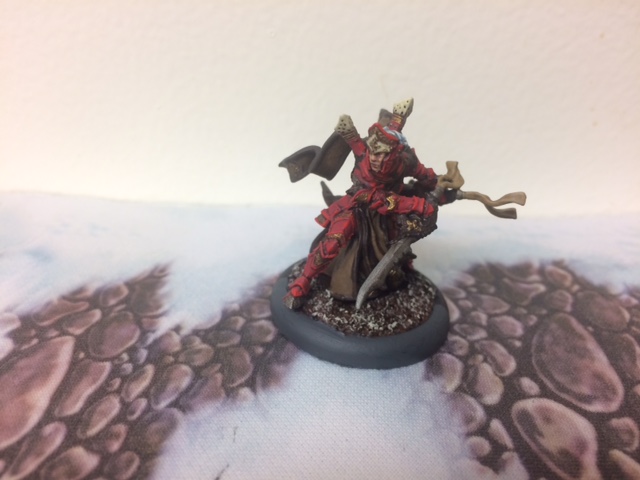
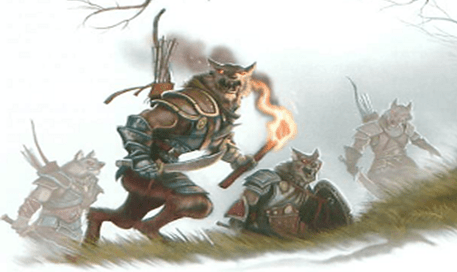
They were a motley group of merchants, animal handlers, and sellswords assembled by Garavel. The sand-blown trail toward his mistress, a Merchant Princess named Almah, was long and weary. Roshin was a fighter slave sold to Almah with the promise of freedom through servitude, who shared overly embellished stories over the nightly campfires. Not to be outdone, Bethir was a bard with martial disposition, who matched each tale with a legend from history. Kazim was more private and quiet, a cleric of Sarenrae who prayed at exactly dawn each morning. Two gnomes traveled with them as well. Duzo, a merchant-minded sorcerer who specialized in enchantments and smoked copious amounts of Pesh, and Tarb the White, a ranger garbed entirely in white who spoke frequently of his hunt for the Katapeshi white lion. Garavel himself was a servant of the mysterious Pactmasters of Katapesh, and had a strange metal bolt protruding from his temple that he kept mostly hidden under his keffiyeh.

Garavel

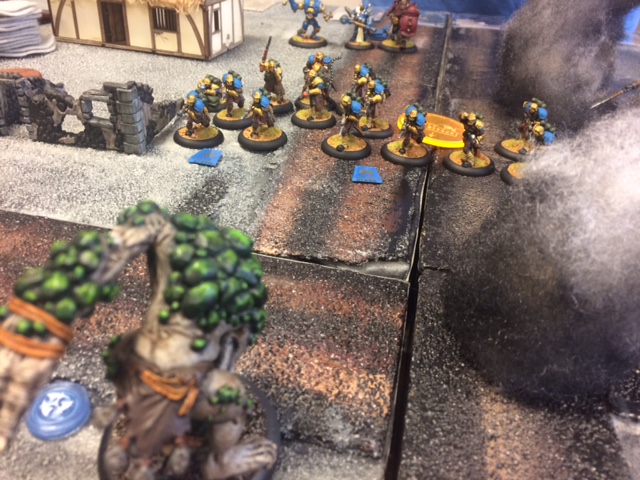
They arrived at Almah’s camp to find a scene of chaos–one of the caravan’s wagons on fire, the fire spreading to the landmark tree called the Sultan’s Claw, and animals running about in a panic. Bethir, Roshin, and Kazim rushed to help move other wagons away from the burning one, while Tarb calmed animals and Duzo used ice magic to stop the spread of fire to the tree. With the crisis over, Almah greeted them and they went over the terms of extended employment: 200gp to each of them for their assistance in liberating the town of Kelmarane from marauding gnolls that took up refuge in the long-abandoned town. Their first task, though, was to find out what started the fire. The wagon had been Almah’s fortune teller’s wagon, and he had produced a dire warning to her just before: unluck, a betrayer in her midst, and the coming of the cyclone–an omen of destruction, fire, and tumult that was mixed with a prediction that still included a successful liberation of Kelmarane. Almah suspected foul play in the fire accordingly.

Almah

The band of adventurers started questioning and exploring the area, encountering the two animal handlers for the caravan (Hadrah and her husband Hadrod), the kindly halfling cleric supplying magical potions and poultices for the expedition, the remaining caravan guards (the talkative Trevvis, the muscle-bound Utarchis, and the dour Dullen), and the strange “gnoll expert”: a man named Dashki. The latter told a tale of gnolls killing his family and village, and his learning to hunt them by learning everything he could about their ways. His stench and strange mannerisms certainly raised suspicions amongst the other caravan members that he was behind the fire. Yet Duzo questioned further, learning through his Speak With Animals ability that one of the goats was missing: Rombard.

Rombard

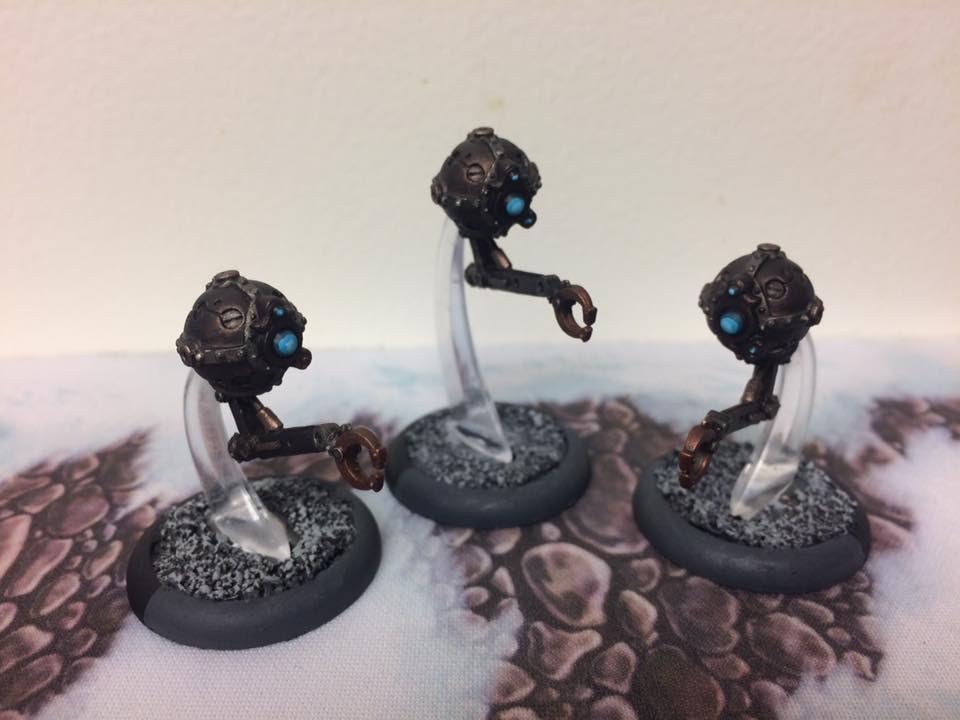
Searching the ring around the caravan circle, Kazim found a strange trail: a goat’s reluctant footprints along with a set of tiny two-legged dog footprints. With jokes about baby gnolls, the adventurers followed the path into the dark night and cactus fields beyond. As the cacti grew thicker, and a feeling of strange foreboding settled about them, they heard the nervous bleating of the goat ahead–in the middle of an extremely dense cacti field. Some maneuvered their way, while others slowly chopped a path, but all were beset by the worst luck they could imagine. Anything that could go wrong did, ending in punctured water skins, broken scabbard clasps, and ample cactus needles embedded in most. The finally reached Rombard, finding the goat in a panic. As they started to free him, a strange creature emerged and started firing arrows at them.

pugwampi

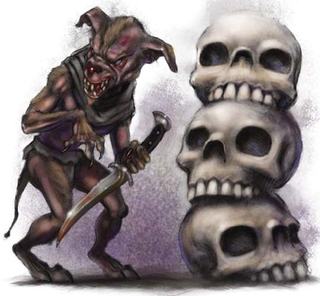
Their luck continued to be poor until Bethir’s sword finally caved in the chest of the small creature. Examining it, they realized it was a Pugwampi–a strange doglike fey that brings great unluckiness to all around it, and delights in setting up situations to watch others suffer the ravages of ill fortune. The small critter had some singed Harrow cards, a likely sign that it was in the burned fortune teller’s wagon–who knows what sort of unlucky circumstances led to the beginning of the fire. They brought Rombard and the corpse of the Pugwampi back to camp, and explained things to Almah and those gathered. Dashki took the corpse, tied it to his staff with a noose, and began stamping the staff around the camp to “ward off other pugwampis, as an infestation would be the worst that could happen.” Satisfied that the fire source had been found, Almah tasked the adventurers to head out into the desert tomorrow morning to a nearby shrine: the Church of Saint Vardishal, a long-abandoned monastery of Sarenrae that their group could use as a staging area to conduct their liberation of the nearby town of Kelmarane.

Desert Journey

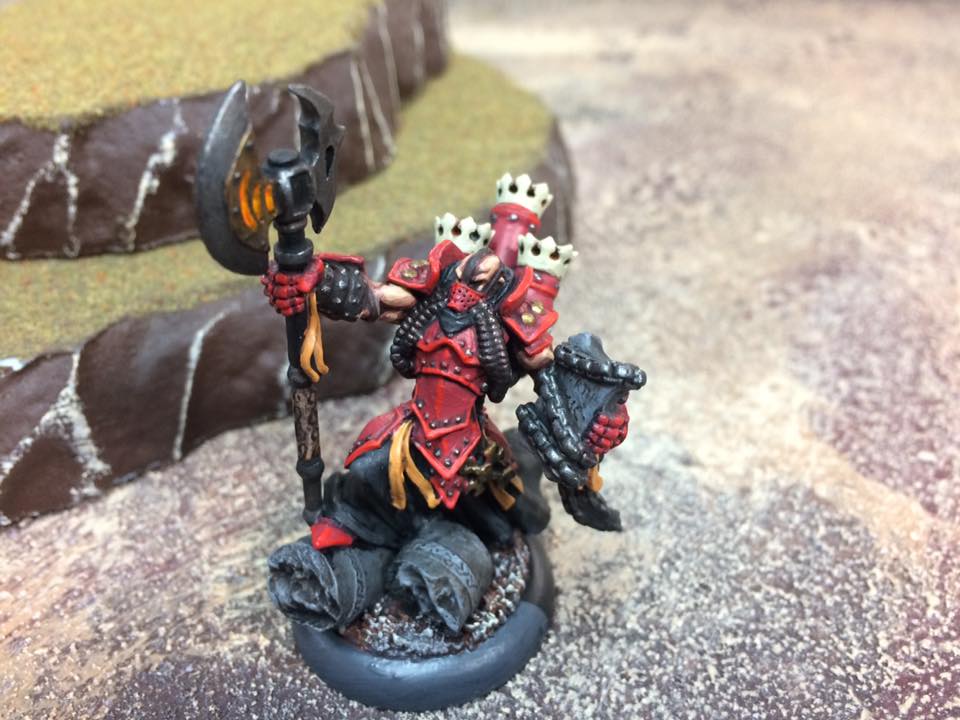
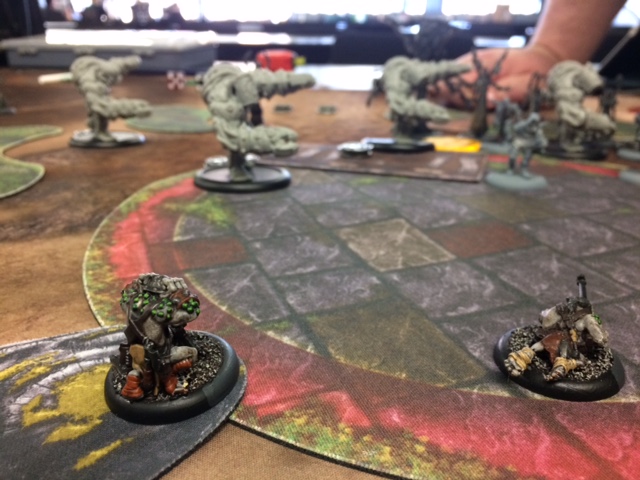
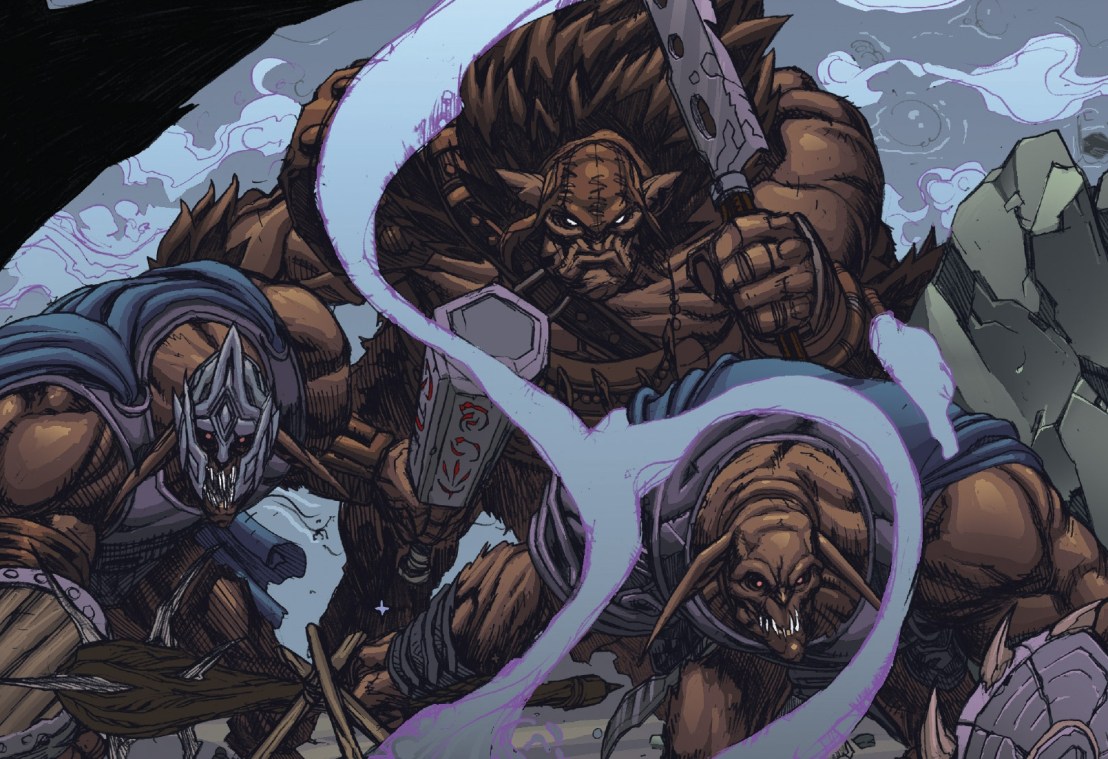
The adventurers journeyed to the abandoned monastery and found it in rough shape. Searching the more mundane quarters first, they found a basement door that seemed to be obstructed, as well as a library in ruins. They encountered two more Pugwampis, seemingly cooks, boiling a massive spotted egg. The battle was full of misfortune again, with broken kitchen implements and awkward tumbles off countertops, until the two creatures were slain. Exploring further, the adventurers found a series of carvings detailing the Templars of the Five Winds, genies that were involved in the great war between genies that caused the Pale Mountain region to be formed in the way that it was. One of them, Vardishal, was slain on the spot of the monastery, and there were a number of carvings depicting his spiritual form advising the priests of Sarenrae through the generations. Oddly, the frescos and carvings of the priests were all purposefully defaced. Leaving a brush-filled courtyard till later, the adventurers finally entered the main chapel. Kazim was saddened to see it defiled with a huge, hanging mound of gnoll skulls arranged like an obscene altar. As they started to try and take the skulls down, they found themselves beset by a large number of Pugwampis–and their leader, King Mokknock.

200px-LoFMokknock2

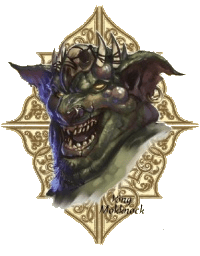
While he rushed into combat battering knees and clobbering shins with his silver hammer, the others lurked above and peppered the adventurers with arrows. Again, extreme unluckiness plagued the adventurers–with the pugwampi king proving to be a nasty foe when protected by the unlucky aura of his kind. Finally the adventurers managed to triumph by tripping the king and surrounding him. Upon his death, the last pugwampi started to flee. Duzo tried to freeze him in place with a cold spell, even managing to hit the creature and overcome its spell resistance, but the damage wasn’t enough. With a shake of it’s little fist, the creature slipped away gibbering no doubt about seeking revenge.

Having cleared most of the upper levels of the monastery, the group decided to take a rest and resume the following day. They rose an hour before dawn, seeking to use as much of the cool morning as they could before the desert heat rose. As they struck their camp, they saw four figures approaching. It was the three mercenaries, Trevvis, Utarchus, and Dullen, escorting a gnome woman with striking pink hair. They introduced her as Roxi, who had been hired by Almah as an infiltrator to join their expedition party. She had missed Garavel’s departure with the rest of the group, and had ridden along and caught up with Almah’s main camp last night. After introductions, the group started some tasks. They sent Trevvis back to report their progress to Almah, and tasked Utarchus and Dullen to start doing some clean-up heavy lifting in the sanctuary righting the tumbled stone benches.

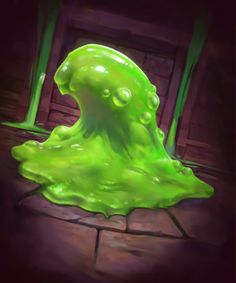
The group then investigated the basement, pushing their way through a door that was crusted shut with an abundant growth of mold. Beyond they found a strange laboratory, which was entirely encrusted in mold. Seems to have been the monastery’s alchemical laboratory at one point, tho now absurdly overgrown with a variety of molds and fungi. As they started to explore, Roshin drew close to a large cylinder of glass–but didn’t notice the movement inside as he stood next to it. Suddenly the glass burst and a huge slime mold oozed out and attacked. Roshin was quickly enveloped by the mold, which acted strange for such a creature–almost strategic. It flowed up toward his face as it gripped him. Unfortunately, Duzo tried to put the mold to sleep and only succeeded in causing Roshin to fall asleep. As he did, the mold flowed down into his mouth and nose with rapidity in horrifying fashion. They managed to wake Roshin with a dose of created water dropped on his head, who got back up with a sputtering cough. After that, the mold was easily dispatched–instead of fighting effectively it merely lashed out at the closest target.

Slime Mold

Roshin started acting a bit strangely following the encounter, as he had a vision that he couldn’t really relate to the others. He just knew that something was buried in the courtyard above that would help him. He dashed upstairs, with the others following, back to the strange pile of vegetable matter and scrub that choked the courtyard. Finally cutting into the mass, they discovered that it was actually a nest of sorts. They broke a couple of eggs, but managed to take one intact thanks to Roxi and Tarb’s steady hands. Given the size of it, whatever bird nests there must be huge. Tarb set a trap to try and snare the bird, affixing the tether to a massive masonry column.

After getting to the bottom of the next, some digging revealed a buried trunk. Within, an ornate heavy flail. When it was finally passed, with no small amount of concern, to Roshin, a strange and sudden thing happened. A sheath of mold formed around his hand and wrist. When he dropped or passed it to others, it went away, but suddenly returned each time it was held. Standing in the courtyard with all the images from the monastery depicting the reasoning, the group started to discern what this might be.

Vardishal, the saint of the monastery, was one of the Templars of the Five Winds that defeated an ancient evil in this area. While he died in the process, his spirit continued to manifest through the heads of the monastery. With them all mysteriously gone, the group surmised that he did his best to stay manifest through the mold that was growing in the lab in the basement–the only sentient thing left at the time. Given that the images of Vardishal they found showed him wielding the ornate heavy flail, it seems that this connection is somehow passed to Roshin. What that might mean going forward, they didn’t know.

Vardishal

They searched the remainder of the monastery, finding that a battle had taken place in the catacombs. Roshin had flashes of memory of it, perhaps triggered by whatever was now inside of him. It seems that the monks were attacked and slaughtered by the village populace–but for what reason, they could not make out.

Having cleared the monastery as a base, the group headed back to Almah’s camp to report and move their base of operations. They shared the information they knew with her and Garavel, and had Father Zastoran do some healing and clerical inquires to judge whether the mold influence on Roshin was going to be a problem. He concluded that there are some magical ways to remove it, but that as of now it seems like it wasn’t going to get worse.

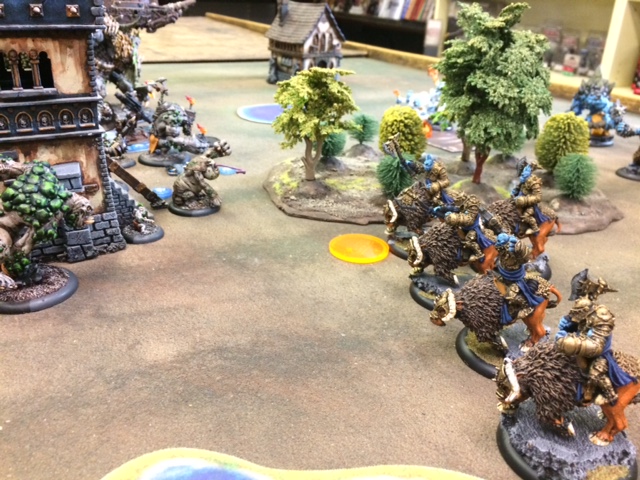
The next morning the full group Almah had arrayed made their move to the Monastery to use as their staging area for liberating the nearby town of Kelmarane from gnolls. Everyone, from the animal herders Hadrod and Hadrah to Almah herself found a spot to settle in. The only disturbing thing was that the trap Tarb had set seems to have been sprung. By something big enough to fly off with a 600-pound hunk of masonry roped to it–as the column was cracked and half (plus the rope) were nowhere to be found.

Setting a careful watch of the skies, the group then decided to cross the pesh fields and start to investigate Kelmarane. They decided to start on the side opposite the river, sending their more stealthy members along first. After finding an empty common house, they ventured further. The three gnomes proved to be quite stealthy, but Bethir was less so. When passing a building with one collapsed wall, he alerted a guardian that seems to have been placed at this end of town: a massive constrictor snake. The thing snatched Bethir up and nearly squeezed him to death until Roxi managed to finish it off. Signs that the gnolls have been feeding the beast by tossing it prey were around the area, and the group readied themselves for further exploration of the town’s extremities.

Constrictor Snake

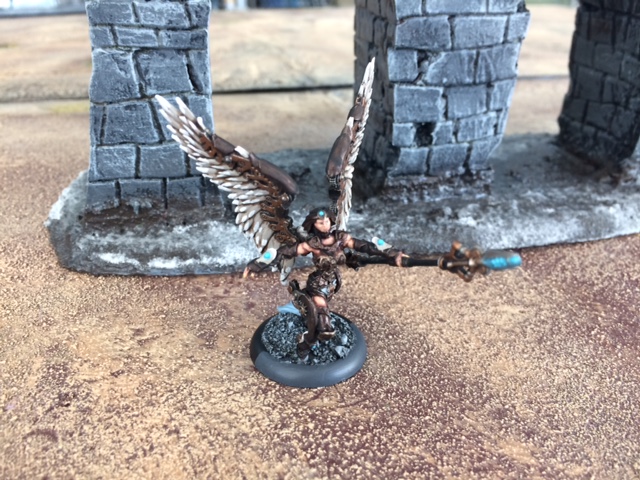
Advancing further into the town, the adventurers reached what had once been a stable that was attached to the town mill (using the power of horses to turn the central mill grinder). As they explored the linked buildings they made two simultaneous odd discoveries. First, a human man hiding underneath the hay in the far stable, shaking with fear and dying of malnutrition. And second, a strange nest in the open rafters of the mill, from which emerged a strange beast that was part wolf, part eagle, and part stag: A Peryton. The beast soared into the air and the source of the fear became evident–as it passed above people it stole their shadows from them and inspired deep dread. The creature was vicious, and despite its deadly bites and goring horns the group managed to finally defeat it.

Peryton

After the battle, they found the hiding man to be much less afraid–yet still quite malnourished. He explained that his name was Felliped, and he was part of a group of five adventurers who arrived here to Kelmarane nearly two weeks ago. The group was captured and locked in the slave pens of the Battle Market. He managed to sneak his way out, but encountered the strange creature and developed uncontrollable fear from him. He hid successfully, but was paralyzed with fear and slowly starved to near-death because of its magical control over his captured shadow. He thanked the group profusely, and helped heal some of their wounds.

The group pressed a bit further, seeking to use some of the ruins across from the mill as a vantage point to see further into the city and further monitor the Gnolls’ haphazard patrol schedule. However, a clumsy turn of an ankle and some shouts alerted one of the patrols they had noted. At first, they thought it merciful as it was only the solitary goat-man they had seen patrolling about. But with a roaring squeal it charged their number with tremendous speed. As they engaged the beast it continued squealing, yet in their minds formed cold and calculated statements of pure dread that seemed to be the thing’s voice: “I will dine upon your toes,” “Your suffering will be legendary”, etc. While they triumphed over it, the creature’s strange halberd seemed to inflict some terrible disease within some of their number. Both Roxi and Roshin suffered from the disease, quickly growing a vile whitish fuzz over the wounds.

Kezurkian

The group decided to retreat to the monastery, bringing the emaciated Felliped with them. Father Zastoran took Roxi and Roshin into his extended care (including shaving the fur from their wounds routinely). With two of their number seriously ill, the group had no choice but to rest up. This becomes more difficult for them as in the far distance of Kelmarane, they observe through the spyglass Almah set up an execution. One of Felliped’s companions is brought forth and horrifically (and slowly) disemboweled, his screams lasting for nearly 20 minutes of time. They watch the execution, powerless to help out.

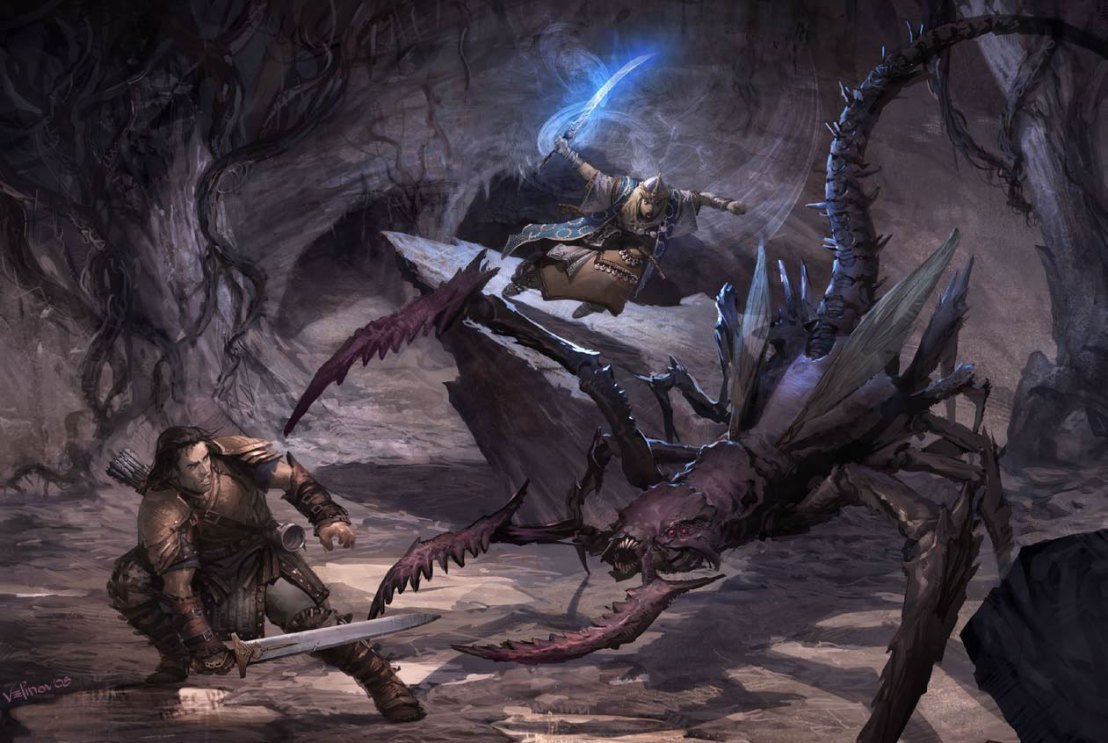
The next day was also spent in recovery, and yet again in the evening a prisoner was brought forth from Kelmarane for an execution–no doubt the Gnolls realized that they’re being attacked at the loss of some of their monstrous defenders, so this was their answer. This time, however, they brought the bound prisoner out into the Pesh fields between Kelmarane and the monastery. Four gnolls with great log-like poles led her there, and then reaching a clearing began pounding the earth. They circled about and began expanding out, and one of the adventurers finally realized: “They’re summoning something”. The group decided they had to do something, and dashed out to try and rescue the person. Having to run a mile through the Pesh fields took time, and as they neared one of the Gnoll “pounders” howled with glee. At this, the four of them began running as fast as they were able back toward Kelmarane. As the adventurers reached the captive, they found out why the Gnolls left with haste.

Dust Digger

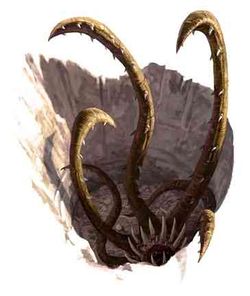
With a sudden rumble of shifting soil, the bound woman suddenly disappeared into the earth. At the same time, great tentacles rose from the sand and began flailing about at the adventurers and fleeing Gnolls. Bethir rushed forward to the spot where the woman disappeared, with Tarb following behind stringing a rope with him. Both were swallowed in a single gulp, revealing a strange maw of a beast in the ground. Bethir tried to shout “I’m Bethir and I’m here to save you, but could barely utter it before the pressure of the stomach and seething acid of the beast started to damage him.

While the others fought the tentacles above, Bethir managed to carve his way out of the stomach. However, he chose the wrong side and found himself outside the beast and pressed into the sand beneath it–going from swallowed to suffocating. Tarb had to act quickly, and chose to rescue his colleague Bethir by carving a hole and tugging him back through into the stomach. However, that meant that the swallowed woman finally perished with the stomach acid. Outside the stomach, Roxi and Roshin lay serious damage into the beasts’ tentacles until it finally perished, its death spasms vomiting up the swallowed party members.

Meanwhile, Duzo had focused on the retreating Gnolls–managing to put one to sleep with a magic spell. Roxi tied up the creature, and Roshin (who speaks Gnollish) questioned it to no avail. Duzo tried to hypnotize it into presenting them as potential slave buyers, but the language barrier proved to be a problem. Bethir finally ended the being’s life. They pulled their wounded back to the Monastery to rest further (and get more medical treatment of disease by Father Zastoran).

That night, Targ noted Dashki the Gnoll Expert stealthily exiting the camp. Without alerting others or Dashki himself, Tarb slipped out and followed him. Dashki wound his way out deep into the Pesh fields, and then found a spot to wait. Tarb hid in silence, watching a line of three faint torches come down from the nearby mountain range to the west of Kelmarane. When they drew into view, Tarb was stunned. There were three Gnolls, and they greeted Dashki like a fellow Gnoll: growling, play fighting, and even sniffing each other. He conferred with them briefly, then made his way back to the Monastery–with Tarb following quietly, certain he knew who to inform if not what to do.

Gnolls in the Pesh Field

In the morning, with Roxi and Roshin fully recovered from the disease, the group purchased some potions from Father Zastoran while Tarb quietly informed them of what he saw. They resolved to speak to Almah about the situation, but upon arrival at her quarters in the reclaimed monastery, she requested a private audience with Duzo first. Almah explained that since her harrow card reader perished, she has been operating without divination, and thought that maybe Duzo would have some insight. He recognized to himself that he had no special divination powers, but he did have some very strong personal supply of Pesh. So he decided to leverage that as his “fortune telling” method, giving Almah an ample quantity. He then spun the prediction (lie) that: “Soon Kelmarane would be under her control, but she should always remember those who helped her establish the town.” After coming down from the high, Almah spoke with Duzo asking him to not only open a shop in her Battle Market when they reclaim the town, but also offering an extra 300gp to each of the adventurers for their services upon success (except Roshin, who is bound by pact to get his freedom only). An angry Roshin vowed to head back and see the terms of her Pactmaster agreement in Katapesh, but was mollified by the group offering portions of their increased share to him.

Tarb then explained to Almah what they observed of Dashki and the Gnolls. She agreed to keep a close watch for now, as the group wanted to travel back to the city and make progress on its liberation. They chose to foolishly travel during the hottest part of the day, leaving them tired and Tarb suffering the effects of true fatigue.

Exhausted but ready to investigate Kelmarane further, the group started searching the lower buildings of the town. One appeared to be a tannery, but given the frequency of the patrols of gnolls the group chose to send Roxi ahead to investigate stealthily. She peeked inside, seeing a strange creature busy at work amid a number of boiling cauldrons. The creature was a harpy, a strange half-woman half-bird. The cauldrons held strange concoctions, including some that seemed to contain humanoid body parts. As she was prepared to slip away, the harpy spoke: “were you peeking at me, dearie?”

Harpy

Roxi was stunned by the comment, giving the Harpy time to approach. “Oh do come in,” she said, her voice simultaneously laden with seduction and malice. She introduced herself to Roxi as Undrella, and she asked what brought such a little thing to her home.

Roxi started with the simple statement that they were seeking the leader of the Gnolls. As they conversed about the city, it became clear to Roxi that Undrella had a complicated relationship with the Gnolls’ leader: Kardswann. Recognizing the name as one of the Templars of the Five Winds, Roxi endeavored to be as interested in Undrella and her past as she could be. Undrella revealed that she and Kardswann were lovers, but that he changed when he came to Kelmarane. After taking over the Gnolls and exploring the ruined church in the south of town he grew crueler and darker in moods than he had ever been.

Undrella then said to Roxi that if she would find her a new lover, she’d betray Kardswann. Roxi smiled (uncomfortably) and excused herself to speak to her group. The group agreed to at least hear more from Undrella, so all went to speak with her. They learned more of Kardswann and his control of the tribe, as well as the names of those in the battle market. She promised to help them and betray Kardswann, but again renewed her need for a new lover–from among their number.

The group agrees, and plots Roxi as the one to court Undrella–faking a “gnomish mating ritual” to give Roxi the chance to get her help without having to actually sleep with the monster (or at least make it less miserable if they do). They arrange for the date that evening in the Pesh fields, out of sight of the town. When Undrella arrived Roxi gave her flowers (which she promptly ate), then bathed the filthy beast in a “traditional gnomish bath”. Next Roxi nervously went for a moonlight stroll with the beast, and found the remainder of the evening actually just a little bit charming. Undrella proved to have moments of stunning brutality, but also was funny and kind in her way. Having completed the date, Undrella was good as her word: she gave them the schedules of the patrols (including that the patrols avoided the graveyard area of the town), keys to the back door of the Battle Market, and the idea that the two smugglers who work within the market may be potential allies. She also agreed to convince Kardswann to not kill any more of the prisoners. Of course, she also said she was looking forward to her next date with Roxi–where they would do a Harpy mating ritual.

They plan to rest another daytime, and then return to the town to plot their infiltration of the Battle Market. The crept up at night to the abandoned church and graveyard on the southern end of Kelmarane. As they got close, there seemed to be a priest of Sarenrae tending the graves. Yet as they approached the priest’s flesh melted away, revealing a strange undead being. They battled the thing, suffering its terrible ability to fight through the most grievous of injuries. Finally they finished the creature, and took time to explore the ruined church.

Halruun

Inside the church they found it deserted except for a strange seal on the ground. There seemed to be some sort of lower level sealed and warded beneath the church, certainly what had been hinted at by both Almah and Undrella in her description of Kardswann. While they could not penetrate the seal, the group realized that the church made a perfect staging ground for assaults upon the city and the Gnoll forces.

They moved on, sneaking their way through the ruined city. At the sound of a patrol approaching, the group ducked into a nearby building. Unfortunately, they chose the exact spot where one of the beasts that Kardswann used in the gladiatorial fights was chained: a massive boar named Old Bonegrinder. He immediately started straining his chains and bellowing. With Gnolls outside and a rioting boar inside, the heroes found themselves in a desperate combat. His chains stretching he gored Kazim, and then Tarb’s use of Dancing Lights to illuminate the battle inside drew the Gnolls’ inquiry from outside. Quickly, they devised a plan: using Obscuring Mist to cover themselves they shouted “Old Bonegrinder is free” in Gnoll. It worked to draw some Gnolls closer while others fled, but then the great beast added reality to the ruse by breaking free of his chains. It rushed out past the group, goring a number of Gnolls and allowing the party to sneak off in the other direction.

Dire_boar

The group used the confusion provided by the boar’s escape and even more Gnoll patrols seeking it to make their raid on the Battle Market. They split up, one group (the gnomes) heading inside sneakily while the others waited outside to watch for approaching Gnolls and to enter quickly if the alarm was raised inside.

The group outside started to discuss escape options, prompting Bethir to sneak across the way to the northern cliff of Kelmarane to tie a rope for a quick escape down the cliff face if needed. Unfortunately, he chose the outside of a guardhouse to tie the rope–and found himself tucked behind a bush as a patrol of a Gnoll with three tracking hyenas emerged. And one seemed to catch his scent!

Inside, things didn’t fare much better. The gnomes were too short to see into the cells that lined the rear hallway of the battle market as Undrella had described. They contented themselves with locking any that were unlocked, and unlocking any that were locked–presuming that they would free prisoners and keep any gladiators locked away. However, they didn’t count on the fact that the most fearsome of the Gladiators, Hurvank the Strangler–a massive ogre, would be locked up for everyone’s safety. Freeing him, he immediately attacked Roxi.

Hurvank the Strangler

With battle joined inside and out, Kazim and Roshin rush in to help their smaller allies against the massive Ogre. In the process, Tarb frees another prisoner, a woman who seems to recognize Kazim and leaps to assist them in their fight against the great brute. Finally they manage to knock the fighter unconscious, but not after he gives a savage beating to some of the smallfolk. They check the remainder of the cells, but learn from the woman (Haleen) that the other new prisoners were moved elsewhere by Kardswann. They also learn that she knows Kazim, that they’re of the same clan. She reveals that she’s on the run due to a great debt, so the reunion is strained to say the least.

Outside, Bethir finds himself alone and beset by tracking hyenas. He does his best to escape, but their trips prove to be too much. He decides on a risky strategy and simply rolls off the cliffside. The hyenas prove puzzled by this, and he is able to use Feather Fall to drift to the ground and hide himself amid the buildings along the river shore.

The group flees the Battle Market, knowing that their commotion has likely alerted other Gnolls within the structure. They dashed to where Bethir tied the rope. Finding him gone, they have no choice but to climb down to escape. Bethir, badly hurt but watching from the ruins, meets with them and the group flees into the Pesh fields, before looping around back to the abandoned church. They planed to rest up and continue their assault, and meant to have some stern words for Undrella–as the prisoners were not safely in their cells.

Hidden in the ruined sanctuary they were using as a base, the group came up with a plan: a coordinated attack into the battle market, set up to ambush Kardswann when he had minimal protection–ideally with Undrella’s help. Roxy snuck out to speak with the Harpy again that night to confirm, and found her once again to be relatively charming with her words. She explained that she had nothing to do with the movement of the prisoners–that was due to the continued raids on the city alone. However, Undrella agreed to help coordinate a time for the group to strike the market. With a parting kiss, and the gift of another blood-created potion (of Haste), Roxi darted back to the group to run through their aims.

The next morning’s assault started at the guard tower. The odd grenades thrown by the hyena keeper–humanoid heads sewn shut that burst and release stinging flies when they hit a target–nauseated Roshin, Bethir, and Haleen. However, the group makes short work of the guard and his hyenas–with Tarb also slaying the pregnant hyena laying in the back of the enclosure.

Carrion Guard

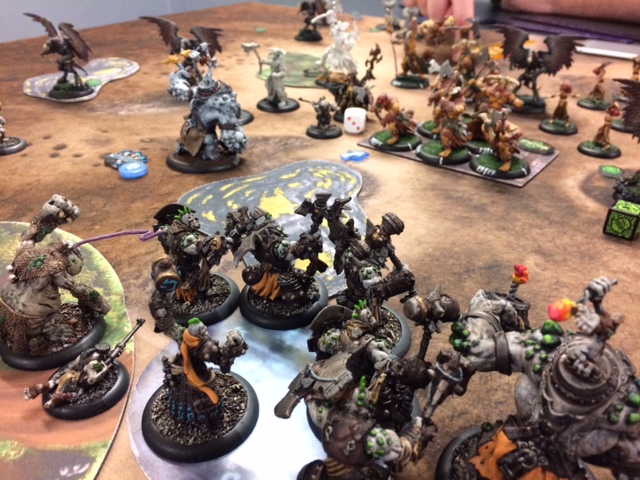
The party then carried the attack into the battle market itself. Curiously, instead of it being empty and a good time to strike, the market was packed with Gnolls–all patiently waiting in the auditorium seats on the first and second levels. There was a fully-stocked bar even, where more gnolls sat–along with a pair of Bugbears. Further back were more markets, where a third Bugbear was haggling with one of the merchants (a harried looking man in light colored but stained garb).

Most disconcerting was the booming voice that greeted them. “Ah, and now our main event has arrived! Don’t be shy. Step up onto the platform and fight, fight for victory!” The heroes looked around at each other, initially confused. Up on the stage they saw two humans, a woman armed with daggers and a man armed with a staff, but both seemed to be looking right at them. With dawning realization, Roshin and Roxi rush forward and take the stage–howling a challenge to Kardswann to take them on as well. They get their first glimpse of the genie, high up on the third tier.

Kardswann

The rest of the group spares no time in attacking the surrounding gnolls, and it becomes a free-for-all as more waves rush from the upper levels of the Battle Market. The two human fighters engage Roshin and Roxi, only to switch their loyalty back to supporting the adventurers when things look to be going their way. However, a swift death at the hands of the gnoll reinforcements ends the both of them. Things started to look grim, when one of the gnolls seemed to turn on the others–it shouts in the language of gnomes “I hope these gnolls don’t speak gnomish, I’m an ally!” as it “accidentally lights some of its fellow gnolls on fire with exploding vials. The whole time the table of Bugbears at the bar and the one hunkering near the market stalls seem to be shouting bets back and forth about the outcome of the fight.

With the gnolls thinning, Kardswann flies down into the center of the Battle Market to finish the heroes himself. The strange turncoat gnoll cries out to the Bugbears: 20:1 odds to the first one who lands a hit on Kardswann. Apparently their love of betting was great, and the three rush forward. With the help of the three Bugbears (Dire, Grim, and Chew), the fight goes in favor of the heroes–with Chew actually scoring the finishing hit.

Roxi was disappointed, as she had promised Undrella she would finish off this rival paramour. However, Undrella seemed to not be phased at all as she leisurely flew down to join the group. Pulling out a gnoll heart and chewing on it, she offers a bite to Roxi as a gesture of affection–and Roxi chokes down a bite.

Meanwhile, the gnoll turncoat drops the illusion and reveals that they are an elf–named Dasram–who had to start imbibing the last of his stocks of illusory potions in order to disguise himself and not be killed by the Gnolls when his recent caravan was attacked. “I was starting to get worried, I am nearly out of these potions” he said with a sigh. He and the Bugbears chat further, with the three of them quickly seeming to enjoy the presence of the adventurers–asking only if they have permission to live within the city still. Which is agreed upon. They find out that the three Bugbears are a little bit on the run right now, as Grim has a huge debt to an aboleth bookie in Katapesh–and he was trying to gamble his way back into wealth here at the Battle Market.

Bugbears

Undrella scares off the remaining gnolls and the two shopkeepers are talked to as well, all in preparation for Almah joining the heroes at the liberated city. The heroes loot the Battle Market and Kardswann’s corpse, finding that his personal chest in his chambers is oddly empty (Undrella no doubt during the fighting). More odd, his body isn’t returning to the plane of origin–strange for an interplanar creature. There seems to be something strange, with odd carapace ridges, that seems to be “within” his skin–that is holding his corpse on this plane of existence. Some experiments with protective spells, and they manage to separate the influence–and his body dissolves. But just as it goes, they here an odd buzzing noise.

Almah arrives at the Kelmarane Battle Market, proud of the heroes for liberating the city from the gnolls. However, she asks to meet with them privately–and reveals that one more step remains. They had noticed the odd sealed door in the church, and that is in Almah’s opinion the portal to the true ruin of Kelmarane. Something beyond that door was locked up, and it’s what she thinks led to the ruin of the city. She has an interdiction key from the Pactmasters, that is attuned to the sealing magic that was placed here. She asks the adventurers for a bit more assistance in their project. Going in and stopping whatever evil presence lies behind the city, and Kardswann’s odd actions, seems to be the final piece of the puzzle to reclaiming the city.

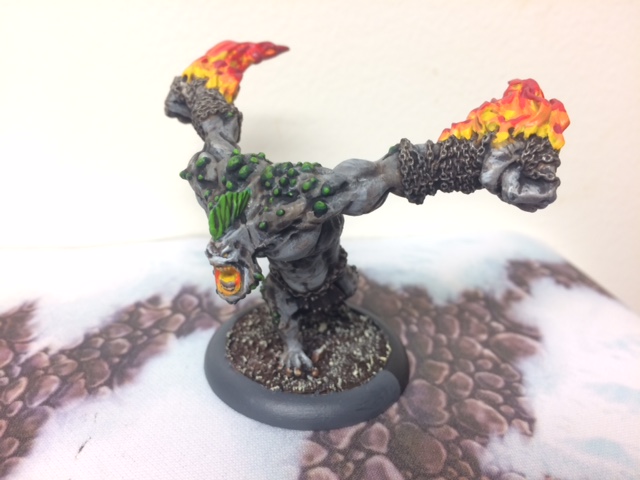
Beyond the seal, they found a small waiting room of sorts beneath the church. A massive circular door lay beyond, with no seeming way to open it. There was also a gong and a well in the center of the room. Finally, one of their number rings the gong. There issues forth a deep booming note, matched by a rumbling sound. The adventurers initially notice two things: the large circular door is just starting to edge open, and three winged feminine forms composed of pure flame appear from inside the well.

Fire Elementals

Dasram, who has been recruited by the adventurers and Almah to assist, proves to be invaluable in fighting them thanks to alchemical bombs of pure ice–although the damage does splash onto some of his new-found allies. Kazim, Roxy, and Bethir all are lit on fire by the creatures at one point, and find themselves rolling on the ground to put their bodies and their equipment out as the fight continues.

Finally defeating the fire creatures, they push on into what proves to be a ceremonial set of tombs–laden with the treasures of the church members who were placed there once upon a time. Careful to not disturb the Sarenrae-protected dead, the heroes searched further and realized that another path had opened at the base of the well. A rope and some climbing later, and they reached the next level of the crypt. As they passed further interred bodies, more than a few of their number couldn’t help but recognize the treasure that was stored here.

Finally, they reached the final room–a large chamber that was strangely not made of the same carefully-cut stone. Instead, it was strung with dangling roots from the outside, and featured a large, sharply pointed hill of rock in the center. On that hill, stood the genie Kardswann.

As they engaged in battle, something was different. An odd hum and the strange ways that he seemed to leverage magical mental attacks at their number rather than wade in with his axe both bothered some of the adventurers. As they drew close, they started to realize that this was all an illusion. There was no pointed hill, there was no Kardswann, there were no dangling roots. Instead, the roots were just ordinary columns. The floor was ordinary stone. And the small hill and Kardswann? They were a massive insectoid daemon that was interfering with their minds, seeking to kill all but one and then dominating that one to free it from the prison of the interdiction seal.

Glomeray

They battled the creature, and its power to turn their very minds against them almost resulted in the party’s failures. Yet they managed to finally kill the beast with enough time, attacks, and coordination across its trickery. With its death, the room truly changed shape back to what it was–and Kelmarane was liberated.

The adventurers explained what they found to Almah, that the creature revealed itself to be Xulthos, servitor of the archdeamon Szuriel, the Angel of Desolation and Horseman of War. It was also clearly what had controlled Kardswann and led him to run the raiding band of gnolls rather than return to service of his mistress Nefeshti, leader of the Templars of the Five Winds.

With Kelmarane liberated, the heroes turned their efforts into restoring the town. Roshin was freed from his enslavement, and Almah gave him a full bonus from her own pocket to match the pay he would have made had he been free. “I can give a gift to a free man,” she says, “but I sadly could not promise equal pay to a slave.” Roshin used the pay to gather information, learning more about the Templars of the Five winds, about Nefeshti, and about his strange link to the weapon–in time he became able to manifest the weapon out of mold spores itself, able to summon it to his grasp and unlock deeper powers of the flail.

Duzo approached one of the shop keepers, and bought out his store of drugs: uppers, downers, hallucinatory powders, and ample pesh. He worked to establish his business in the market as a growing economic concern.

Roxi pursued a personal romance with Undrella, finding that her only downside was her penchant for eating civilized humanoids and using their remains to craft her magical potions. Roxi found Undrella to be an oddly wonderful lover, and the potions she was gifted to be powerful indeed. She had to only ignore the fact that the occasional wanderer or drunken lout who caused a scene went missing. Yet there was always good meat cooked the next morning for her by her lover… a secret cannibalism she participated in and became increasingly determined to hide from the others.

Bethir spent the following months searching the city, finding clues to his youth. He uncovered his childhood home, and the unfortunate end of his parents in the fall of the city some 20 years prior when Xulthos’ influence must have gripped the populace. He did find an artifact though, an heirloom magical item that he remembered his parent having when he was young.

Tarb had found a challenge of his own–in one of the Battle Market’s pens he found a white lion cub: scrawny, malnourished, and angry. He spent time feeding and befriending it, trying to gain its trust. Gradually the beast came to be his friend and companion as the year progressed onward.

Kazim set his sights on restoring the Church of Sarenrae. As he did, he found the blessings of Sarenrae come down upon him and other followers within the region that had assisted in reclaiming the legacy of the fallen town. With the church rebuilt, he served the role of Abbot-Protector–second only to high priest with whom he corresponded and is now traveling from Katapesh to be installed as the formal spiritual guide for Kelmarane.

Dasram, relatively new to the group but still a part of Almah’s team that liberated the city in the end, turned his mind toward two things: learning more about the area’s history and legends, and liberating some of the magical treasures in the vault of the Church of Sarenrae. While successful at the first, and learning that there is a tome that contains all the information about Nefeshti and the region’s strangely genie-influenced history, the second didn’t go quite as well. While he was indeed able to recover the magical items, it seemed that Sarenrae was displeased with the disturbed tombs. While Kazim shone with the power of Sarenrae, Dasram seemed to suffer her displeasure.

As the months passed, it seemed like Kelmarane would become a peaceful settlement and spot for the Pactmasters’ trading routes to rely upon. Sure, there were some oddities left: Dashki and the other gnoll tribes, the disappearance of Hurvank the Strangler (who had only been knocked unconscious), occasional tales of a gigantic bird that attacked caravans, the newly-hatched baby bird that the group was raising, and more. But Kelmarane seemed safe enough. Safe until a rising at the House of the Beast would draw the adventurers back into battle for the very safety of Kelmarane’s future.

Kelmarane established

The Even Longer One (is shorter)

The Even Longer One (is shorter)

As per my last post, early August was crazy. Well, late August, September and October were even crazier. In short: I had a tumor in my neck that had to be removed, I recovered from it (benign), I attended GenCon Masters, won an Appalachian Cup qualifier, and finished runner up for the Appalachian Cup 2017 tournament. Oh and painted not nearly as much as I wish, but still a fair amount. So this details that entire process in one big post. Hope to get back to regular updates following.

First up, painting. So there are four factions total represented here. A bit of a scattered approach. I mainly played Trollbloods through this period though, as I took them to GenCon and used them in the Appalachian Cup. The others represent the three projects that I’m thinking of focusing on going forward, as it’s time for the Trollbloods to take a break. Three months straight of that army means I’m needing a change.

1 Trollkin Krielstone Bearer and Stone Scribes Unit

For years I resisted running a Krielstone. I finally had to add one. It still isn’t in all my Trollbloods lists, but I have been exploring some lists where it fits and is important. So here it is…

2 Trollbloods Pyre Troll

Pyre Troll. Thinking toward Horgle2 he’s a handy beast. 

3 Minions Splatter Boar

Splatter Boar to go with my Protectorate-themed Rorsch and Brine. Had a nonsense idea for him with Malekus that never really took off. 

4 Cryx Reaper

It’s been a LOOOONG time since I played Cryx. My team for the ATC is trying to get me to run them, as I haven’t used that faction since Mark II. I got in two practice games with Scaverous and painted this Reaper up. Not exactly my strongest preference, but a thought. They sure did fare well in the WTC this year (nearly 70% win rate is a thing). 

5 Khador Juggernaut

Decimator test model for Khador. I know they look similar to my Protectorate, as I’m using almost all the same tones minus the gold. I honestly like it better I think. The bone stripes on red please me. 

6 Khador War Dog

War Dog. This is the model I’m most proud of in this set. Just really pleased with the look.

For GenCon and the Appalachian Cup, I’m going to skip game pics in the interest of space. Below is the finisher sheet for GenCon Masters. Not great, going 1-2, but still okay. My losses were to the the person who ended up winning the entire Masters event, John Carter with his Convergence of Cyriss, and to Michael Ireland’s Elara2 Retribution list with all the Halberdiers. Finishing right behind Jake Van Meter in a field this strong? Not so bad.

7 GenCon Warmachine Masters Heat A 2017

And for the Appalachian Cup, I’m just going to provide the link to the amazing website for the event. It details the qualifying rounds, standings, and the 2017 Championship. Getting runner up meant being in the Hall of Champions even! I was really proud of myself for doing well, and I was a single dice roll away from snatching victory in a hard-fought game against Rob’s Witch Coven in the final game. One boosted roll that was an 8 which needed to be a 9 or better from victory. Alas!

So I’m now back on the blogging wagon again, hoping to expand both here and restart writing for Bell of Lost Souls soon. More to follow!

365 Points Challenge Progress (2017):

509/365

Battles (Privateer Press):

Overall Totals 2017: 111 (Win/Loss 80/31/0); 2016: 123 (Win/Loss: 74/49/0); 2015: 43 (Win/Loss: 29/14/0)

Trollbloods:

40 Wins (Gaspy1, Terminus, Barnabas, Gunnbjorn, Kaya2, Helynna x3, Stryker2, Kraye, Venethrax, Kaya3, Absylonia2, Skarre1 x2, Kallus2, Gaspy3, Karchev x3, Una2 x2, Saeryn & Rhyas, Grayle, Baldur2 x2, Baldur1, Horgle2, Kozlov x2, Exulon Thexus, Skarre2 x2, Siege, Vlad1, Lylyth1, Heretic x2, Nemo 1, Kraye, Calandra, Butcher1, Vlad2) / 11 Losses (Feora3, Exulon Thexus, Caine3, Haley1, Calandra, Kozlov, Absylonia2, Butcher3, Vlad1, Axis, Elara2, Coven)

Convergence of Cyriss:

11 Wins (Maddox, Haley2, Rask, Helynna, Makeda1 x2, Gorten, Kaelyssa, Vayl2, Gaspy1, Heretic) / 2 Losses (Venethrax, Helynna)

Protectorate of Menoth:

4 Wins (Kaelyssa, Magnus2, Skarre1, Lyltyh1) / 7 Losses (Makeda1, Deneghra1, Thyron, Kozlov, Kryssa, Fiona, Gaspy3)

Skorne:

8 Wins (Kaelyssa, Nemo3, Zaadesh2, Makeda1 x2, Kaya3, Grayle, MacBain) / 4 Losses (Makeda2, Venethrax, Grayle, Horgle2)

Retribution of Scyrah:

13 Wins (Tanith x2, Venethrax x2, Malekus, Gaspy1, Ragnor, Zaadesh2 x2, Grayle, Borka1, Makeda1, Strakov) / 5 Losses (Zaadesh2, Thyra, Xekaar, Tanith, Gaspy1)

Cryx:

2 Wins (Gaspy3 x2)

The Long One

The Long One

So August happened. What a mess. I did get in a fair number of games, and painted a ton. But work and life stuffs happened. And continued to happen. So this is a LONG post detailing everything. It involves three factions, changes over what I think I’m bringing to GenCon, and a rapid amount of painting.

At first, I thought I would take my Convergence to GenCon 2017. But they’re just not quite doing it for me painting-wise. I completed a fair amount, but have too much yet to complete. Here’s photos of what I did manage to paint in the end of July and start of August though:

Convergence of Cyriss Aurora

I’ve liked Aurora as a model for a long time, and as an idea for the battlefield. I got to field her in one game (see below) and I was as nonplussed as everyone warned me I would be. 

Convergence Assimilator and Attunement Servitors

I also managed to fit in a number of Warjacks and some support. Here’s an Assimilator and Attunement Servitors.

Convergence of Cyriss Cipher

It might be just that I hate the clunky big four-leg warjacks for this faction. This is my second Cipher, and I dunno. Just don’t care for their look at the end of the day. 

1 Convergence Modulator

Yet the floating Jacks look really neat. I’m quite pleased with how this Modulator turned out. 

With a fair amount of painting but far too much left, and a couple of practice games with them, I realized that I wanted to bring a different option to GenCon. Hence, some real rush on painting Protectorate of Menoth–the faction I think I’m most inclined to be excited about and play.

2 Anson Durst Protectorate of Menoth

First up, the Warcaster I know that I want to make the core of my lists. Anson Durst is just too cool a model, and I have an idea for how to run a list with him that I really like. I’m super-pleased with how he turned out as well. And that always helps. I think my Protectorate is my best-looking army—even tho I love my Trollbloods as well. 

3 Thyra Protectorate of Menoth

The picture on Thyra turned out a bit darker than I hoped, but I’m pleased enough with her. Once she gets some units of Flame Bringers and Daughters of the Flame completed to join her, I’ll be really pleased. 

4 Protectorate of Menoth Castigator

And for my Durst plan I needed another Castigator. So here he is. I really like these Warjacks with him, as they answer pretty much everything I’m concerned with in his list: help with volume of attacks, can reach pretty impressive defense and armor values. They don’t hit as hard as others in the faction, but I really think they work with him. 


Now for the rapid-fire gaming recaps. I got in a bunch of games. One with Protectorate, a pair with Convergence, and then a whole heap of Trollbloods games as I continue to play in our local store’s Trollbloods-themed event.

5 Anson Durst vs Lylyth1

My first attempt with my Durst list turned out to be successful, against Dave C.’s Legion list with Lylyth1. I learned some key things about running it, and I will definitely swap a couple of pieces going forward. But I really like what it does as a list. I won on assassination after a long grind of a game. 

5 Aurora vs Calandra

My first outing for Aurora ended up with a win vs Ryan’s Makeda1 list. I managed to live the Aurora “dream”–having an angel run into base to base with the enemy Warlock then charge and finish with Aurora. Even though it worked this time, it was extremely iffy at best. Not sure she does enough for the force right now to make it worth attempting. 

5 Lucant vs Heretic

My other game with Convergence was against Kevin, fielding his Grymkin forces. I fielded Lucant and managed to beat the Heretic on scenario. Facing Grymkin is interesting–I managed to get a few games against his Heretic list with my Trolls as well. 

6 Madrak2 vs Butcher3

Speaking of Trollbloods, let the Troll games parade begin. I faced Paul’s Butcher3 with my Madrak2 list. Apparently Madrak2 simply cannot beat any Khador Warcaster I face. Butcher did his usual–get to the point where I couldn’t avoid him and stay relevant in scenario, then axe to the face. 

7 Madrak2 vs Siege

Followed that game with Madrak2 against Mike’s Cygnar Trenchers list led by Siege. This game went far better, as Feat turn saw every single Trencher but one die to a rampaging Trollkin Champion. Opened the door for the Earthborn, who shot in and finished things up after surviving a round of retaliation. 

8 Jarl vs Kozlov

Next up, Jarl versus Paul’s Vlad1. Jarl did his best, but got a bit too close in a later turn and got a Khador heavy to the face for his trouble. 

9 Grissel2 vs Kozlov

Paul and I then played again with me swapping to Grissel2. I managed to get really close to killing Vlad by targeting things around him. He ran and hid, and still I got sprays onto him thanks to Grissel2’s flexibility. But it was just too little at the end and he had a couple of boxes left… which meant Grissel2’s quick demise to a Kodiak. 

11 Grissel2 vs Kozlov

Seems like a steady diet of Khador for my Trollbloods lately. As my next game was against Zach’s Kozlov-led force. It was a good game back-and-forth, but Janissa Stonetide definitely won it for me. By making five Tough rolls in a row. Being steady, that meant she kept on surviving. That left him unable to clear the way and made Kozlov easy prey for my Mauler. 

12 Jarl vs Heretic

The prior-mentioned Grymkin vs Trolls clashes. Played a Jarl theme list with lots of shooty Warbeasts into Kevin’s Heretic. The first game was a pretty handy win by assassination for me. If a Bomber gets a line on a Warlock with no transfers, even high defense won’t save you. It took the Swamp Troll rolling high to finish him off, but it worked. 

13 Jarl vs Heretic Again

We decided to play again, just swapping the side of the table. This was a much more even match. He needed to take out Jarl to prevent the inevitable crash of heavies into him, and managed to miss a CRA from some flanking Hollowmen to allow Jarl to spin around and face the rest and survive the onslaught. Two great games against a good opponent, and a good chance to practice against Grymkin. 

15 Borka 1 vs Nemo1

Finally, I got in three games as my Pacific Rim tournament ended up having an odd number of players for the event. I made 14, so I played as the Bye round opponent. That meant first facing off against Gary’s Nemo1 list. The combination of Bulldoze and 4″ reach on the Sea King is definitely something to respect, as Nemo wasn’t ready for just how far it could get with Borka1’s Feat turn. 

16 Borka1 vs Lylyth1

Second Bye round offering was against Andy’s Lylyth1 list. This was a good game too, but trampling and then Mosh Pit for the auto-knockdown did the job to finish off his Warlock. Was a really fun battle as momentum kept swinging back and forth. 

17 Borka1 vs Helynna

The final Bye round of the event I got to play against Steve’s Retribution of Scyrah list led by Magister Helynna. The bright spot for her was that his force got to the point where they had nearly, but not quite, finished off the marauding Sea King. Only Helynna remained, and so she charged in and got the kill herself. Sadly, Rök was close by with enough whelps that he could eat 3 free strikes and still get to her and finish her off. 


Phew! What a set of games. All great matches with great opponents, so that was fun. Now to get a few more Protectorate things in shape before GenCon (or just relax and bring my Trollbloods… one of the two).

365 Points Challenge Progress (2017):

454/365

Battles (Privateer Press):

Overall Totals 2017: 97 (Win/Loss 70/27/0); 2016: 123 (Win/Loss: 74/49/0); 2015: 43 (Win/Loss: 29/14/0)

Trollbloods:

35 Wins (Gaspy1, Terminus, Barnabas, Gunnbjorn, Kaya2, Helynna x2, Stryker2, Kraye, Venethrax, Kaya3, Absylonia2, Skarre1, Kallus2, Gaspy3, Karchev x2, Una2, Saeryn & Rhyas, Grayle, Baldur2 x2, Baldur1, Horgle2, Kozlov x2, Exulon Thexus, Skarre2 x2, Siege, Vlad1, Lylyth1, Heretic x2, Nemo 1) / 9 Losses (Feora3, Exulon Thexus, Caine3, Haley1, Calandra, Kozlov, Absylonia2, Butcher3, Vlad1)

Convergence of Cyriss:

11 Wins (Maddox, Haley2, Rask, Helynna, Makeda1 x2, Gorten, Kaelyssa, Vayl2, Gaspy1, Heretic) / 2 Losses (Venethrax, Helynna)

Protectorate of Menoth:

4 Wins (Kaelyssa, Magnus2, Skarre1, Lyltyh1) / 7 Losses (Makeda1, Deneghra1, Thyron, Kozlov, Kryssa, Fiona, Gaspy3)

Skorne:

8 Wins (Kaelyssa, Nemo3, Zaadesh2, Makeda1 x2, Kaya3, Grayle, MacBain) / 4 Losses (Makeda2, Venethrax, Grayle, Horgle2)

Retribution of Scyrah:

13 Wins (Tanith x2, Venethrax x2, Malekus, Gaspy1, Ragnor, Zaadesh2 x2, Grayle, Borka1, Makeda1, Strakov) / 5 Losses (Zaadesh2, Thyra, Xekaar, Tanith, Gaspy1)

Seeking the Sea King

Seeking the Sea King

A bit behind on updates due to the Independence Day holiday, but that didn’t stop me from getting ample games in! Here’s the rundown of my games played with my Trollbloods… a whole heap of Gunnbjorn and Grissel2, with a few doses of Doomshaper2 and Madrak2 sprinkled in.

Painting these past two weeks put me at 374 total points so far for 2017–already exceeding my 365 point goal. Pretty good progress, given that we’re only in July. Trying to decide if 500 points for the year is the new goal, or the impressive double-rate of 728 points. Given that I’m both doing this Trollbloods campaign at Drawbridge and prepping my Convergence army to be two fully-painted and ready lists, I’ve got high hopes for the latter!

Anyhow, onward to painting! And the Sea King!

1 Sea King Trollbloods

I love this model. His rules, well… less so. Still not sure what Warlock (if any) can make him functional. But I’m really pleased with how he turned out in the painting. 

Trollbloods Captain Gunnbjorn

Gunnbjorn is my current choice for helping the Sea King get work done. Snipe and a turn of ranged immunity helps a lot, as well as the wall to limit people reaching the big guy. 

2 Minions Swamp Gobber Chef

I also completed a Swamp Gobber Chef, because I needed that clutch one-point option for forces. I’m not fielding enough infantry to ever make him all that useful. Guess he can simply cook up the whelps for eating by giving them double Comfort Food.

Got in a whole heap of games with my Trolls too, so ample photos to follow.

3 Trollbloods Grissel2 vs Khador Karchev

 Finally a game where my Burrowers contribute to a win! The first (and only time, as you’ll see below). Knocked down Paul’s Karchev and then the Burrowers finished him off. 

4 Trollbloods Doomy2 vs Circle Baldur1

I next faced Joe, a new player to our area, fielding Baldur1. It was a slug-fest, but Doomshaper2’s speed let me get in better position for scenario and I won via that method. Fun game and glad to see new folks!

5 Trollbloods Grim2 vs Cygnar Haley1

Did I mention how much I hate Haley1 ever? I’m certain I did. I faced Brandon’s Haley1 in the first-ever outing of the Sea King. Got assassinated by her, despite having pretty good leverage. I’ll put this down to Grim2 being just a little too aggressive. 

1 Gunnbjorn vs Calandra

Gunnbjorn’s first outing with the Sea King also ended in a loss. The Sea King lived, everything else died in my game against Ryan’s trollbloods led by Calandra. 

2 Gunnbjorn vs Horgle2

More Troll-on-Troll violence when I played Mike G.’s Trollbloods. They are amazingly painted, so I had to include this great shot of his cavalry charging up toward my line. 

3 Sea King gets beaten by Mulg

He fielded Horgle2, who is no joke with Mulg. My Sea King was undamaged, then got a bit too close to Mulg and a Bouncer. Horgle2’s feat plus them ended him with Fury to spare. It bought time for Gunnbjorn to win the game on scenario for me, but Horgle2 remains legit for damage output to be sure. 

4 Mulg vs Kozlov

Seeing Mulg in action makes me always want to field my own. My next game against Paul’s Khador, led by Kozlov, saw Mulg in full destruction mode with Doomshaper2. A bit of clobbering got me up there. Kozlov tried to retaliate, and Mulg finished him the next round. 

5 Grissel2 gets lucky against Baldur2

Next game was against Michael D’s gorgeous Circle Orboros force. I took Grissel2 against his Baldur2. It seems like I always end up with her into this matchup, even though she’s hardly ideal. And yet again, I managed to pull a win by assassination. Go go Grissel2!

6 Khador Jacks vs Madrak2

Another game against Paul’s Khador (yay for summer and getting to play more often). This one was against Kozlov again, with me fielding Madrak2. Came up short even though my Champions did a number of one half of the table. Once the infantry is stripped of Madrak2 he gets way more fragile. 

7 Trollbloods Sea King vs Exulon Thexus

Next up was a great game against Taylor’s Exulon Thexus-led Mercenaries. This one was a win by sheer dumb luck and then some kindness from my opponent. I left a dumb opening that was a pretty likely assassination. Thexus came up just shy of killing Gunnbjorn. I was able to recover and get him safer, and then took my own shot at assassination. Taylor is an experienced Trollbloods player, and gave me an order of activation suggestion that really helped me get it done (rather than coming up short). Really fun game with lots of twists and turns, and a great opponent.

8 Trollbloods Sea King vs Absylonia2

Next game was against Dave B’s Legion, again his Absylonia2 list. Given that he wasn’t going to be fooled again by Doomshaper2, I took Gunnbjorn. It was probably not the best choice, but I had a couple fair moments of success before Abby2 was able to just get close enough to get a Scythean in on him and assassinate me. 

9 Trollbloods Grissel2 vs Skarre2 Kraken

These were actually two games, both against Kyle’s Cryx using Skarre2. It was two games, because in our first Skarre2 stood too close to the objective during her Feat turn. All the defense in the world won’t save you from an AOE knockdown on a DEF model adjacent to you. She didn’t take damage from the blast, but it made subsequent shots into her an easy assassination. We re-racked and played the same lists again. This was a much closer battle, and I managed to win by scenario–Janissa’s heroics pushing models away from contesting are always welcome. Two great games!

365 Points Challenge Progress (2017):

374/365

Battles (Privateer Press):

Overall Totals 2017: 85 (Win/Loss 60/25/0); 2016: 123 (Win/Loss: 74/49/0); 2015: 43 (Win/Loss: 29/14/0)

Trollbloods:

27 Wins (Gaspy1, Terminus, Barnabas, Gunnbjorn, Kaya2, Helynna, Stryker2, Craye, Venethrax, Kaya3, Absylonia2, Skarre1, Kallus2, Gaspy3, Karchev x2, Una2, Saeryn & Rhyas, Grayle, Baldur2, Baldur1, Horgle2, Kozlov, Exulon Thexus, Skarre2 x2) / 7 Losses (Feora3, Exulon Thexus, Caine3, Haley1, Calandra, Kozlov, Absylonia2)

Convergence of Cyriss:

9 Wins (Maddox, Haley2, Rask, Helynna, Makeda1, Gorten, Kaelyssa, Vayl2, Gaspy1) / 2 Losses (Venethrax, Helynna)

Protectorate of Menoth:

3 Wins (Kaelyssa, Magnus2, Skarre1) / 7 Losses (Makeda1, Deneghra1, Thyron, Kozlov, Kryssa, Fiona, Gaspy3)

Skorne:

8 Wins (Kaelyssa, Nemo3, Zaadesh2, Makeda1 x2, Kaya3, Grayle, MacBain) / 4 Losses (Makeda2, Venethrax, Grayle, Horgle2)

Retribution of Scyrah:

13 Wins (Tanith x2, Venethrax x2, Malekus, Gaspy1, Ragnor, Zaadesh2 x2, Grayle, Borka1, Makeda1, Strakov) / 5 Losses (Zaadesh2, Thyra, Xekaar, Tanith, Gaspy1)

Pacific Rim Steamroller 2017

Pacific Rim Steamroller 2017

Here’s the scoop on Drawbridge Games’ Pacific Rim Steamroller 2017 event, happening on July 22nd, 2017. We developed these variant Steamroller rules to both showcase the cool huge models and to explore the joy of titanic monster movie clashes. “Today we face the monsters that are at our door and bring the fight to them!”

You can register for the event and follow all the details here at the Facebook event

Date: 7/22/17

Time: 12:00 PM – 10:00 PM. Doors open at 11am, dice roll at noon. Rounds will ostensibly run noon-2, 2-4, hour break for food, 5-7, 7-9. If rounds end quicker, we’ll move the schedule up accordingly.

Army Size: ONE 75 points list. This is a variation from the two list format that is normal with Steamroller events.

Rules: Steamroller Format missions, Deathclock (52 minutes each), Drawbridge play area rules (Please note the no external food/drinks policy. Drawbridge does have beverages and snacks for sale, and we’ll have an ample break for food around dinnertime–I also may bake Colossal and Gargantuan decorated cupcakes, no promises tho), and Colossal/Gargantuan bonus (see below). Ranking at the end of the event will use wins/losses, strength of schedule, control points, and army points destroyed (in that order).

Prizes: Steamroller Awards for 1st through 3rd place + Colossal Door Prize + Gargantuan Door Prize + Special Secret Bonus Prizes (x2) + Trophy for the best self-painted Huge Base model fielded in the event. To be eligible for any prizes, players must be present at the end of the final round.

Fee: General Admission – $15.00 Gatecrashers – $12.00 (Click here for info on Gatecrasher membership and discounts).

Colossal/Gargantuan Bonus: For this Steamroller, expect some huge carnage. The more huge bases you field in 75 points, the better your starting situation. Instead of random initial seeding, the player(s) with the most huge bases in their list will get first choice of opponent. Thus, everyone can expect that they should bring an armor-cracking list but the privilege of bringing more huge bases (being more “on theme”) is increased likelihood of getting to decide who your first round pairing is. Pairing for subsequent rounds will be done normally through wins/losses.

The process will be as follows: the player with the most huge bases in their 75 point list will go first. We’ll have a list of all players and their Warcaster/Warlock (not the full list). They then pick their first opponent. Once you’ve been picked, that’s your paring for the round. We then move to the set of players with one fewer Huge base, until all have chosen opponents for the round. If there are ties in number of huge bases, dice will randomize.

This format is designed to be a bit more fun and silly than traditional 2 list pairings, so expect people to tech for killing huge bases. Fully expect odd combos, Warcasters and Warlocks you haven’t seen before (one list changes things dramatically), and the happenstance of low percentage matchups. That’s why we have FOUR different prizes that go to anyone in the field, not just the winners (including at least one Colossal and one Gargantuan model). Come, have fun, get in some silly big brawls, and hopefully win great prizes.


Future Cleveland: Story and Faces

Future Cleveland: Story and Faces

Background: The Desolation of Clevelandador Futuris

Clevelandador is a three planet system that was discovered in m.36 by the exploration fleet of Clevelandador Patel IV. One planet is resource-rich but uninhabitable, while another is a dry waste with thin atmosphere unsuitable for much. However, the third planet was the perfect spot for colonization to exploit the resources of the system. It was settled, and named Futuris, for the dream of a better future it might bring.

The primary city on the planet is formally designated “The Royal Arch-Dominastae of Prelate Xadu”, and has been named that for eight years. The curious method of rule of the planet involves the noble families having the right to have each city on the planet, or “dominastae” named after their familial liege, with the capital city having the formal name of the current majority elected aristocratic leader. The constantly switching names has led to the peoples of the system simply calling the cities by slang for their surroundings: “Metaltowne” for the small hamlet near the mines, “Mountainview” for the cliffside city, and “Future Cleveland” as the low gothic version of the planet’s name for the capital city. 

War has come to Future Cleveland. The planet, positioned with some residual resources in the system but nothing spectacular, has long escaped the most dutiful eye of the Imperium of Man. The populace has long been left to their own devices by an increasingly competitive nobility structure that seeks merely manipulate the commoners for their own electoral power and wealth. The decadence of the nobility has led to a gross public acceptance of mutation that would shock most Imperial citizens. Even the current Mayor of Future Cleveland has a most horrific mutation–yet it was simply cause for a laugh among most of the populace. 

This laxity has led to debased demagogues proliferating across the city, willing to exploit troubling ideas of the most base kind, to generate multiple cults of Chaos amongst the outlying settlements of the great city. Cults of Nurgle have been literally and figuratively festering on the fringes of the great basin (where much of the settlements exist). Cults of Khorne meet in secret dueling societies and conduct murder rituals under the smog-choked skies. Other, nameless cults proliferate as well, seeking the deeper contacts with the powers of Chaos in all their might. 

What triggered the War for Future Cleveland was the death of Prelate Xadu. The rival Chaos bands made independent play for complete control of the city–and thus the planet. Because of the street warfare between cultists, order broke down and an urgent dispatch was released before the astropath was destroyed. The city fell into ruin, rubble, and disorder as the economy died and battles raged between rival cults and fringe noble houses. As the battle raged, the different cults recruited darker and more horrible powers from beyond reality: strange oozing daemons seeking to further debase to populace and power armored Chaos Space Marines who see control of the industrial center as a way to bolster their continued efforts to win the long war against the Emperor. 

Strife breeds response, in ways both helpful and harmful. The dispatches claiming that the city, and perhaps the system, were going to be lost to the ruinous powers were heard. The Fourth Company of Ultramarines was dispatched en masse to root out the powers of Chaos, as chancing the corruption of the Imperial Guard with such blasphemy was seen as a danger. In case the entire city warranted destruction, Lapinius Rex, Warlord Titan of the Legio Immortalis, is slated to arrive on-planet to support the Ultramarines.

Lapinus Rex Warlord Titan


Lapinius Rex, Warlord Titan of the Legio Immortalis, Pride of Forge World Konor

But the Imperium of Man were not the only ones who heard requests for help. A nearby Tau sept had been monitoring the planet. While they were blissfully unaware of the grim warnings of Chaos corruption in the astropathic communications, the Tau noticed the unrest in other ways–merchant ships that traded with them reported the increase in strife that led to closure of the space docks. Thinking it a perfect time to arrive and spread a message of conciliation and union with the Tau Empire, the Tau sent forth a delegation ready to entreat with the citizens.

The third complication revealed itself as one of the noble houses suddenly ceased all communication. Runners from the various warring factions in the area went to spy on what was happening, only to marvel as a huge force assembled for war streaking thru the sky on jet-powered vehicles. Unknown to the humans of the planet, nor the powers they worked for, a powerful Eldar Farseer had decreed that this situation of unrest was part of a broad machination that needed to be pacified. Her runes of fate determined a single image–the Avatar’s shape, standing in the center square of the main city of the planet called “Crios Meirge” in the Eldar star charts, burning with the fire of thousands of suns and striking the first blow for the resurgence of their race. She called upon the war hosts to assemble, and anointed commanders to bring the prophecy to fruition.

Like moths to a flame, a fourth external entity made planetfall at the same time. A mighty Kill Kroozer, loaded with ork warriors but limping from a recent larger engagement with the Imperial Navy, was forced to crash-land on Futuris. With the planet’s defenses in disarray and the sudden arrival of other war hosts, response to the crash was delayed too long. The Orks had quickly cannibalized the remains of their ship into the machinery of war, and began growing stronger from the initial clashes with outlying cult factions. With a city full of industrial scrap on the horizon, a new Waaagh was born.

With all forces assembled in different outlying areas of the great basin, the race was on to see which force would be able to wrest control of “Future Cleveland”.

9da20343df2776e5fb93507e45f232a5

Forces of Future Cleveland

[Forthcoming]

Campaign Futuris: Rules

Campaign Futuris: Rules

Campaign Futuris (also known as “Future Cleveland”) is a campaign involving eight players at Drawbridge Games in Pittsburgh, PA that is being launched with the 8th Edition Warhammer 40k ruleset. Some of us are returning, some are making new armies, and some are brand-new to the game. To motivate the campaign we’re using a variant of the wonderful Games Workshop Blood in the Badlands campaign system with the rules re-purposed to 40k. Future Cleveland was the joke name for the Shadow War: Armageddon board that a participant (Ryan) built. Given all the ruined buildings, the joke was based on these amazing satires. Anyhow, here are the modified Blood in the Badlands rules as we’re using them.

Campaign

The campaign runs for one year in game time: four seasons with three sections each season (called rounds). At the end of each season is a special event game, and the finale is the culminating battle for Future Cleveland–the player that wins that battle wins the campaign.

Heroes and Armies

Each player begins by selecting three different HQ choices that will represent the three commanders of their armies. One is the overall war leader, while the other two represent lieutenants. Players will create a unique name and backstory for each of their heroes. Every season, the player gets three armies led by their three heroes. We are using a map image, and the players will decide each round where those armies move (they begin in a starting hex for the faction). These leaders can span armies as long as they make sense to be paired together (Imperial forces in particular are likely to be this way), and represent armies drawn from that faction.

Players also can decide on any allied forces, and declare them as a part of the beginning of the campaign (they can break alliances later if desired). In our Future Cleveland campaign, the Chaos players may be the most likely allies, but there is no reason they wouldn’t fight each other to gain more control of the city. No one may ally with a Tyranid player, though alliances with Genestealer Cults are allowed (they are deceptive, after all).

Future Cleveland PreDeployment

The Map

The map is composed of a set of hexes, representing the great basin on Futuris, the primary planet in the Clevelandador system. The northern portion of the map contains 7 hexes representing the city nicknamed Future Cleveland, with the remaining hexes representing surrounding areas. The players roll-off to determine order of choice. They then claim a hex and indicate it as their base, and mark the six hexes around them as their starting territories. The four Chaos players will position in spots around the city, representing their control of the outlying suburbs. The four non-Chaos players will be spread around the city, and fighting to get in. Players can then decide one hex in their territories to contain a fortress and one to contain a manufactorum. Finally, the player selects three different hexes as the starting points for their three armies. The total of controlled hexes a player has is considered their Empire for the purposes of these rules–and the size of their empire is counted by number of hexes.

Turn Order

Each round, each player follows the turn order below in order of smallest empire to largest, rolling for ties.

  1. Random Events
  2. Move Armies
  3. Declare War
  4. Roll for Manufactorums
  5. Fight Battles
  6. Resolve Victories
  7. Resolve Expeditions
  8. End of Turn

1. Random Events

Each player rolls a d66 on the random Events Table and resolves the event. The random events can affect battles, campaign-map actions, or both. The player who rolled the result is the active player for purposes of the event.

The random events table is long, so it is produced at the bottom of this document.

2. Move Armies

Armies can claim unclaimed tiles, fortify lands, fend off invading armies, and claim enemy territory–they do so primarily via movement in the campaign map portions.

At the start of each season, players can select any Hex they control to contain one of their armies (starting with the player with the smallest number of hexes).

Each campaign round (three rounds per season) players take turns, again smallest hexes first, to move armies one-at-a-time. To move an army, the player nominates the army and then rolls a d3 to see how far it moves on the map. Each player moves one army during this phase, then go back to the first player to move their second army. This way players can react to opponents’ movements. At least one army must always remain somewhere within a player’s borders to defend their empire.

3. Declare War

Starting with the player with the smallest empire, each player can challenge another player to battle. A player may issue only one challenge per turn, and may not issue a challenge to an opponent who has already been challenged*. A player who has been challenged may not issue a challenge of their own*.

* There may be cases where it makes sense to have multi-player games due to the map and the sides involved. In these cases, additional challenges can be made if they make sense to all parties involved and the narrative of how the forces are arranged on the map.

The position of armies on the campaign map is central to determining challenges. Players should review the following list, in order, to determine their challenged opponent.

  1. If you have an army in the same tile as another (non-allied) player, you must issue a challenge to them.
  2. Otherwise, if another (non-allied) player has an army in your empire, you must issue a challenge to them.
  3. Otherwise, if you have an army in another (non-allied) player’s empire, you must issue a challenge to them.
  4. Otherwise, if none of these apply, you may challenge any player an ally could challenge instead.

This should result in a game every game round for each player.

Chaos Rules

4. Roll for Manufactorums

While not every race may have a Manufactorum, each faction has their own way of supplying new troops: birthing new warriors, recruiting new cultists, traveling thru warpgates, or supply ships arriving from afar. Manufactorums are the way we represent these things–each Race is encouraged to come up with their own preferred story of how the support arrives.

In this phase, roll a d6 for any Manufactorums (and related structures) and apply the results. See the full listing below in Structure Rules for the various structures and their effects in this phase.

5. Fight Battles

When starting a battle, the players decide two things: which hex it takes place on the map and which armies are involved. Normally this will be clear, but sometimes armies are a bit further apart. Use the closest armies to the opponent and a tile that lies under them or between them in a direct line.

When picking your list for battle, the following rules apply:

  • The game may be of any mutually agreeable size. The games will use the Power Points system for Warhammer 40k 8th edition. Players should aim to assemble a starting force of 40 Power points for early games in the campaign. As players build their armies, we can raise that number accordingly.
  • You must take the Hero HQ choice associated with the army that is fighting. Their power points must be paid for out of your total. Any game effects that apply to them or their force due to prior games must be used.
  • If one army is bigger than the other army due to Manufactorums, random rolls, other map elements, or relics, it cannot exceed more than 25% more points than the opposing force.

The table is then set up to represent the hex terrain and the scenario of the engagement. If players mutually agree on a scenario that fits the narrative, they can play that scenario. Otherwise, they can roll randomly among the available scenarios.

6. Resolve Victories

After the battle, the victorious army gains while the defeated army must recover. To represent this, the victorious player rolls a d6 on the Spoils of War chart below. In addition, if the “Hero” HQ of either player was removed from play as a casualty during the game, that player has to roll for them on the Character Effects table below.

Finally, the winner must roll an additional d6:

  • 1-3: the defeated army is driven back a tile toward its own empire or capital
  • 4-6: the defeated army is removed from play as it scatters. It can reform at the start of the next season, with this Hero or a new Hero as desired.

Spoils of War Chart

1 Pyrrhic Victory: You won, but your supply lines are stretching thinner and thinner. Can you hold out? In the next Roll for Manufactorums phase, subtract -2 from the rolls for all Manufactorums in your territory.
2 Stunning Victory: It’s hard to hold territory in the face of such a dominant army. Any Fortification saves made by an opponent for a hex being conquered by this army are reduced by a further -2.
3 Ranks Bolstered: The commander of your forces wants to keep these victories rolling by sending more troops. In the next game in which this Hero HQ’s army is fielded, you get an additional 5 Power Points to add to your army.
4 Elite Status: This army has been recognized as deserving of elite support in terms of manpower and materiel. In their next battle, they may add any one unit to their force beyond the normal limits of a Battle Forged army, and still count as Battle Forged. (e.g. A Patrol detachment could include a 3rd Heavy Support choice).
5 Tactical Superiority: Your victory allowed your forces insight into enemy battle plans on the planet surface, and their designs on Future Cleveland. The Hero HQ of this army immediately gains one Relic.
6 Economic Breathing Room: Your victories have allowed your production facilities to make advances as well. You may immediately construct one structure that you can place in any hex where it would be allowed (you must control the hex, no other structure there, etc.). This can be in addition to any other building this round or season.

Character Effects Chart

1 Killed: The Hero HQ succumbed to their injuries, and died. Their army, now leaderless, scatters and is removed from the map. The player cannot re-use this Hero HQ in future seasons. Their story ends here.
2 Captured: The Hero HQ has been taken hostage by the enemy. Their army, now leaderless, scatters and is removed from the map. The player whose Hero HQ is captured can choose to play a rescue special mission in any subsequent round in addition to their normal battle. If they are successful, they can then replace the captured Hero HQ with their army at any of their fortress squares.
3 Mission Incomplete:  The Hero manages to limp to safety or be picked up by medical staff. However, their injuries led to a critical command-and-control mission going incomplete. The opposing army’s Hero HQ immediately gains one Relic.
4 Offscreen Escape: What looked grim on the battlefield turned out to be simply a time for the HQ to flee to safety. They participate normally in the next battle of their army.
5 ‘Tis a Flesh Wound: The HQ recovers from their injuries fully, and participates normally in the next battle of their army.
6 You’ll Get Yours: Make a note of which Hero HQ led the force that removed this HQ as a casualty. In the next game between these two armies, this force gets to field an additional 5 Power Points, representing them evening the score against the foe.

7. Resolve Expeditions

Armies can do more than simply battle–they can conquer tiles or fortify your empire.

Starting with the smallest empire, work through the following sequence with each army on the map.

  1. If your army was driven back by another army, it may not do anything else this turn as it is too busy making a retreat.
  2. If your army is in an unclaimed tile, you may claim it. That tile’s border colors will change to match your map color.
  3. If your army is in a tile occupied by an enemy army and a battle wasn’t fought, roll a d6: on a 1, your army is removed, 2-3 your army is driven back a tile, 4-5 the enemy army is driven back a tile, 6 the enemy army is removed.
  4. If the army is in its own empire, it may build a structure from the list of structures in the Special Rules. Note that some structures can only be built by certain factions. Each tile can only contain one structure, though you can replace structures as you see fit. Each army may only build once per season (not per round).
  5. If your army is in an enemy tile that does not contain any enemy armies, you may attempt to conquer it. The player whose tile you are conquering is then allowed to make a fortification save to see if they are able to garrison their lands in time to stave off attack. They roll a d6 and apply the following modifiers
  • The tile borders a tile of the attacking enemy -1
  • The tile is adjacent to a fortress +1
  • The tile contains a fortress +2
  • The tile contains a different structure that affects the roll (variable)
  • Keys to Future Cleveland. If you have any relics, you may sacrifice them to invading armies to give you time to gather your forces. For each relic you choose to transfer to an opponent, you can increase your roll by +1

If the roll is 6+ the defending player is successful and the tile does not change hands. If the save is failed, the tile is conquered. The tile changes color to that of the invading force.

8. End of Turn

At the end of each round, make certain that all things are set for the next round. At the end of each season, there is a bonus Season Climax event. Following the season climax event, all players remove any armies that they have on the board–and then to start the next season they can place all three of their armies anywhere in their empire. If they lost any Hero HQ choices, they can have that model return (with 0 Relics and no bonuses or penalties) or recruit a new Hero HQ choice for their force to lead subsequent armies.

Planning Session

Relics

Relics are a special currency used in the game to represent information and objects that will help a faction secure control of Future Cleveland. These can range from knowledge of a special access tunnel to the physical key for a secure Adeptis Mechanicus bunker in the heart of town, and anything in-between. They can be used during the campaign rounds, but also will matter for the purposes of the campaign finale. Many will simply be a “Relic”, but some special Relics with additional rules will be the rewards from seasonal games.

Relics are possessed by one of the three Hero HQ’s for the force, and their possession will be tracked in the information for the campaign. Any time that two same-player-controlled armies end their movement in adjacent hexes, the player can swap Relics between their Heroes as they see fit.

In addition to the ways that Relics can be used elsewhere, Relics can always be traded in during the Manufactorum phase of a given round. A Relic redeemed in this way gives the player an additional 5 Power Points for the army attached to the Hero HQ that redeemed it for that subsequent battle round. As the Manufactorum phase occurs after the Challenge phase, players should know which Hero of theirs will be fighting for the round.

Structure Rules

The following is a list of the various special structures that can be present on the map tiles. Note that certain structures can only be built  by certain forces–any limitations are in brackets behind the structure’s name. Where the structures have in-game procedure for the Campaign Map phase each round, they generally occur in the Manufactorum phase, unless otherwise indicated.

Manufactorum: Roll a d6 for each Manufactorum you control and consult the following:

1 – Resources Exhausted or Sabatage: The Manufactorum ceases production for some reason. Remove it from the map.

2-4 – Production Continues: For any battle fought this round, you can include 5 Power Points more forces than the agreed upon total (e.g. You and your opponent agree to a 40 Power Point game, this result means that you get to field 45 Power Points worth of army. Both players could have this, and that would mean that despite agreeing to a 40 Power Point game it ends up being both sides at 45).

5-6 – Exceptional Output: You can choose to either gain the benefit of “Production Continues” as above except with 10 Power Points rather than 5, or you can return one Army that was removed during this season to the game and place them in a hex containing one of your Manufactorums. The returning Hero HQ has the same limitations as if they were returned at the start of a season.

Fortress: Fortresses increase the fortification saves of tiles they are in and near. In addition, any battles fought by an army garrisoning their fortress (defending that hex) should include a set of defensive structures for the garrisoning player.

Psychic Anomaly: Whether an arcane amplifier, a waygate to focus a seer’s power, some blasphemous shrine to a chaos god, or a strange neural network of organic warp power, the effects are the same for this structure. If the controlling player has a Hero HQ that can use psychic powers, if they have a Psychic Anomaly structure they can reverse the numbers they roll for the Random Events table (e.g. a 36 becomes a 63).

Space Dock [Imperial only]: This structure assists in moving troops and materiel, and is essential for Imperial movements. An army starting on or adjacent to a hex they own with a Space Dock can be moved to any hex that does not contain a Fortress or is one of the 7 Future Cleveland hexes during the Move Armies phase. If the Imperial player does not choose to use this ability, then the Space Dock can be used to simply bring down more materiel. The Imperial player can field 3 more Power Points than they normally would for the agreed-upon game (similar to a Manufactorum roll).

Spore Chimneys [Tyranids only]: Tyranids not only attack the populace of a planet, but the very environment. Their consumption of the planet occurs at even a chemical level. This can generate conditions that make certain types of warfare impossible. Tyranid armies in or adjacent to a Spore Chimney hex roll a d6 and apply the following weather condition if they are the army that participates in the battle that round:

1-2 – A Nice Day After All – No effect.

3-5 – The Air is Thick with Death – The enemy player may not field any models that have both the Vehicle key word and the Flying key word.

6- The Very Earth Erupts in Horror – The enemy player may not field any models that have the Vehicle key word.

Charnel Altar [Chaos only]: While the form varies by the Chaos god, the intent is the same: this great, blasphemous altar to an unholy power of the warp focuses the intent of the Chaos forces while unnerving the Imperials. The Chaos forces receive one free unit of 10 cultists for any battle fought in or in a hex adjacent to the Charnel Altar. In addition, Imperial forces must go out of their way to target the altar to eliminate its blasphemous presence. When they have a Charnel Altar, Chaos gets a +3 bonus on all Fortification Save rolls against Imperial units for any hex that does not contain the Charnel Altar. However, due to the ire of the Imperials at the blasphemy, the Chaos player also suffers a -2 to all Fortification Saves for the hex containing the Charnel Altar itself when attacked by an Imperial force.

Waygate [Eldar only]: These structures can allow the Eldar quicker movement around the battlefield than opponents expect, allowing them to control the engagement with the foe. An Eldar force in a hex adjacent to or in a Waygate can always be the force that responds to an enemy challenge, even if there are closer Eldar armies. If they do so, that army is then moved to one hex away from the challenging army, and the battle is fought in that hex. If this would cause the Eldar player to have no armies in their home territories, they must then immediately move one of their other armies to the Waygate hex.

Triangulation Nexus [Necrons only]: Necron architecture and energy is dependent upon carefully calculated yet arcane loci and lines of magnetic power of a planet. Should the Necrons construct a set of them that complete a triangle, they are at a strong advantage. Individual Triangulation Nexuses have no benefit. If the Necron player is able to build three Triangulation Nexuses in non-adjacent hexes that form a perfect triangle (same number of hexes per side) then they can gain a set of nearly-permanent advantages. Hexes containing the Triangulation Nexuses themselves and any within the triangle automatically pass all Fortification rolls (Triangulation Nexuses can be lost thru rolls on the random events table, however). In addition, any Necron armies that are positioned in any of these hexes gain an additional 10 Power Points in any battles in which they take place. Finally, at the end of the campaign an intact and properly triangulated monolith trio yields the Necron player a bonus d6 Relics immediately before the final game.

Recruitment Center [Tau only]: Tau present themselves as beneficial conquerors, able to provide access to material comforts and stable existence to the planetary population. Any Tau-controlled hexes containing or adjacent to a Recruitment Center structure gains +1 to all Fortification saves to represent this loyalty. In addition, Tau forces can ignore result 13 “Enemy Sympathizers” on the random events table if they have a Recruitment Center in any of their hexes.

Big Mek’s Scrapyard [Orks only]: Once they get onto a planet, Orks go into full scavenger mode to produce all manner of machines of war. During the Manufactorum Phase, roll a d6 and apply the following result:

1-2- Still Werking. No appreciable gain.

3- Kan I have Kanz? For any battle fought this round, you can include 4 Power Points more forces than the agreed upon total. You MUST include a unit containing a single Killa Kan in your list to represent this addition.

4- Construct the Trukk. For any battle fought this round, you can include 5 Power Points more forces than the agreed upon total. You MUST include a Trukk in your list to represent this addition.

5- Kan I have Moar Kanz? For any battle fought this round, you can include 8 Power Points more forces than the agreed upon total. You MUST include a unit containing exactly two Killa Kanz in your list to represent this addition.

6- Deff-initely Dread-ful! For any battle fought this round, you can include 8 Power Points more forces than the agreed upon total. You MUST include a unit containing exactly one Deff Dread in your list to represent this addition.

The Core Chamber: This is a strange structure at the center of Future Cleveland. At the end of the campaign it counts as 5 relics. The Core Chamber is the prize for winning the scenario at the end of the Fall season, and cannot be built or claimed until then.

Faction Rules

Each faction gets a special rule in the campaign.

Chaos (Undivided): Due to their consort with the warp, Chaos armies’ Fortresses count as Psychic Anomalies, and can be used by Hero HQ’s of Chaos Undivided forces that are not themselves Psykers.

Chaos (Nurgle): The waves of plague unleashed by their forces undermine the defenses of the foe. All Fortification Saves made by forces that lose to a Chaos Nurgle army suffer a -1 penalty.

Space Marines: Space Marines are the premiere strike force, designed to take out enemy Fortifications with lightning fast raids. The bonus provided from the Fortress structure is lessened by 1 (that means that adjacent hexes gain no bonus whatsoever) if a victory from Space Marines prompted the check.

Adeptus Mechanicus: A player with any Adeptus Mechanicus armies in their hexes may re-roll the result for any Manufactorum rolls they make.

Inquisition (Ordo Xenos): Ordos Xenos not only eliminates the key technology of alien threats but works behind the scenes to protect the populace against their insidious threat. Hexes adjacent to or occupying an Ordo Xenos army gain a +1 to Fortification Saves versus Eldar, Tau, Tyranids, Genestealer Cults, Orks, Necrons, and any other Xenos armies. In addition, when an Ordo Xenos army wins a battle in an enemy Xenos territory hex that contains a structure other than a Fortress, the Ordo Xenos player may immediately destroy that structure.

Eldar: Eldar forces do not re-arm in the ways that normal forces do, as they must import all of their technology. Eldar gain no benefits from Manufactorum structures. However, Eldar are also swift in their assaults. During the Move Armies phase, Eldar armies can always move up to three hexes rather than having to roll.

Genestealer Cult: The Genestealer Cult may be welcoming the Tyranids’ arrival, but they’re not exactly allies. Genestealer Cult armies may not be placed in the same hex as a Tyranid forces. If they are moved into a hex that contains a Tyranid force they are immediately removed for the season.

Tyranids: Tyranids can regrow and replace their HQ organisms with ease. Tyranids ignore results 1, 2, and 5 on the Character Effects tables–treat as result 5 instead. Their relics often represent information about how to access the city or the tactics of their foes–and thus when a Tyranid Hero HQ is removed, they can transfer any relics to a different Tyranid Hero HQ that is on the board.

Necrons: Necrons rise from below the ground when they strike, which can take opponents’ armies unaware. During the Move Armies phase, the Necron player may roll a d6 for each of their armies on the map. On a result of a 6, instead of moving that force normally they may move that army to any hex on the map they wish, representing forces emerging from a crypt network in a surprise assault.

Tau: Tau work carefully with local populations in order to hopefully recruit them. They frequently carry non-lethal loadouts and riot suppression gear to minimize civilian casualties should they have to resort to violence. This manifests in two ways in the game. First, in any scenarios that use civilian models, any injuries inflicted on them by Tau have a greater change to be nonlethal (see scenarios for particulars). Second, any time an opponent rolls on the Character Effects table after a battle against Tau in which Tau units were still present on the battlefield at the conclusion of the game, the Tau player can choose to make results of a 1 “Killed” or 3 “Mission Incomplete” be a 2 “Captured” instead–representing the selective use of nonlethal rounds to subdue the target.

Orks: With roar echoed by 1,000 Ork voices, the Waaagh gets sounded. Once per Season during the Move Armies phase, the Ork player may declare a Waaagh (by shouting appropriately). All of their army movement rolls get counted as a result of 3 that turn. In addition, Ork players re-roll result 44 on the Random Events table.

Season Mission Preview

As the seasons progress, there will be a special culminating event that occurs between each of the three sets of rounds. I’m keeping them somewhat under-wraps for now, but here’s the teaser:

Spring: “Titanfall”

Summer: “A Call Answered”

Fall: “The Core Chamber”

Winter: “The Battle for Future Cleveland”

As each gets played, I’ll provide the full rules here as a record for the campaign.

Random Events Table

11 Recalled from War: Remove one of your armies from play until the start of the next season
12 Embattled: Roll 2d3 when moving all of your armies this turn and pick the lowest result
13 Enemy Sympathizers: Any fortification saves you have to make this turn are at an additional -1
14 Assassin: A random opponent picks one of your Hero HQ choices. You must immediately roll on the Character Effects chart for that Hero HQ.
15 Deserters: Pick any of your hexes. It is immediately lost to you (and Structures it contains are destroyed)
16 Plague: Remove one of your structures.
21 Temperate Weather: No effect, for good or ill.
22 Heavy Rainfall: In your next battle, models with the Vehicle keyword move at half their listed speeds unless they have the Fly or other keywords that keep them from being bogged in the mud.
23 Sporadic Lightning: In your next battle, models with the Flying keyword must roll a d6 each time they move. On a 1, they suffer a single wound (save as normal).
24 Lava Vents: In your next battle, infantry models that do not fly or have jump or jetpacks are in danger of falling into lava. Each time you and your opponent Advance with an infantry unit, roll an additional d6 and allocate that many wounds to the unit (saves as normal).
25 Clear Skies: Thanks to the lack of obstructions, both sides in your next battle can try to leverage their air power. Both players can bring one extra Flying unit (up to Power Points 10) to the battle.
26 Terraforming: Due to the weapons and forces deployed around Future Cleveland, the very earth itself is changing. At the end of each player’s turn during the game, scatter any non-occupied, non-building terrain pieces d6” in a random direction.
31 Stoking Unrest: Pick any of your enemy’s hexes that do not contain a Fortress. It is lost to them.
32 Settlement Mission: Pick an unclaimed hex that is not within Future Cleveland. You immediately gain control of it.
33 Raiding Party: Pick any of your enemy’s hexes that do not contain a Structure. They must make an immediate Fortification save. If they fail, you gain control of that hex.
34 Sappers: Remove one of your opponent’s Fortresses.
35 Resource Capture: Remove an enemy’s Manufactorum from the map. Immediately build a Manufactorum in one of your tiles, per the normal rules of building by an army.
36 Seize the City Center: Gain control of any one hex in Future Cleveland that is currently unowned.
41 Forced March: Move one of your armies again.
42 Logistic Success: Roll 2d3 when moving your armies this turn and pick the highest result
43 Bad Intelligence: You can move one of your enemy’s armies this turn instead of them
44 Diplomacy: Name an opponent. They cannot challenge you this turn.
45 Subvert Command and Control: Pick an opponent. You may choose who they challenge this turn.
46 Secret Tunnels: You may pick any opponent to challenge this turn, regardless of location.
51 Spies: For your next game, your opponent needs to reveal their army list in advance of the game to you (allowing you to tailor your force to beat theirs if you wish)
52 It’s a Trap: In your next game, you may pick whether to deploy first or second and who gets to go first or second, regardless of the rules for the scenario
53 Prepared Ambush: In your next game, you may pick the scenario played, the deployment zones, and who is attacker/defender (if applicable)
54 Reserve to the Front: You get an additional 5 Power Points in your next game
55 Overwhelming Force: You get an additional 10 Power Points in your next game
56 La Grande Armée: You get an additional 20 Power Points in your next game
61 Strategic Information: Gain one Relic
62 Schematics of Future Cleveland: Gain d3 Relics
63 Bolstered Defenses: Any fortification saves you make this turn are at an additional +1
64 Cunning Commander: For the rest of the turn you count as having the smallest empire
65 Reinforcements from Home: For the rest of this season, you gain an extra army. They get their own Hero HQ that you designate, and operate as normal armies in every way
66 Fortune Favors the Bold: You can play two games this round. If you are challenged, you can make a challenge of your own. If you get to make the challenge first, then you may immediately make a second challenge. Either way, this second challenge can lead to another player getting an extra game in as well.
Bronze Medal Masters

Bronze Medal Masters

So I recently won a Steamroller with my Trollbloods, and now just a couple of weeks later I managed to finish in Third Place in a 16-player Masters Trinity event.

For the event I worked hard to get everything painted up and completed. That meant finishing up a unit of Pyg Burrowers, as I think they could be good with Grissel2 (spoiler alert: they’re not). I also got a Swamp Gobber chef mostly painted, but he still needs touch-ups and so I’ll include him in a subsequent update. Despite him being a little rough, tho, I was completely painted with all three lists. I’ll attribute any success I had to the fact that I managed to field so many painted models.

0 Trollbloods Pyg Burrowers

They’re so cool looking, and they could be absurdly nasty for assassinations with her. But their Burrow is just ghastly slow. Both games I used them they never even had an opportunity to surface–and both were long games. 

For the Masters, it was a Trinity event so that meant three lists. And it was Divide and Conquer 1, which meant that I had to play each at least once (a harrowing proposition). I decided to go with my Doomshaper2 list that has been working very well, my Madrak2 anti-Ghost Fleet list (as I was anticipating up to three Ghost Fleets at the event… was wrong), and my Grissel2 list that I’m tinkering with.

1 Trollbloods Trinity Masters 3 lists pairing

The three lists and my results, along with my third place Bronze medal.

2 Trollbloods Madrak2 vs Legion Saeryn and Rhyas

Round one was against Dave C’s Legion of Everblight led by the Twins. This was a brutal slug-fest of a game. A Champion on Feat turn missed both MAT 9 attacks on an infantry model, which meant I didn’t finish off one of his heavies with 2nd/berserk swings, which led to me having to play really defensively. Mercifully, the timed rounds imposed a deadline. Dave played the game in great fashion, and literally left me with just Madrak2 and a single knocked down Fennblade Officer far away–but he ended that turn with only 18 or so seconds on his clock. We agreed to work out his declarations of his turn on my clock, so he could get the most from his time. He charged the unprotected Madrak2 with a boosted attack roll by Rhyas. Hit and scored 13 damage, but not enough to kill him–and no Crit meant that Madrak2 survived as time ran out. One of the closest games I’ve ever played, against a great opponent. I’ll remember this game for a long while. I bet 3/4 of the times he would win the match, but I happened to get lucky. 

3 Trollbloods Doomshaper2 vs Circle Grayle

My second game was against Savage’s Circle Orboros force. I wanted to get my lists played to not be locked in a later round, which meant either Grissel2 or Doomy2. Given that he had Grayle, which would give Grissel2’s shooting list a really poor look, I had to choose Doomy2. I ended up facing Grayle, and taking him out with Rök’s usual pacman trickery. Grayle didn’t have Fury on him, so once Rök got there with Wild Aggression and Primal on him, it was over. 

4 Baldur2 Stand In Art

Third round I played Larry IV and his Baldur2 Circle Orboros list. I forgot to take a photo of this game, so apologies for the substitute image above. The list was a Woldwrath, Megalith, another stone heavy, two of the stone shrimp, some stones, and a few support models. I knew that Grissel2 was a bad look into it, but I also knew that terrain could be my advantage–there was a big house blocking the path from the center zone to the flag on a Recon. I took a chance and played Grissel2, and it paid off. With the house and my strong shooting, I was able to misdirect and pull him to one side, then run her to to the flag on the other side and clear a few models. I had just enough stuff to clog the way each turn, which led to a scenario win for me. It wasn’t pretty, and I didn’t do more than 1-2 damage to Megalith or the Woldwrath thru the game. But it worked and got me to the final game undefeated. 

5 Trollbloods Grissel2 vs Cygnar Caine3

Game Four was against Larry III and his Caine3 Cygnar list. I wasn’t list-locked, so I knew I could play any of them. I might have been better to have chosen Madrak2, as he had even more shielded protection, but I went with Grissel2 as there wasn’t much to screen Caine3–and if I could get him knocked down at any moment it would be game over. It ended up being a pretty fun slugfest. He got the advantage on his Feat turn, but I still had ample to threaten him. I was able to take out all of his lights except for Ace, and cripple the right side of the Hurricane. Still not quite enough to push me thru, and there were two turns of some really bad looks for me. I played well enough for him to keep Caine3 away at least, so I’ll take that as a developing player. “First step: don’t lose to assassination on the Feat turn”. Done. Caster eventually dying in an attrition match, well… so be it. I’d prefer the win, but I’ll take this against one of the top players in our meta to be sure. Was a great game, as always with Larry III. He’s an exceptional player, and every game I face him I get better. 

All in all a great tournament. The folks at SCG Hobbies put on a good show, and there was great turnout. I was really proud of myself for doing so well, but I also recognize that I got very lucky in my games. A few seconds more in game one, a gap of more than an inch in game two, and just enough models to clog in game three were the difference between 3-1 and 0-4 for the day.

365 Points Challenge Progress (2017):

321/365

Battles (Privateer Press):

Overall Totals 2017: 73 (Win/Loss 52/21/0); 2016: 123 (Win/Loss: 74/49/0); 2015: 43 (Win/Loss: 29/14/0)

Trollbloods:

19 Wins (Gaspy1, Terminus, Barnabas, Gunnbjorn, Kaya2, Helynna, Stryker2, Craye, Venethrax, Kaya3, Absylonia2, Skarre1, Kallus2, Gaspy3, Karchev, Una2, Saeryn & Rhyas, Grayle, Baldur2) / 3 Losses (Feora3, Exulon Thexus, Caine3)

Protectorate of Menoth:

3 Wins (Kaelyssa, Magnus2, Skarre1) / 7 Losses (Makeda1, Deneghra1, Thyron, Kozlov, Kryssa, Fiona, Gaspy3)

Convergence of Cyriss:

9 Wins (Maddox, Haley2, Rask, Helynna, Makeda1, Gorten, Kaelyssa, Vayl2, Gaspy1) / 2 Losses (Venethrax, Helynna)

Skorne:

8 Wins (Kaelyssa, Nemo3, Zaadesh2, Makeda1 x2, Kaya3, Grayle, MacBain) / 4 Losses (Makeda2, Venethrax, Grayle, Horgle2)

Retribution of Scyrah:

13 Wins (Tanith x2, Venethrax x2, Malekus, Gaspy1, Ragnor, Zaadesh2 x2, Grayle, Borka1, Makeda1, Strakov) / 5 Losses (Zaadesh2, Thyra, Xekaar, Tanith, Gaspy1)

Kriel Ordeal

Kriel Ordeal

Another week of (lots of) games, and more progress and practice with my Trollbloods. It’s good, as our summer event at my main game store is a story game that is Trollblood-related, so having more completed is always good.

First up, painting progress: I spent a Friday night, all day Saturday, and about two hours on a Sunday morning just painting two Dire Trolls. Finished up Rök and a Dire Troll Bomber. It was a grueling painting session, but I wanted to be certain that I get everything finished for a big Masters Trinity event coming up in my area.

1 Trollbloods Rok and Dire Troll Bomber

I’m really pleased with how they both turned out, Rök especially. He’s such a great model, with so much character to him. And the Bomber was fun, as I did a pose more like he is hurling one of the lit barrels of explosives. 

On the gaming side, this week was just five different games against a variety of opponents–some folks I face often, others who it was fun to face because we don’t get to play as frequently. For the first three, I was still working on getting some table time with my Doomshaper2 list that I’ve been working on. I’m hoping to see where his limitations and difficulties lay. The latter two, I took my Grissel2 list because I wanted to be more practiced with her list.

2 Trollboods Doomshaper2 vs Kallus2

First up, a game with Doomshaper2 against Enrico’s beautifully-painted Kallus2. He played the match up very well. I got an edge by taking out his Beast Mistress with a long-distance trample by the Earthborn thru a woods. He bought a few attacks and killed her, which left Kallus2 down on points. He did ample damage (killing Rök and Mulg both), but finally was knocked down by a thrown Carnivean and killed. Was a great game, as both Enrico and Kallus2 were tough opponents. 

3 Trollbloods Doomshaper2 vs Gaspy3

Second game with Doomshaper2 was against Ryan’s Gaspy3. Ryan is always a great opponent, and this was a match of the fast. Gaspy3’s Mobility and fast base SPD on jacks meant that we threatened each other at long range. I managed to get Mulg in first on his Kraken (it was go for it, or lose him because of the speed I was facing), but didn’t quite finish it off. However, Rök did a great job mulching the screening Satyxis Raiders and collapsing one side of the assault. Gaspy3 had to use his Kraken to try and kill Doomy2, but he came up just short. When he did, we called the game as Rök and the Earthborn were in place to roll in and kill Gaspy3. Fun game to be sure, but I definitely would play it different next time–making sure to save Mulg for cleanup and let the Earthborn or Mauler lead the way. 

4 Trollbloods Doomshaper2 vs Karchev

Third game with Doomshaper2 was against Colton’s Khador, a heavy list led by Karchev. It turned into a huge slugfest. You can see in the picture above, it was just a jumble of heavies clobbering each other across a couple of rounds. I managed to get the lead when he counter-charged the Mauler with Behemoth. Able to take out Behemoth after he had just one attack in on my beasts rather than a full round made the difference. Colton had to use Karchev to try and regain ground. Unfortunately, I had just too much heft left and was able to finish him off. Great opponent in Colton as our games always seem to become crazy slugfests when we’re able to play. 

5 Trollbloods Grissel2 vs Exulon Thexus

Swapped it up by switching to my Grissel2 list for additional games. I faced off against Larry’s Cephalyx list, helmed by Exulon Thexus. It was a rough battle, but I managed to keep the score close through scenario play. By reaching a spot where I could win unless he went for it, he went–and was able to use Thexus’ feat to line up a slam that took the Runebearer over Grissel2, leaving her prone and prey for one last Monstrosity (her defense 17 with Swarm would have been a tough one to get thru otherwise). I definitely knew to respect the feat, but it got hard to avoid it as the game drew on. Great game as I always have fun and learn a ton playing against Larry, and I definitely need to swap some elements of my Grissel2 list. 

6 Trollbloods Grissel2 vs Una2

Final game was against Rob’s Circle Orboros army, led by Una2. Full of Griffons, I knew that I needed to strike fast at Una2 if I could. Rob is one of the very best technical players in our greater meta, so if there was a way to engineer a kill on Grissel2 he’d find it. I had a huge dose of luck on my side in this match. Grissel was able to position to get a knockdown shot onto Una2 and heaped on the damage with her shooting. Then I got super lucky drifting templates onto her from the Bombers to kill her–amusingly even more lucky because a few Pygs that I could actually charge in died because I stupidly chose the Crescendo shot for my third shot. I managed to just get the kill on Una2, and it was totally dice luck rather than much skill to be sure. Rob was a great opponent, and I’m looking forward to facing his Circle again in a match where it’s much more skill vs skill than me getting absurdly lucky. 

All in all some good games. I need to tinker some with my Grissel2 list, and think up another list to pair with them for three list formats. But I’m feeling fairly pleased with how my Trollbloods are doing for me.

365 Points Challenge Progress (2017):

313/365

Battles (Privateer Press):

Overall Totals 2017: 69 (Win/Loss 49/20/0); 2016: 123 (Win/Loss: 74/49/0); 2015: 43 (Win/Loss: 29/14/0)

Trollbloods:

16 Wins (Gaspy1, Terminus, Barnabas, Gunnbjorn, Kaya2, Helynna, Stryker2, Craye, Venethrax, Kaya3, Absylonia2, Skarre1, Kallus2, Gaspy3, Karchev, Una2) / 2 Losses (Feora3, Exulon Thexus)

Protectorate of Menoth:

3 Wins (Kaelyssa, Magnus2, Skarre1) / 7 Losses (Makeda1, Deneghra1, Thyron, Kozlov, Kryssa, Fiona, Gaspy3)

Convergence of Cyriss:

9 Wins (Maddox, Haley2, Rask, Helynna, Makeda1, Gorten, Kaelyssa, Vayl2, Gaspy1) / 2 Losses (Venethrax, Helynna)

Skorne:

8 Wins (Kaelyssa, Nemo3, Zaadesh2, Makeda1 x2, Kaya3, Grayle, MacBain) / 4 Losses (Makeda2, Venethrax, Grayle, Horgle2)

Retribution of Scyrah:

13 Wins (Tanith x2, Venethrax x2, Malekus, Gaspy1, Ragnor, Zaadesh2 x2, Grayle, Borka1, Makeda1, Strakov) / 5 Losses (Zaadesh2, Thyra, Xekaar, Tanith, Gaspy1)